
The Raspberry PI 3+4 has proven itself as an amateur radio computer. Both at home as the main computer in the shack but also on the road. It is small, inexpensive and incredibly versatile. The operating system and the most important programs are available for free.
What hardware is needed? A Raspberry PI 3 or 4, a USB sound card (or a radio with a built-in sound card). It is especially handy if the radio also has a CAT controller.
What software is needed? A sound modem (e.g. Direwolf), an APRS software (e.g. Xastir) and a terminal program (e.g. PiQtTermTCP).
Install the Software
How to install the programs for this there is a separate article from me. In the setup below, I assume you used the Build a Pi script from Jason, KM4ACK.
https://dl1gkk.com/setup-raspberry-pi-for-ham-radio/
Setup Software
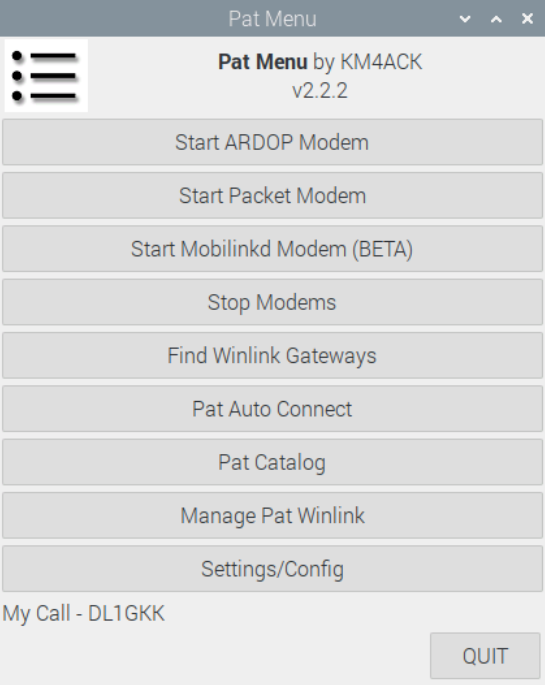
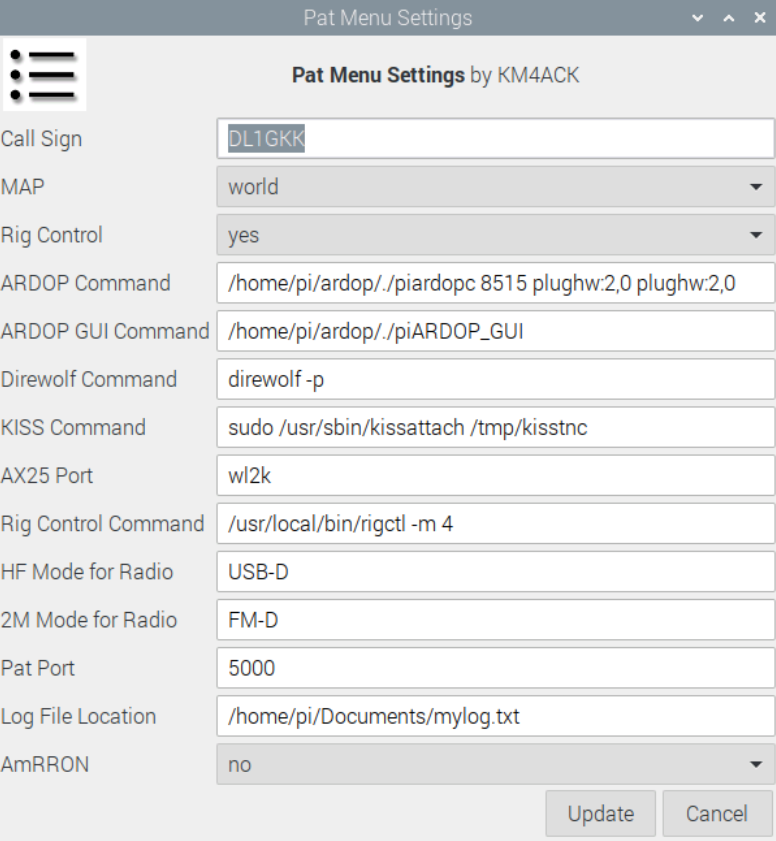
First, let’s open the Pat menu and take a closer look at the default settings. Important for us is the menu item “Settings/Config”.
Cat control is done with FLRig in this setup. In this respect it is important to check under Rig Control Command that the number 4 is there. This selects FLRig. In a terminal you can display all available devices with the command rigctl -l. It is also important that you set the correct sound card in the Ardop command. In my case this is the built-in soundcard of my ICOM 705. plughw:2,0, plughw:2,0 means that this soundcard is used for both receive and transmit.
Before we start Direwolf we can have a look at the associated config file.
We open a terminal and enter the command: sudo nano direwolf.conf
There we can check if everything was entered correctly when installing the software. Under ADEVICE it says plughw:2,0. If this is written only once (other than in the pat menu) the software assumes that the same soundcard is used for sending and receiving. Under MYCALL should be the own callsign. For the PTT to work this must be defined. For me with the IC-705 this is: PTT RIG 373 /dev/ttyACM0
IMPORTANT: The transceiver control only works if Hamlib was installed correctly. Please do not be surprised. RIG 373 is the ICOM 7300. I have entered CI-V code 94h in my ICOM 705. At the time of writing this article, the 705 is not yet available in Hamlib.
Now we can start Direwolf in the Raspberry menu or simply enter the command in a terminal: direwolf -p
If we have done everything correctly and the settings are correct, the startup window looks like this:
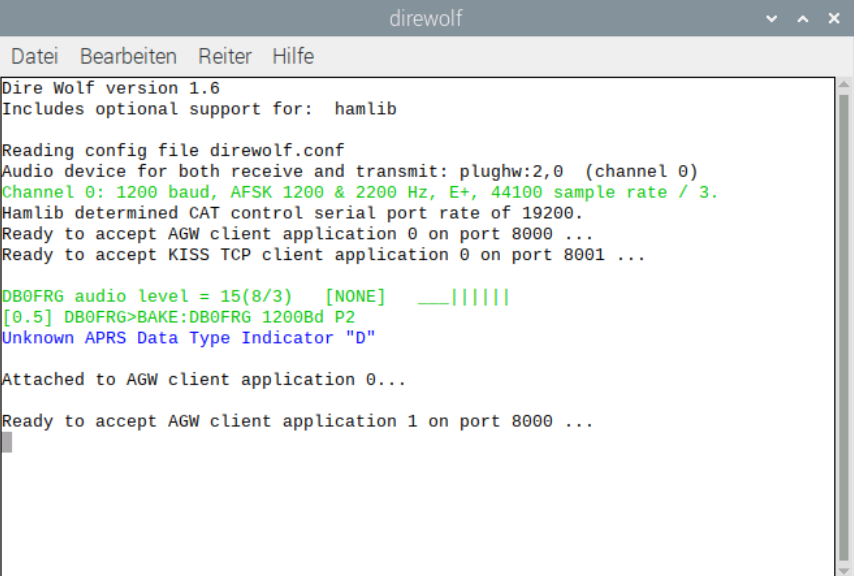
As long as we need the sound modem the window must remain open. We can of course minimize it if it bothers us. In the picture we can see that Hamlib is installed correctly. Also the sound card is detected correctly and Hamlib has detected CAT control on the serial port. Direwolf is now also ready for an AGW client or KISS. We can also see a received data packet (DB0FRG my home digipeater) and that an AGW client has been connected.
Set up terminal program for Packet Radio
In the Raspberry menu we start PiQtTermTCP under Accessories and go to Setup AGW Configuration.
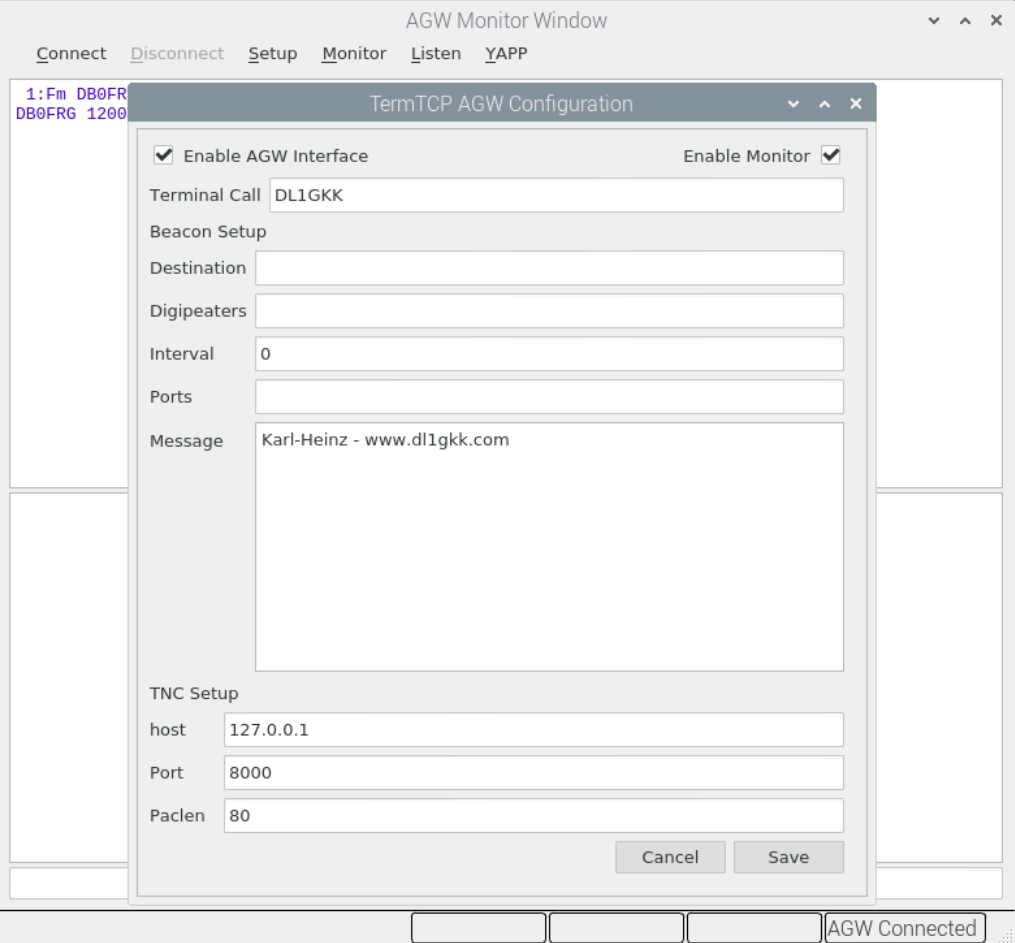
Activate AGW interface and monitor. Check the TNC setup which must match the settings in Direwolf. If you like you can also activate the beacon here.
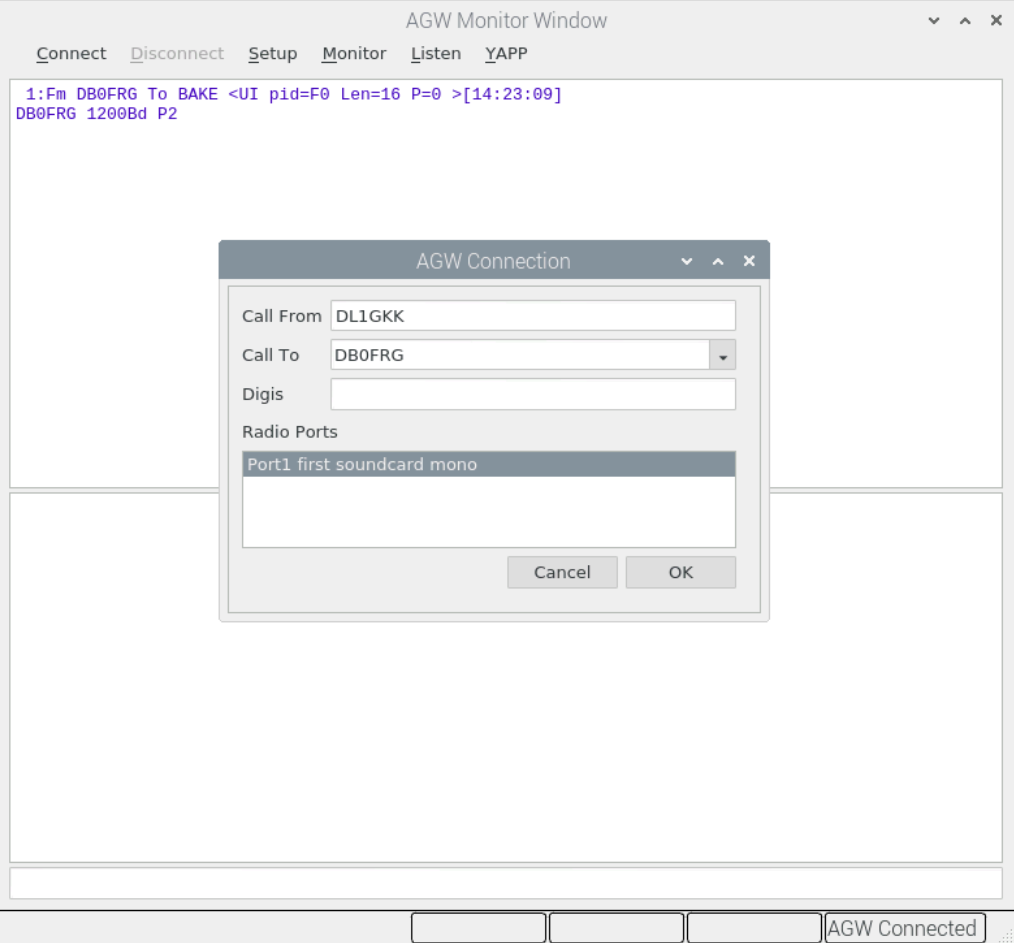
Now we can connect the desired digipeater. Important: You must click on the radio port to activate it. Then click on ok.
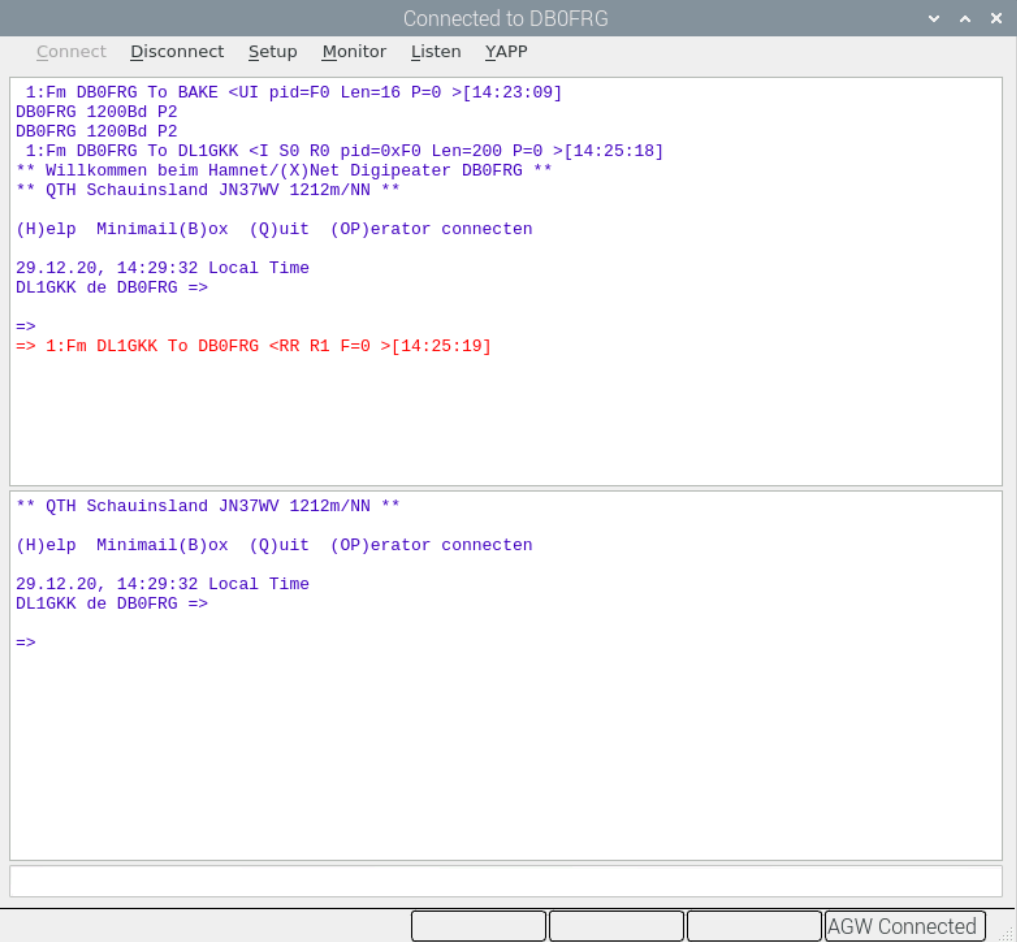
The connection is established and it is possible to work with the digipeater. The upper window shows the monitor, the window below shows the received text and the narrow text line is for entering the commands.
PiQtTermTCP has extensive possibilities. More information here:
http://www.cantab.net/users/john.wiseman/Documents/QtTermTCP.html
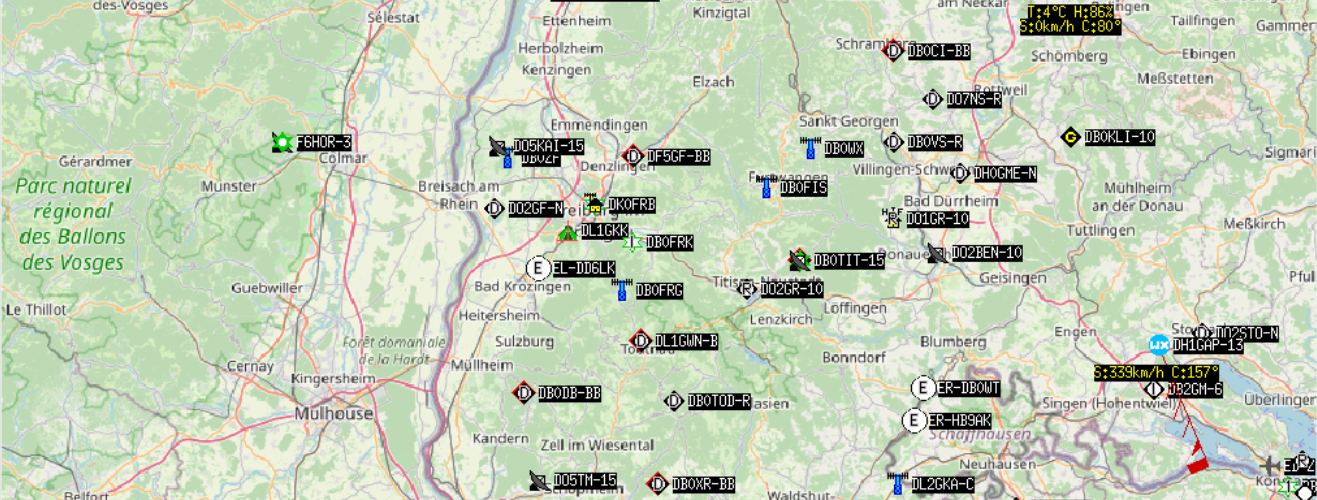
Set up Xastir program for APRS
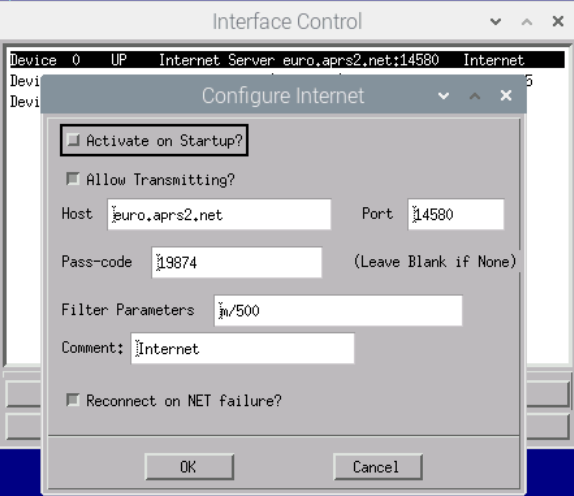
In the Raspberry menu we start Xastir. There we open Interface Control. I use three interfaces.
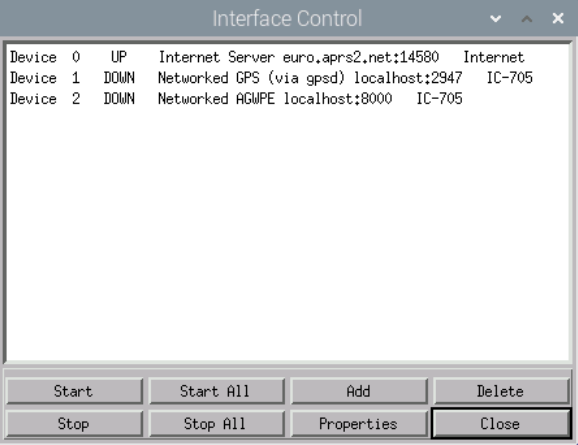
Device 0: I use it to display APRS stations over an internet connection. You can google on the Internet which host is suitable for you. The passcode is linked to my callsign. You need your own pass code for your callsign. You can generate it e.g. here: https://apps.magicbug.co.uk/passcode/
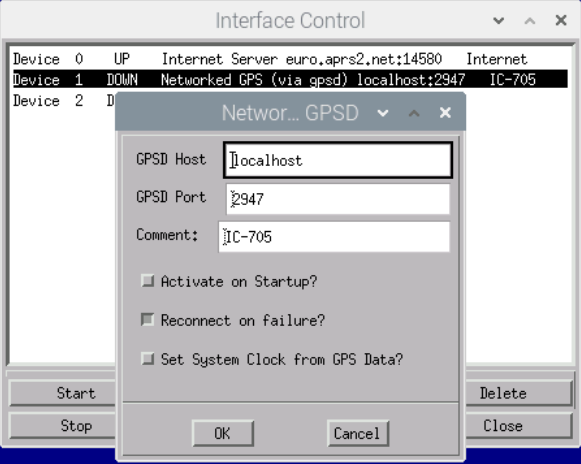
Device 1: My IC-705 has a built-in GPS which I can also use for Xastir. A corresponding interface is quickly set up when GPSD is installed.
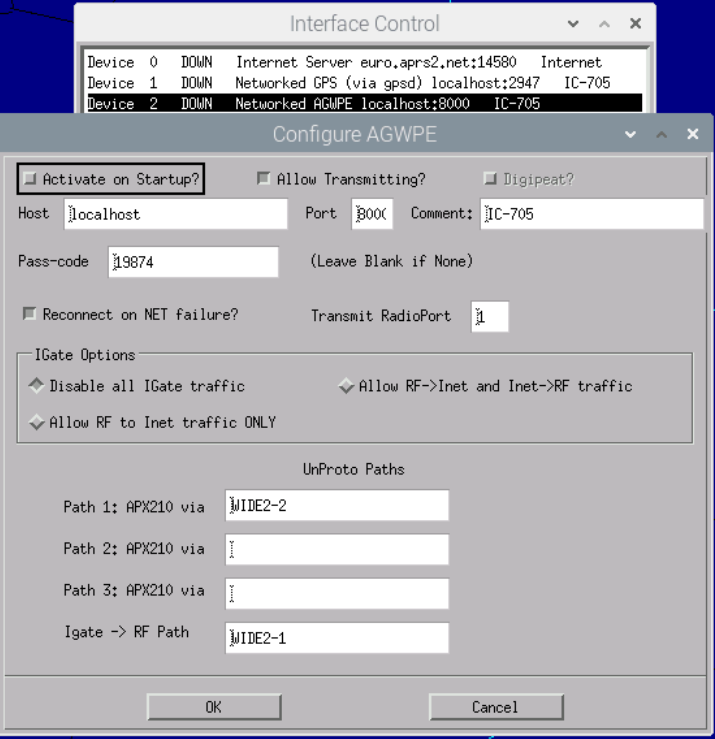
Device 2: However, it is only really fun when APRS data is received and transmitted on air with your own radio. Thanks to AGW, an interface can be set up very quickly for this purpose as well.
By the way, if you have a radio with a built-in TNC, it’s even easier. I have written a separate article for this.
https://dl1gkk.com/raspberry-pi-xastir-and-kenwood-th-d74-for-aprs-a-good-relationship/
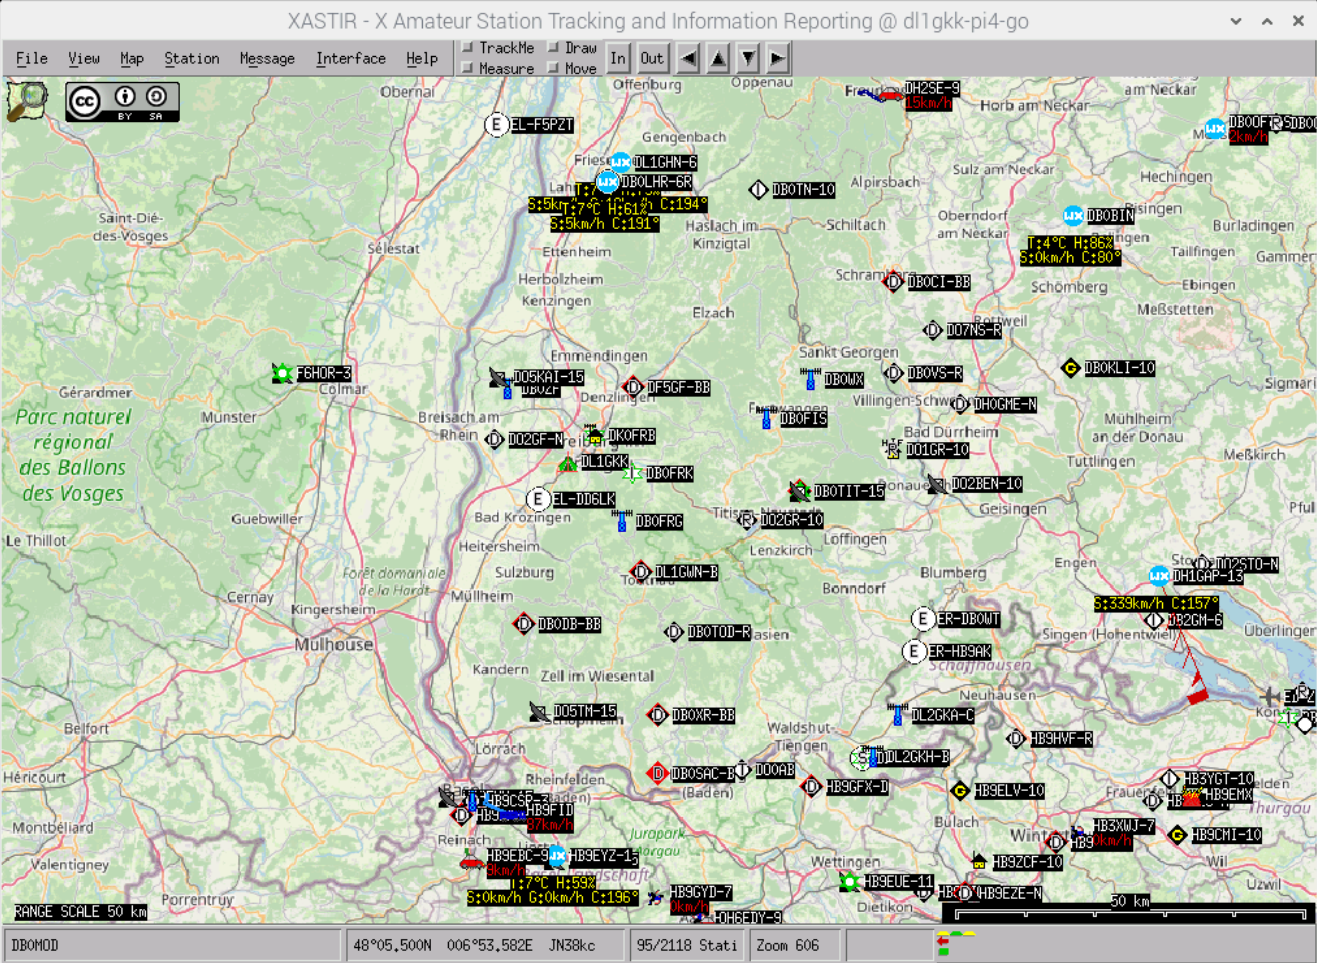
That’s it! So simple. APRS and Packet Radio like magic.
Good luck and have fun with it. Stay healthy and all the best for 2021.
Karl-Heinz, DL1GKK.