

I am a big friend of the small Raspberry PI (Raspi) computer which is also very good for amateur radio. All the programs I use work without problems on a PI3, but the performance of the PI4 is much better, but it also gets much hotter and needs more power. Both are great little computers. Try it out, it is worth it and makes fun.
Table of contents of this site
- Preliminary remarks
- Hardware
- Prepare SD Card
- Install operating system
- First start and basic setup Raspberry pi (Raspi)
- Backup & Restore
- Install GPS Clock (Time sync & Position)
- Install Real Time Clock (Additional hardware)
- Install Packet Radio (Hamlib, Direwolf, Xastir, Linpac)
- Install FLRig (Transceiver Control)
- Install FLDigi (Data Mode)
- Install WSJT-X (Data Mode)
- Install JTDX (Data Mode)
- Install GridTracker (Display connections on a map)
- Install JS8CALL (Data Mode)
- Install PAT (WINLINK)
- Install zyGrib (Weather data visualization)
- Install CQRLOG (Advanced Ham Radio Logbook)
- Install TQSL (LOTW Support)
- Install GPredict (Sat-Tracking)
- Install QSSTV (Slow Scan Televison)
- Install GQRX (SDR)
- Install FreeDV (Digital Voice)
- Install VOACAP (Propagation Prediction)
- Install Chirp (Programming transceivers)
- Install Qtel (Echolink Client)
- Install D-RATS (D-STAR Communication)
- Install CubicSDR with SDRplay RSP’s (SDR)
- Install ADS-B Receiver with SDRplay RSP’s (SDR)
- Install VirtualRadar (Display Airplanes)
- Install XDX (DX-Cluster Client)
- Install Xcwcp (Morse Code Tutor)
- Some important Raspberry PI commands and settings
- Other useful software
- General Information (last but not least)
- Disclaimer
Last content update: July 3, 2021
Due to a lot of work in my company it is currently not possible for me to update this article regularly. If you want to use a Raspberry for amateur radio, the fastest way is to use the great Build a Pi script from Jason, KM4ACK.
Preliminary remarks
There are 5 ways to set up the Raspi for use in amateur radio
1.) You can use my instructions as listed below. You can learn how to install and backup the operating system and various programs on the Raspi. Not everything is always up to date and you may get a more recent version and information from the programmers homepage. Learn it by doing it.
2.) Another excellent alternative is to use a script from KM4ACK to install the most important amateur radio programs on the Raspi most fully automatic. https://www.youtube.com/km4ack
3.) You can use a ready SD card image e.g. https://sourceforge.net/projects/hampi/
4.) You can buy a ready installed SD card e.g. from G4WNC. https://photobyte.org
5.) You can use a hardware solution e.g. DRAWS. http://nwdigitalradio.com/
Note: The order of enumeration is not an evaluation of what is best for you. Just take a look at everything and then decide for yourself.
Further Information
I recommend to check out the YouTube pages of KM4ACK and OH8STN. There you can find extensive information about QRP operation, amateur radio and the Raspi. Many thanks to Jason and Julian. Much of what I have written down here I could copy from there.
YouTube side from KM4ACK
https://www.youtube.com/user/jasonoleham
YouTube side from OH8STN
https://www.youtube.com/user/SurvivalTechEU
Acknowledgement: I find it impressive how much time people spend making great, free, open-source licensed programs available, writing application reports and recording videos. For me this is real ham-spirit. A huge thank to everyone. A real enrichment for our hobby.
NOW LET US START
It is not necessary to install all programs. Just choose what you like and install what you need. But: I recommend that you read through the complete page first so that you develop an overall understanding. The installation will take some time. Take it easy and do it step by step. You will be rewarded with a very efficient, stable, high frequency safe (i recommend ferrite cores over the connecting cables and a Alu case) computer for amateur radio applications which is also particularly suitable for portable use.
Please understand that I don’t have much time for support due to professional reasons. Errors, infos or quick questions to info@dl1gkk.com. The instructions are based on the assumption that you have basic knowledge in the use of electronics and computers and that you are a licensed amateur radio operator or short wave listener.
Let’s talk briefly about programming
# That is for your info - you don't need it
Command line-1
Command line-2
Command line-3...
reboot
In this manual you will find many code windows as shown bevore. The input is done in the LXTerminal of Raspbery Pi OS, in the following only called terminal. You will find it in the Raspi menu under accessories.
You can copy them by hand and paste them in the terminal or you can open a browser parallel to the terminal and copy the commands directly from my homepage.
I myself like to program my Raspi via VNC. Then I don’t need a keyboard and mouse on the Raspi itself and can do everything with the VNC client on another computer with a better keyboard, mouse and screen. I don’t even have to be in the same room as the Raspi.
Important: The input is always done line by line, followed by return. Then wait until the command is executed before entering new commands. If you get error messages please check if the command was entered correctly. Please note special characters, upper and lower case. Sometimes lines are also very long and are displayed wrapped on the screen. Always copy the whole line. Please do not copy and paste several lines at once. Only one line at a time. Lines beginning with a # are for information only and are not required for programming.
If a link do not work it is possible that it was changed. This can be the case in particular with software updates, i.e. a new release number. Then please have a look at the homepage of the programs.
Additional Informations
Installing the programs under Linux is not always easy. Sometimes something doesn’t work although the installation instructions are relatively clear. Then, a deeper introduction into the problem is maybe necessary. Here is the visit of the homepage from KI6ZHD recommended. Thanks David, great job 🙂 http://www.trinityos.com/HAM/CentosDigitalModes/RPi/rpi2-setup.html
Sometimes the installation does not work because the SD card is defective. SD cards cannot be overwritten indefinitely. In this case just try a new SD card. Sometimes the Raspberry PI itself or any connection cables are defective. I have already experienced this. Then you have to replace the hardware. If the power supply of the Raspberry Pi is too weak, problems and errors can also occur.
If you have any questions I recommend to visit the homepage of the corresponding program. There you will usually find helpful information and user guides. This is also important to check if new updates are available. And hey, if you don’t get any further, Google is not seldom your best friend 😉
Hardware
Raspberry Pi 3b
https://www.raspberrypi.org/products/raspberry-pi-3-model-b-plus/?resellerType=home
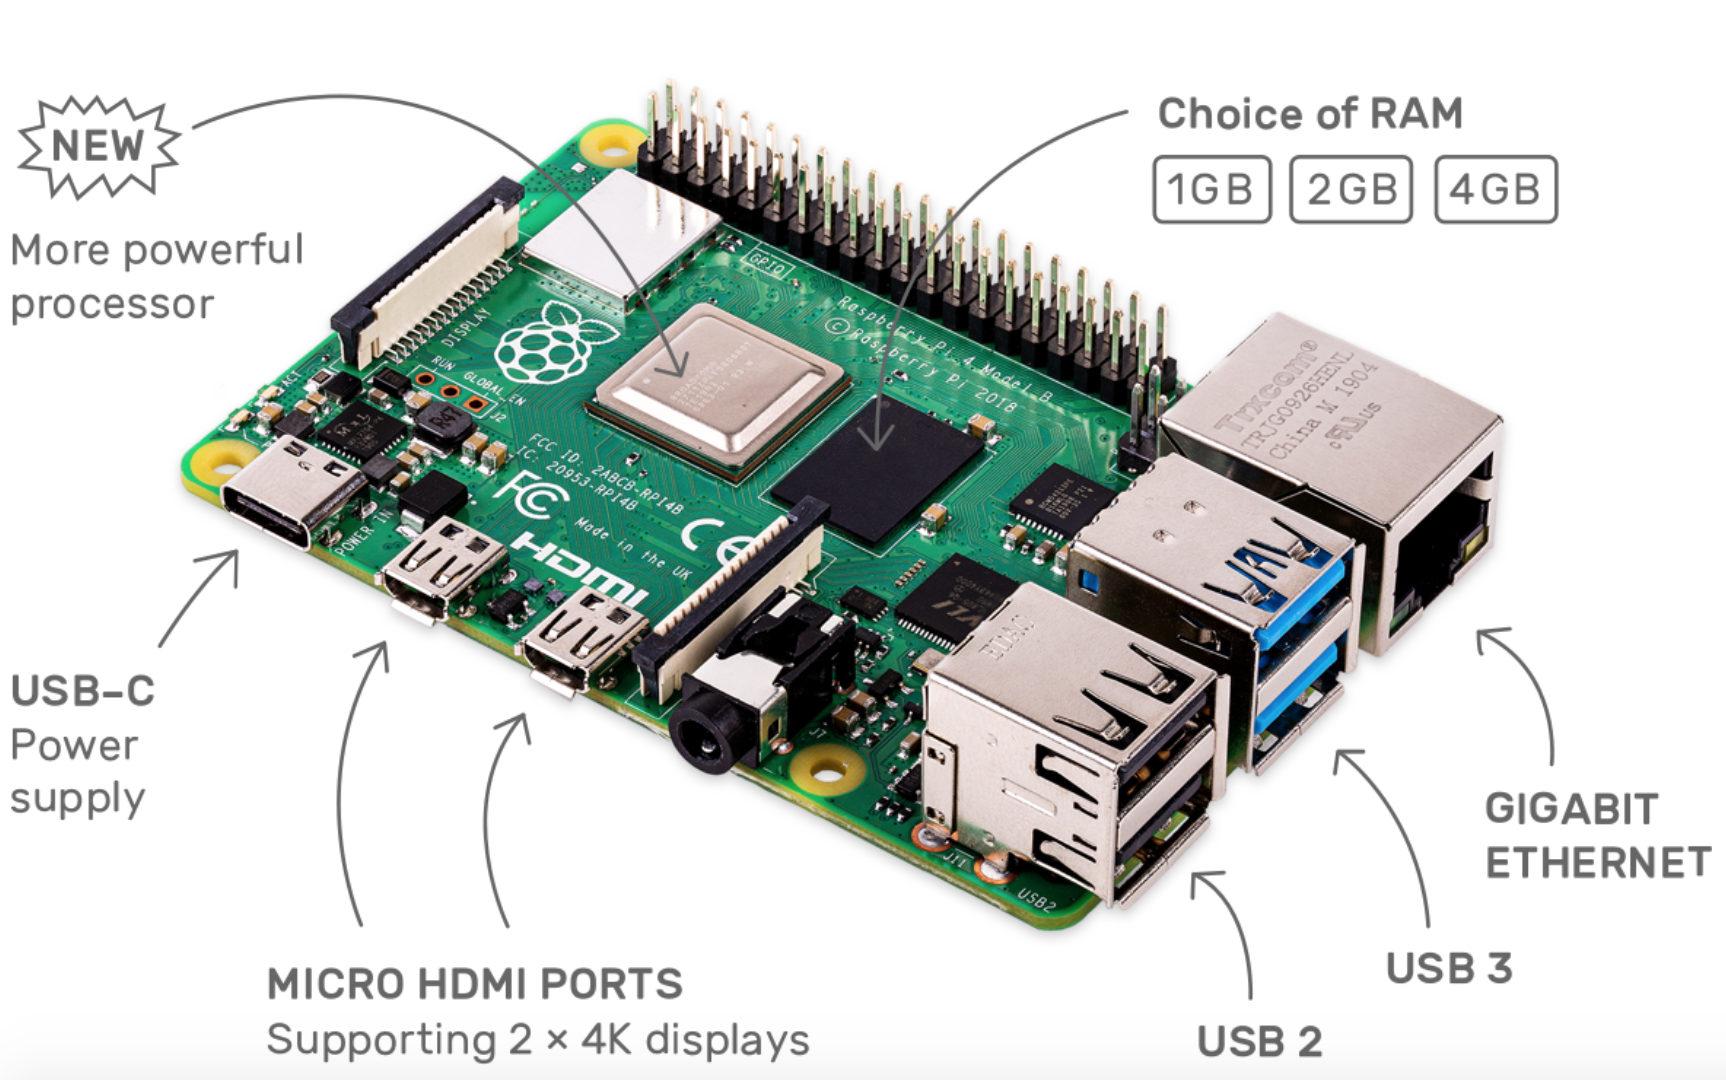
Raspberry Pi 4b
https://www.raspberrypi.org/products/raspberry-pi-4-model-b/?resellerType=home
Current portable Setups from DL1GKK
For more information and setups read the other article on my blog on www.dl1gkk.com
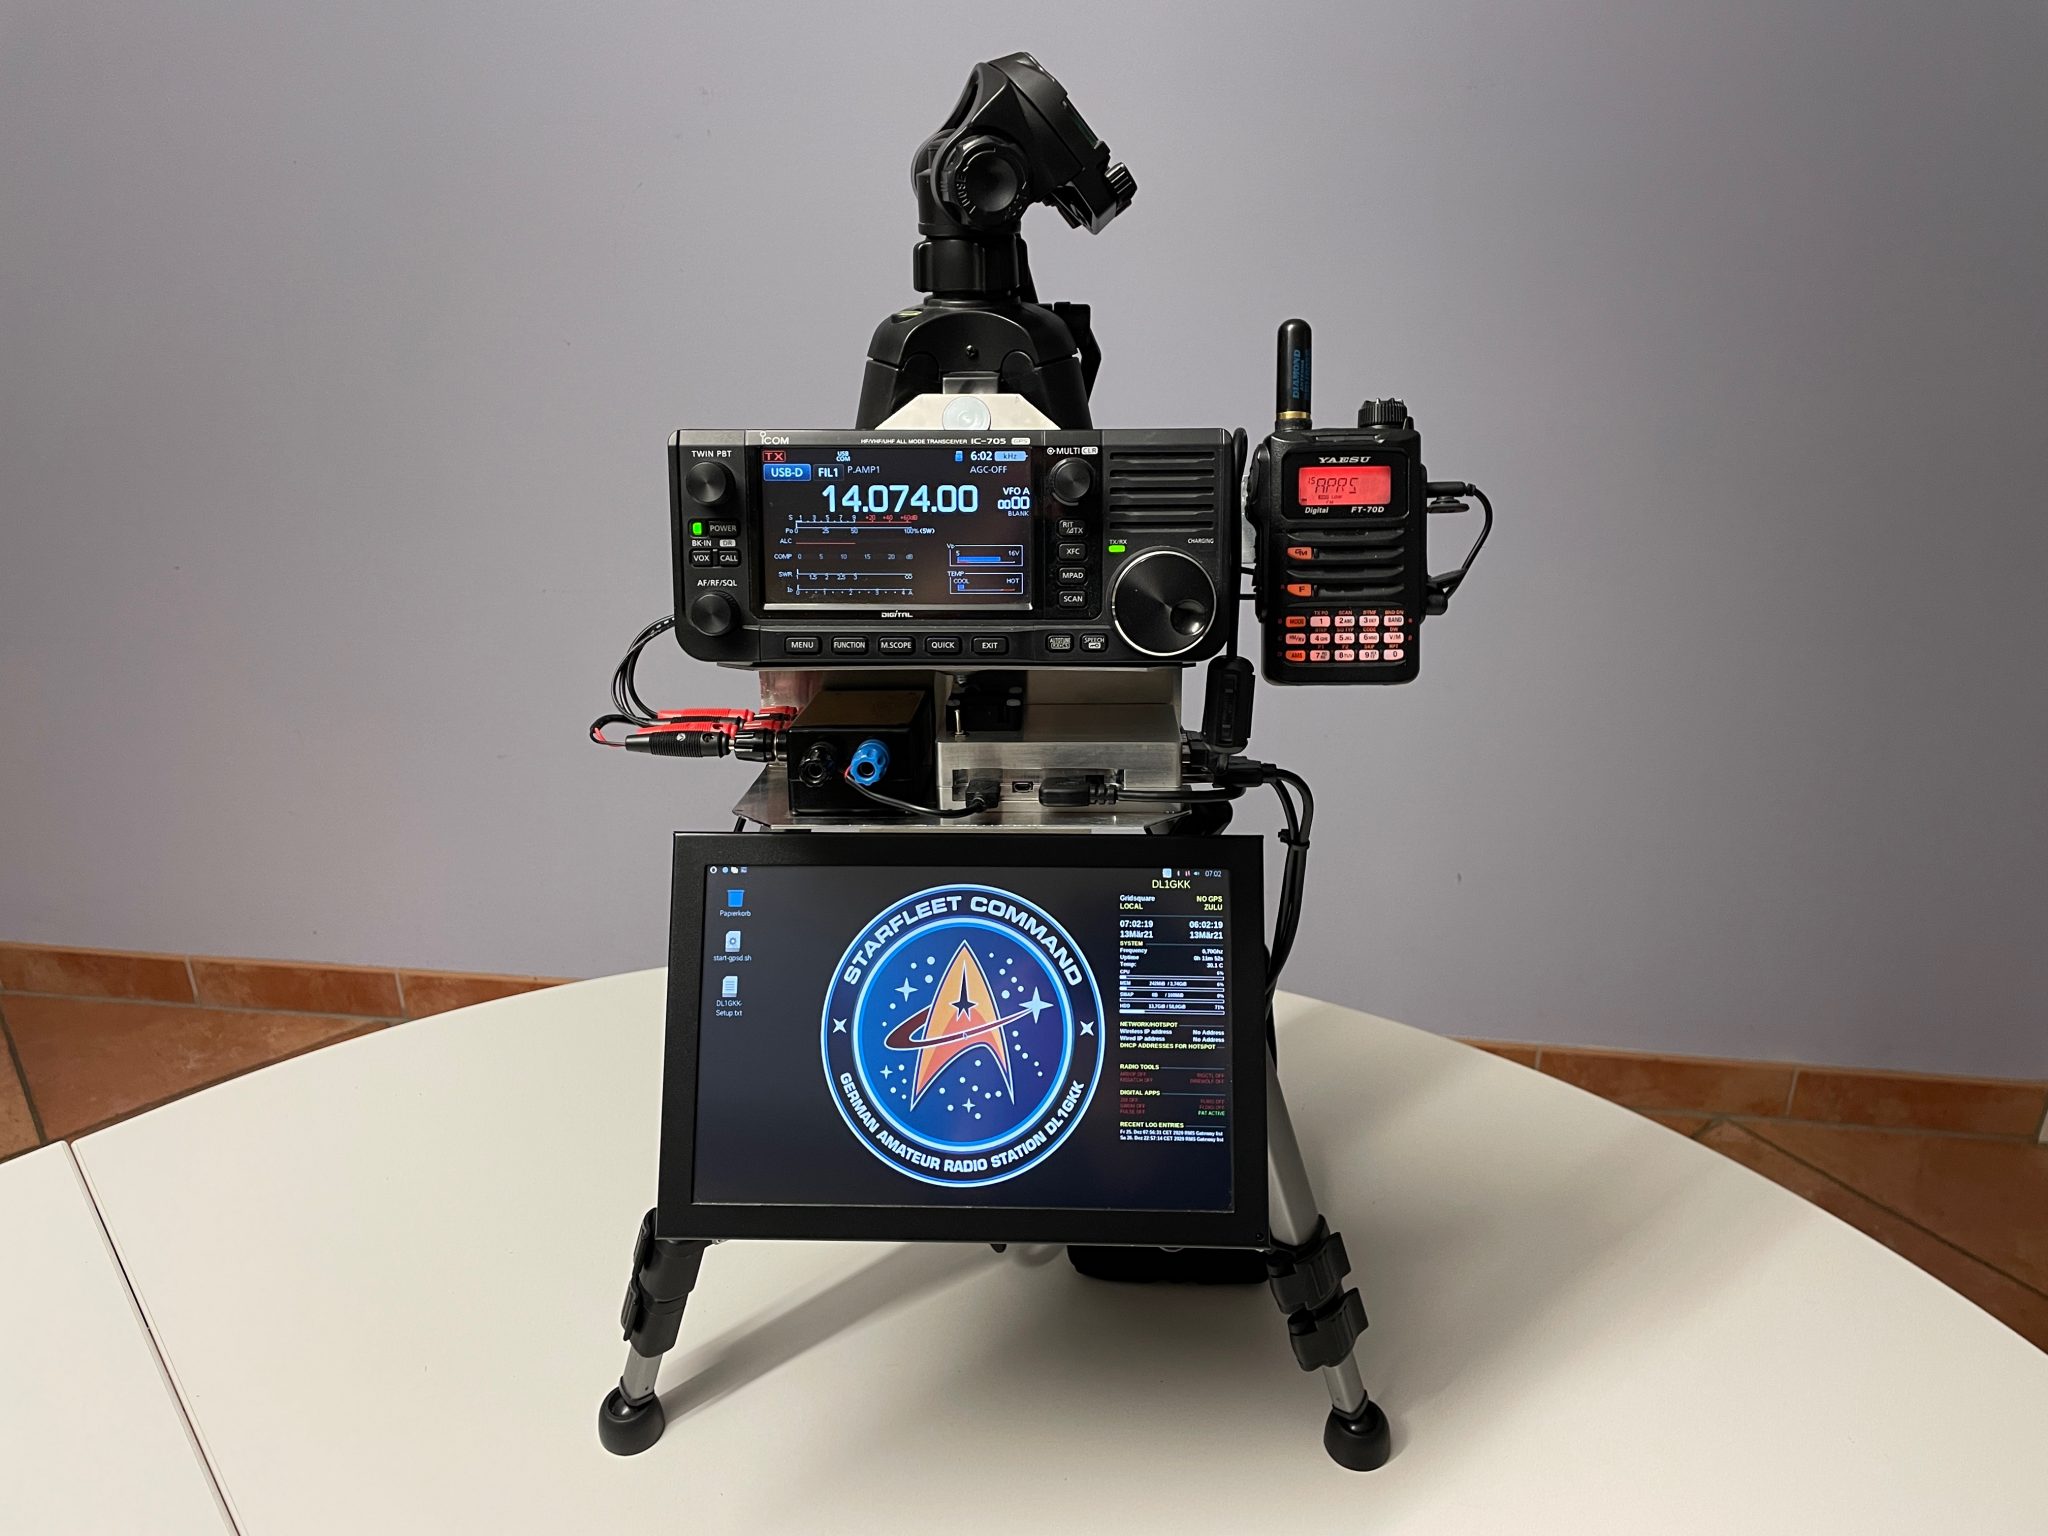
TRIPOD-GO-BOX, Raspberry PI4, ICOM IC-705, FT-70DE, Mobilinkd TNC3, SDRplay RSP1, Monitor, wireless keyboard
https://dl1gkk.com/pimp-up-my-tripod-go-box/
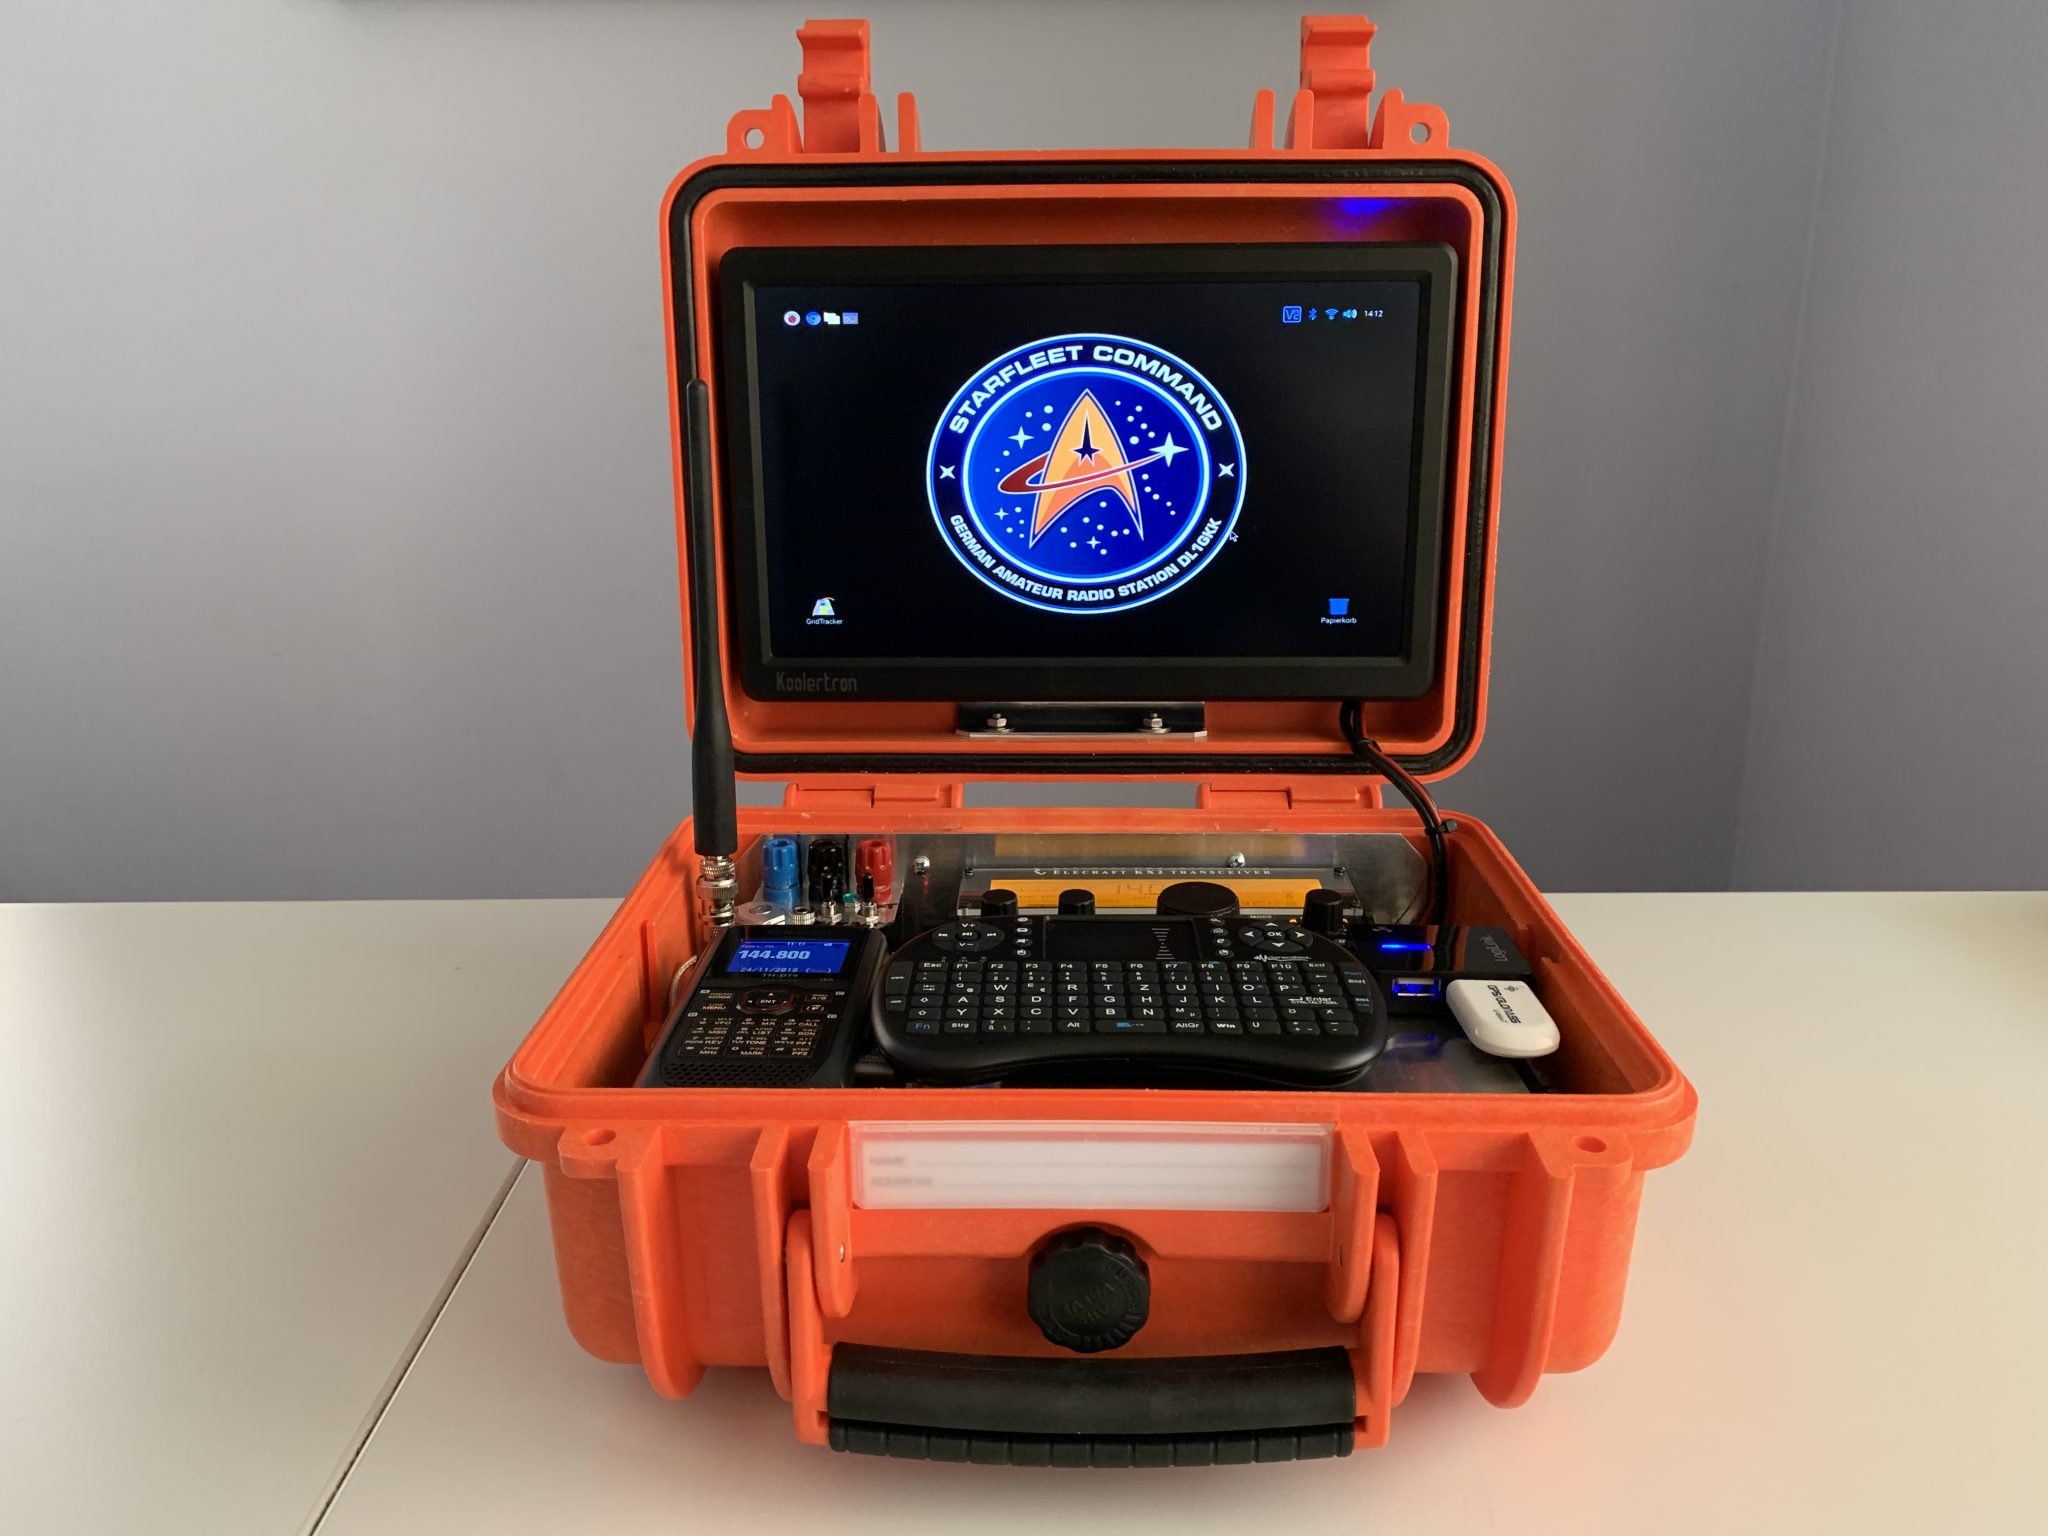
GOBOX, Raspberry PI4, ELECRAFT KX2, KENWOOD TH-D74
https://dl1gkk.com/small-qrp-go-box-powered-by-raspberry-pi4-kx2-and-th-d74/
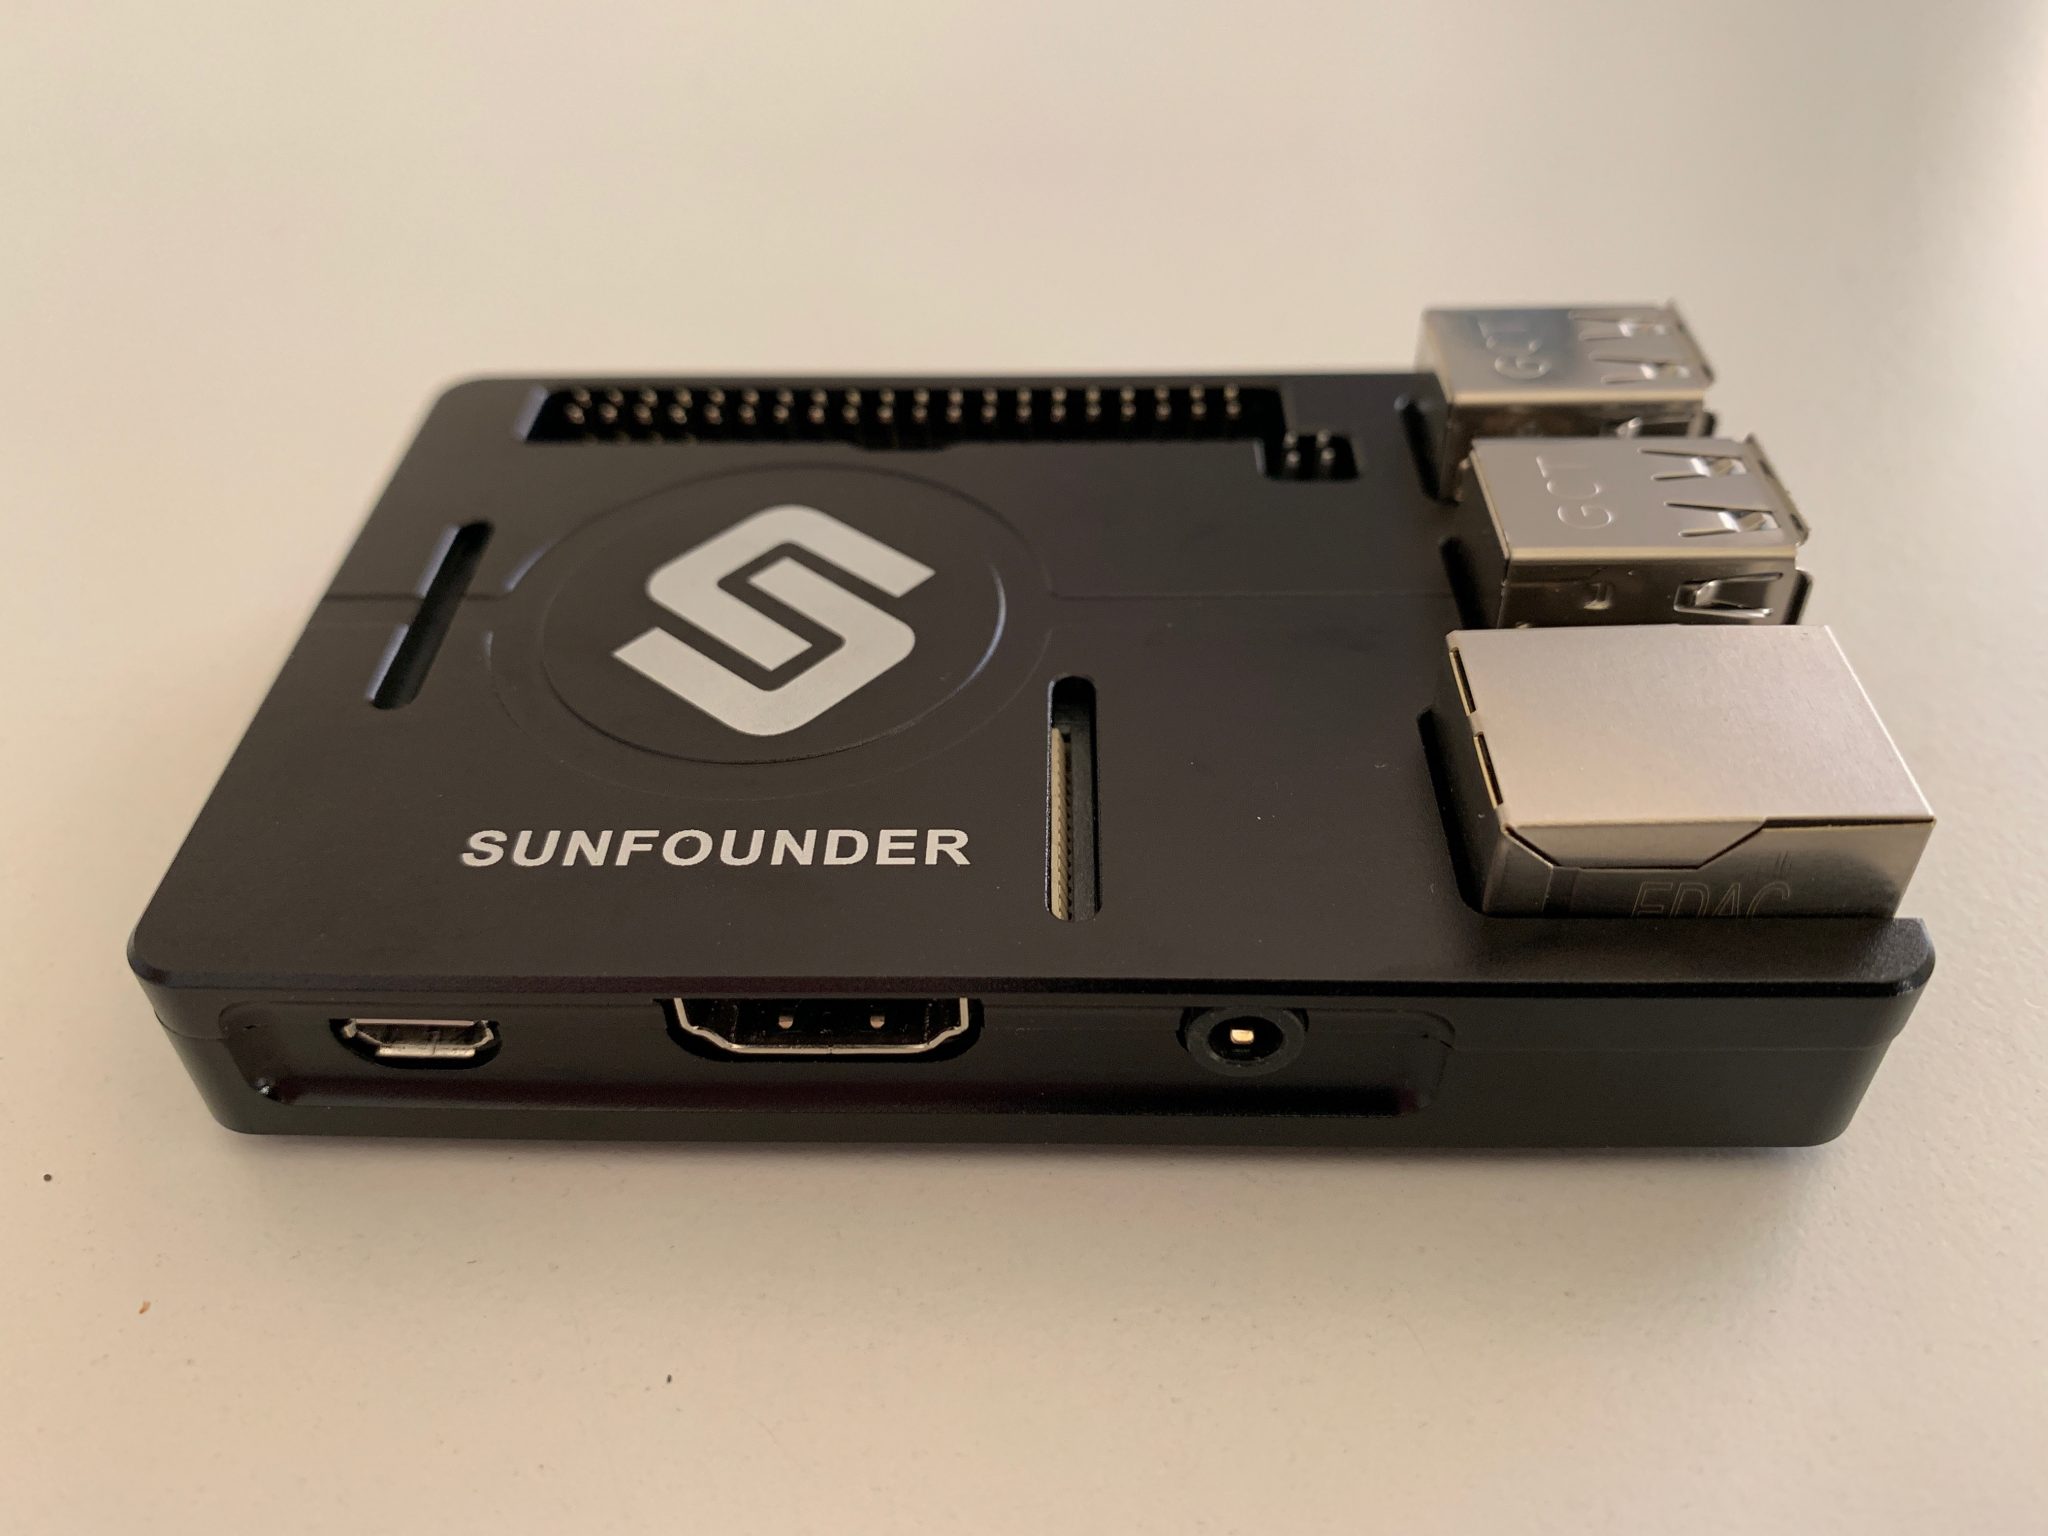
SUNFOUNDER / GEEKWORM PI3 ALU CASE
For my RPI3 I use a very flat ALU case with passive cooling. The RPI3 does not get very hot and the case is usually good enough to dissipate the heat. The disadvantage is that the hardware clock module is plugged outside the case.
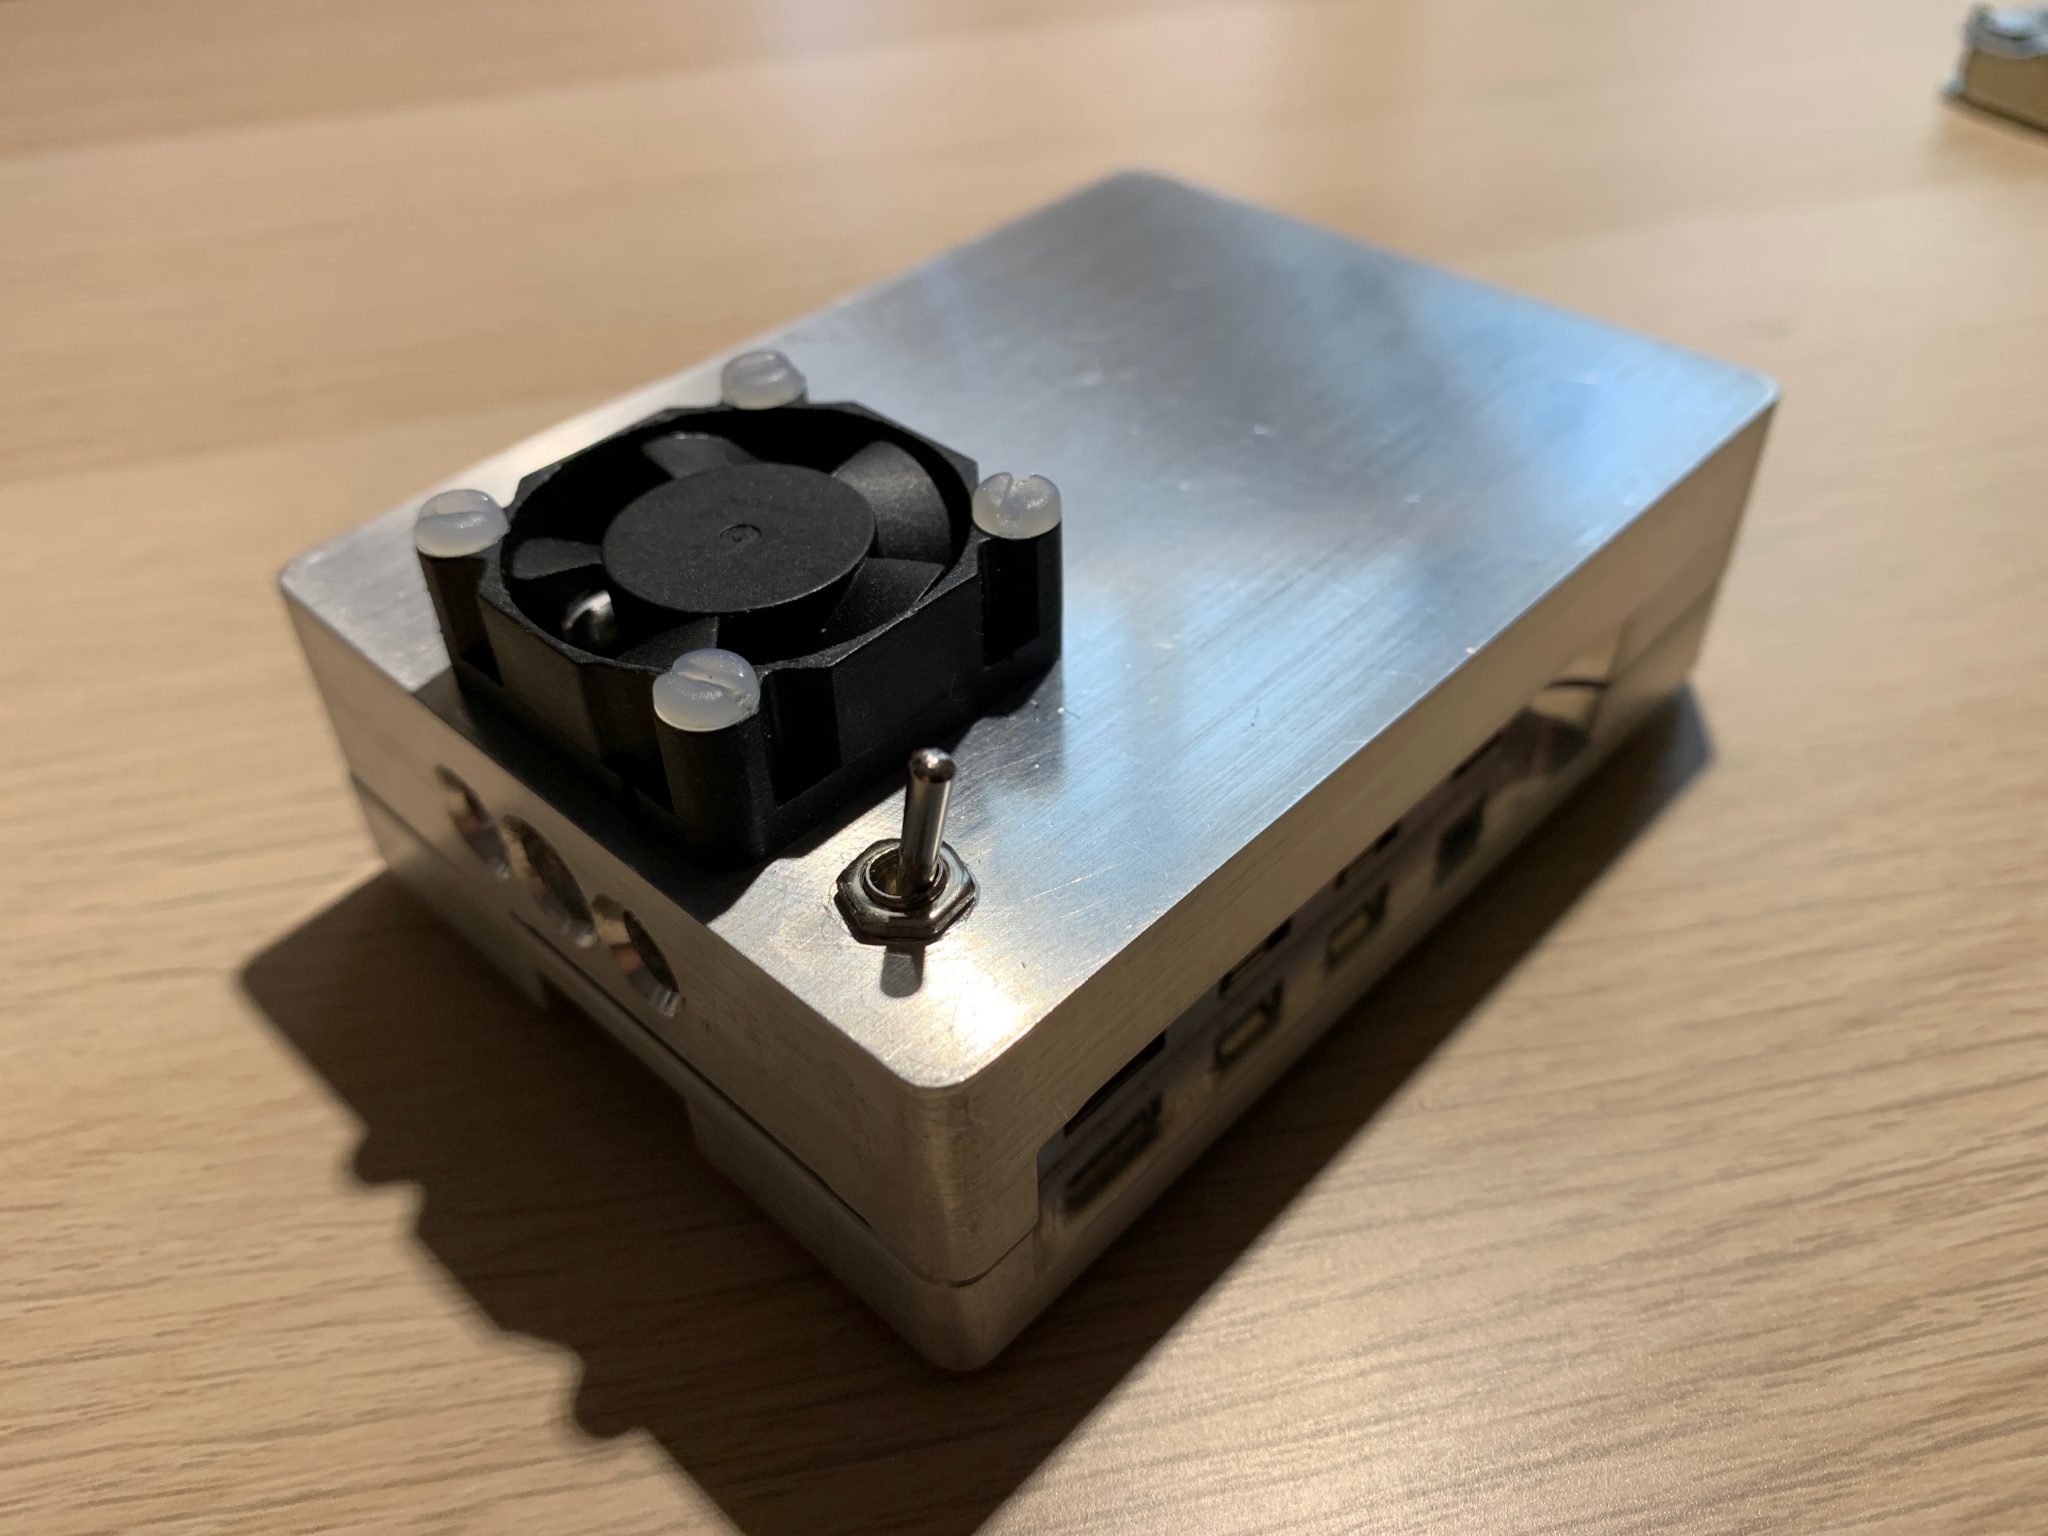
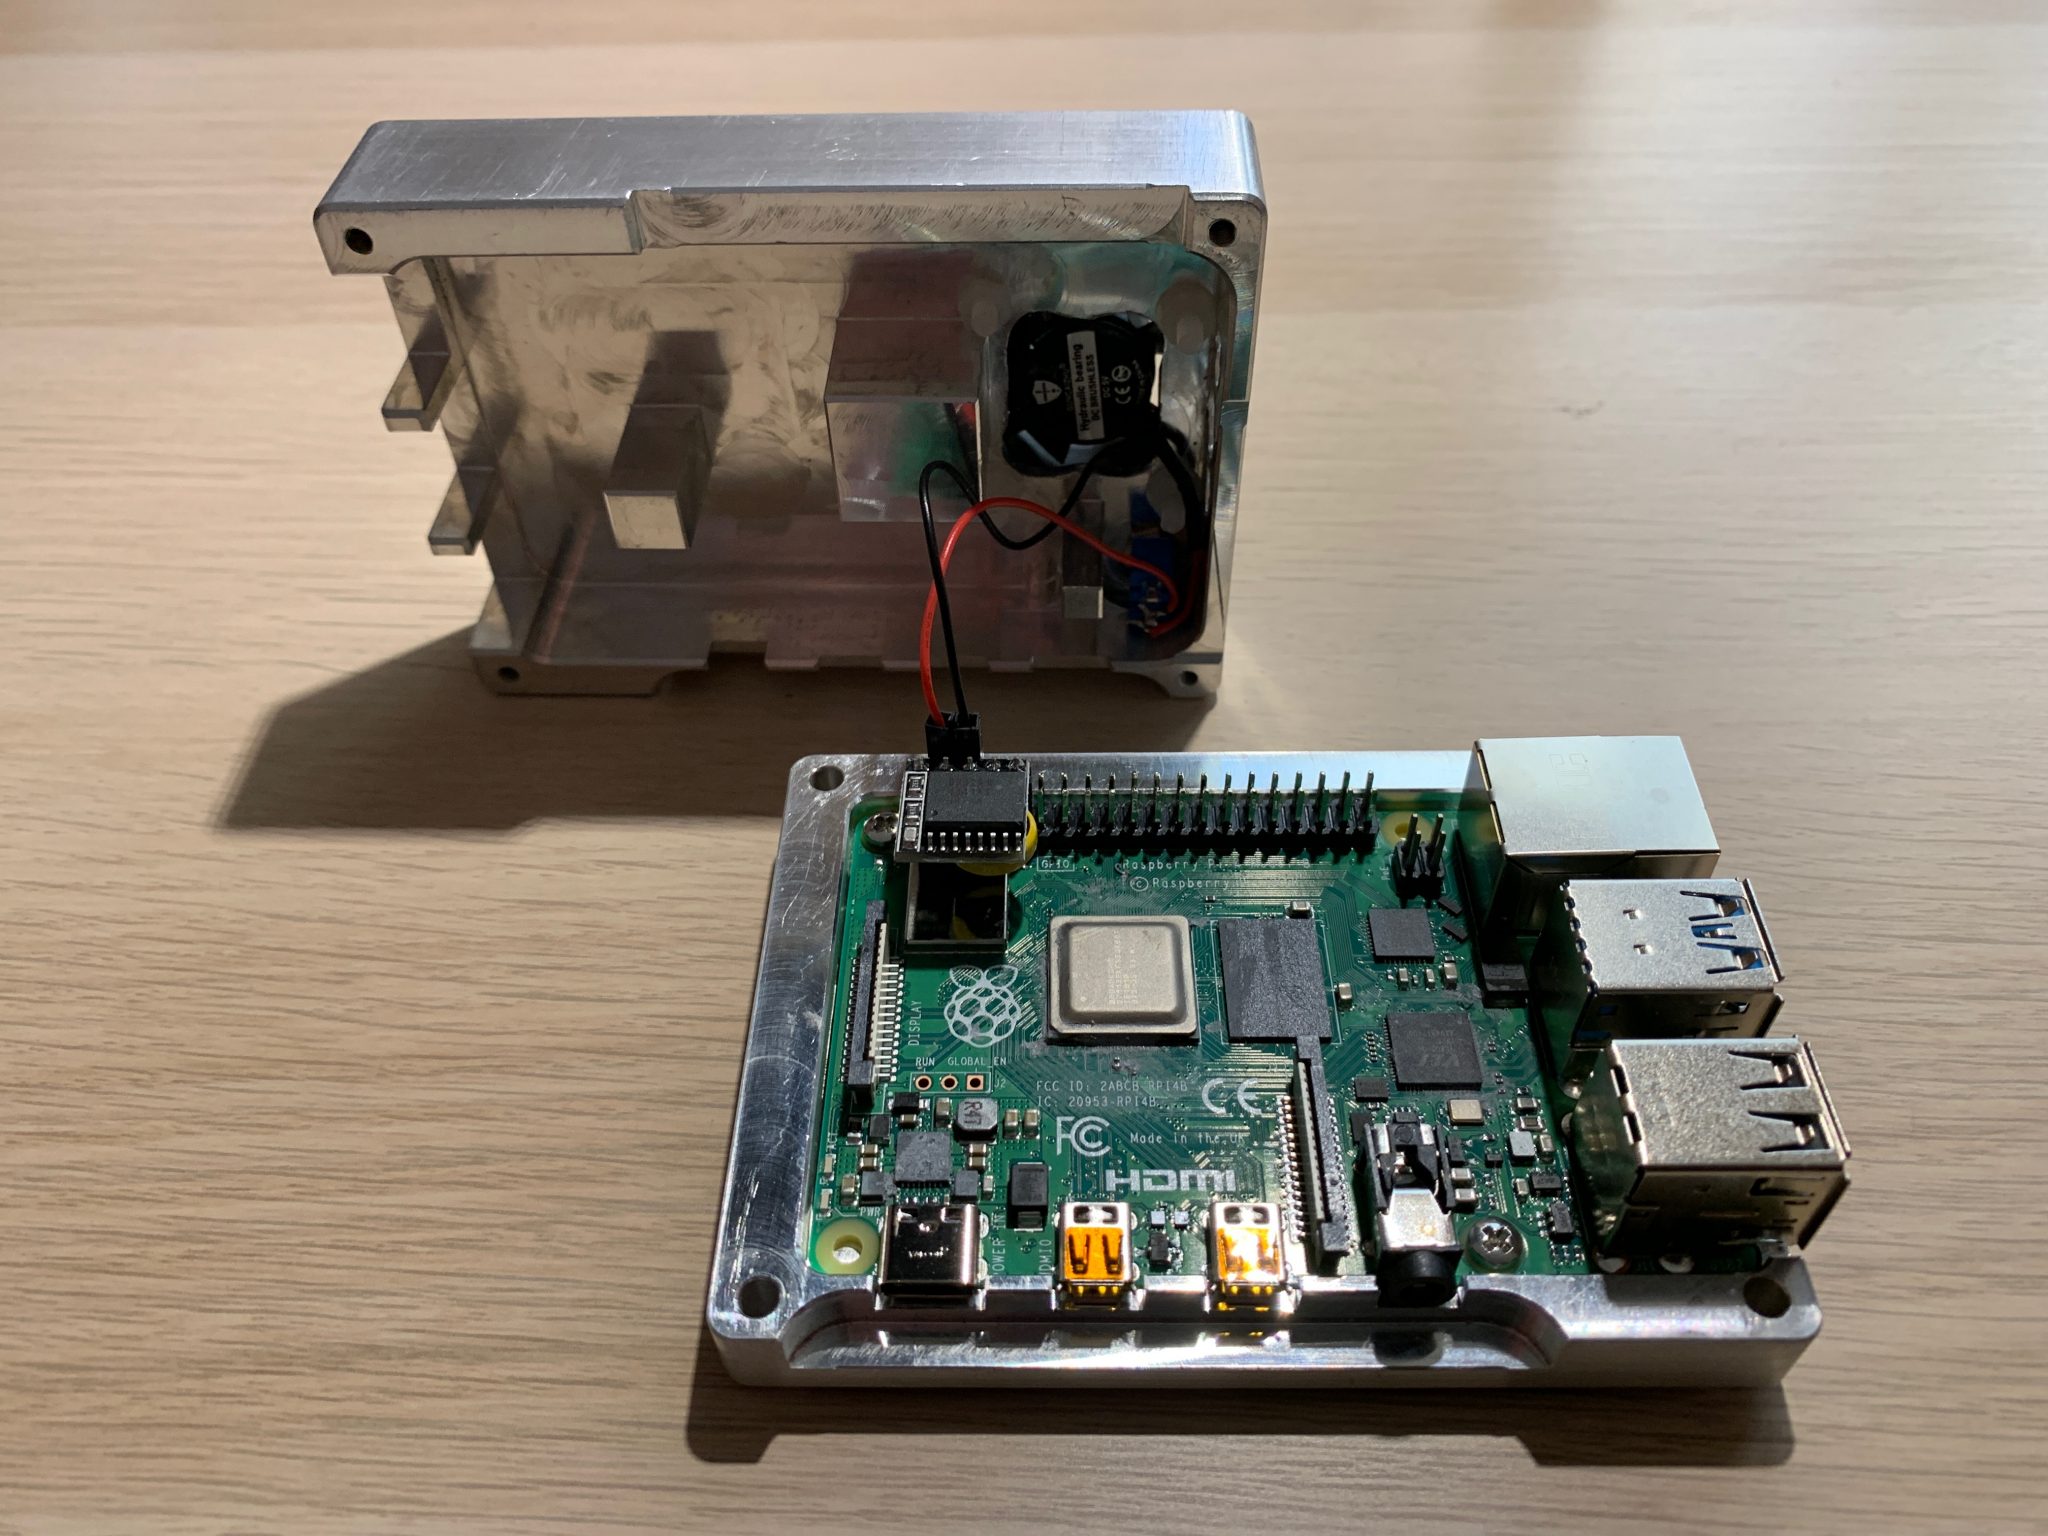
MANOUII PI4 ALU CASE
For my RPI4 I use a more massive ALU case with passive cooling. The housing is large enough to hold the hardware clock module inside. But the RPI4 gets very hot and in the shack the passive cooling is not sufficient. Therefore I mounted an additional 5V fan with on/off switch. First I connected the fan to the 5V GPIO pin. The cooling was extremely good but the fan was very loud. Then I connected the fan to the 3.3V GPIO pin. The cooling is now perfect and the fan is nice and quiet. Maybe I modify the switch to switch between off, 5V and 3.3V. This is for the case when the cooling is not sufficient in summer with 3.3V. Do not forget to apply heat conductive paste to the transition surfaces from the ICs to the aluminum fingers before closing the case.
Important
Check your sound card and how to control and optimize it for radio transmission
https://dl1gkk.com/sound-card-check/
Please adjust the levels of your soundcard in the USB Audio Device Setting. A too strong signal only disturbs the frequency. Switch off Auto Gain Control! For reception check the display of the corresponding program. For transmissions check the ALC of your radio.
Prepare SD Card

I am using the ScanDisk Ultra and Extreme Pro SD Cards with 32GB.
I recommend using a fast SD card because it has a significant impact on the performance of the Raspi.
If necessary, you can format them using SD Memory Card Formatter.
https://www.sdcard.org/downloads/formatter/
ATTENTION: If you use a SD Card who has more then 32GB you need to format it before you install the operating system. https://www.raspberrypi.org/documentation/installation/sdxc_formatting.md
Install operation system
Download Raspberry Pi OS. I use the full version with desktop and recommended software. https://www.raspberrypi.org/downloads/raspberry-pi-os/
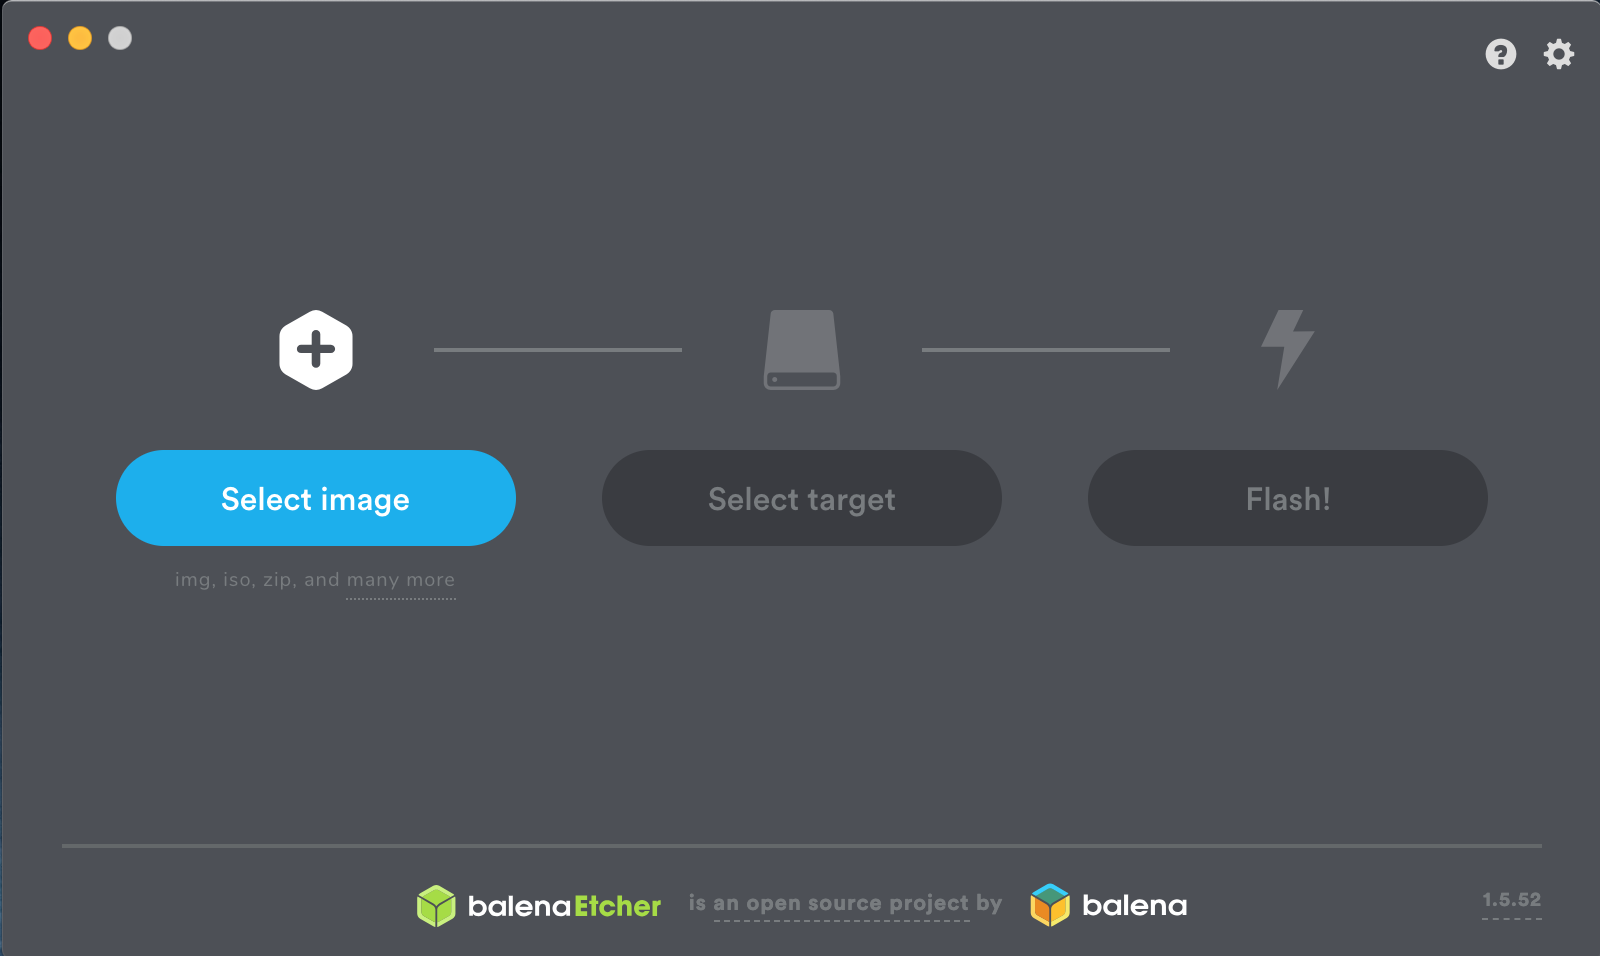
Copy it on the SD Card. It is very simple with
https://www.balena.io/etcher/
Another easy way is to use Raspberry Pi Imager https://www.raspberrypi.org/downloads/
First start and basic setup Raspberry Pi
Insert the SD card into the slot of the Raspi. Connect the network cable, HDMI screen, keyboard and mouse and start the Raspi by plugging in the power connector. Use the original power supply or a power source with enough power. Follow the setup instructions. I’ll skip searching and installing new updates at this point and do that later in the terminal. Before rebooting the Raspi I go to the Preferences, Raspberry Pi Configuration. There I assign my own hostname, for example dl1gkk-pi-4, so that I can identify it well later in the network. Then I switch to Interfaces and enable the VNC Server and ssh. With this I can control the further software installation via VNC or ssh. If you like to use a hardware real time clock then enable I2C. Now you can restart the Raspi.
After this i make a software and operating system update
sudo apt-get update
sudo apt-get upgrade
sudo apt-get dist-upgrade
reboot
For remote control install a VNC Viewer on another computer
https://www.realvnc.com/
It is recommended to create an account with RealVNC. This allows you to control up to 5 computers for private use. After logging in, this is also possible from outside your own network. Once this is done, log on to the VNC server on the Raspi (click on the icon in the menu bar) and the VNC Viewer. Access should now be possible. You have assigned the host name and password yourself. The user is: pi
Backup & Restore
Let’s talk about backup & restore. I recommend to make regular backups from the SD card. For new installations I do this after every completed step. E.g. after the installation of the operating system, after the installation of software A, after the installation of software B… The reason is that something can go wrong during an installation. Then you can simply start again with the previous step and don’t have to reinstall everything completely.
There are many reasons for not touching a functioning system. But I would add: if you don’t have a backup. For this reason I always work with two SD cards on the Raspi. One I use to test new installations and another one is my working system. On the working system comes only what really works.
The easiest way to create a copy of the SD card is to use a program that is already installed on the Raspberry.

Open the Start menu, Accessories and start SD Card Copier. I use two identical SD cards of the same size and a USB SD card reader/writer for this.
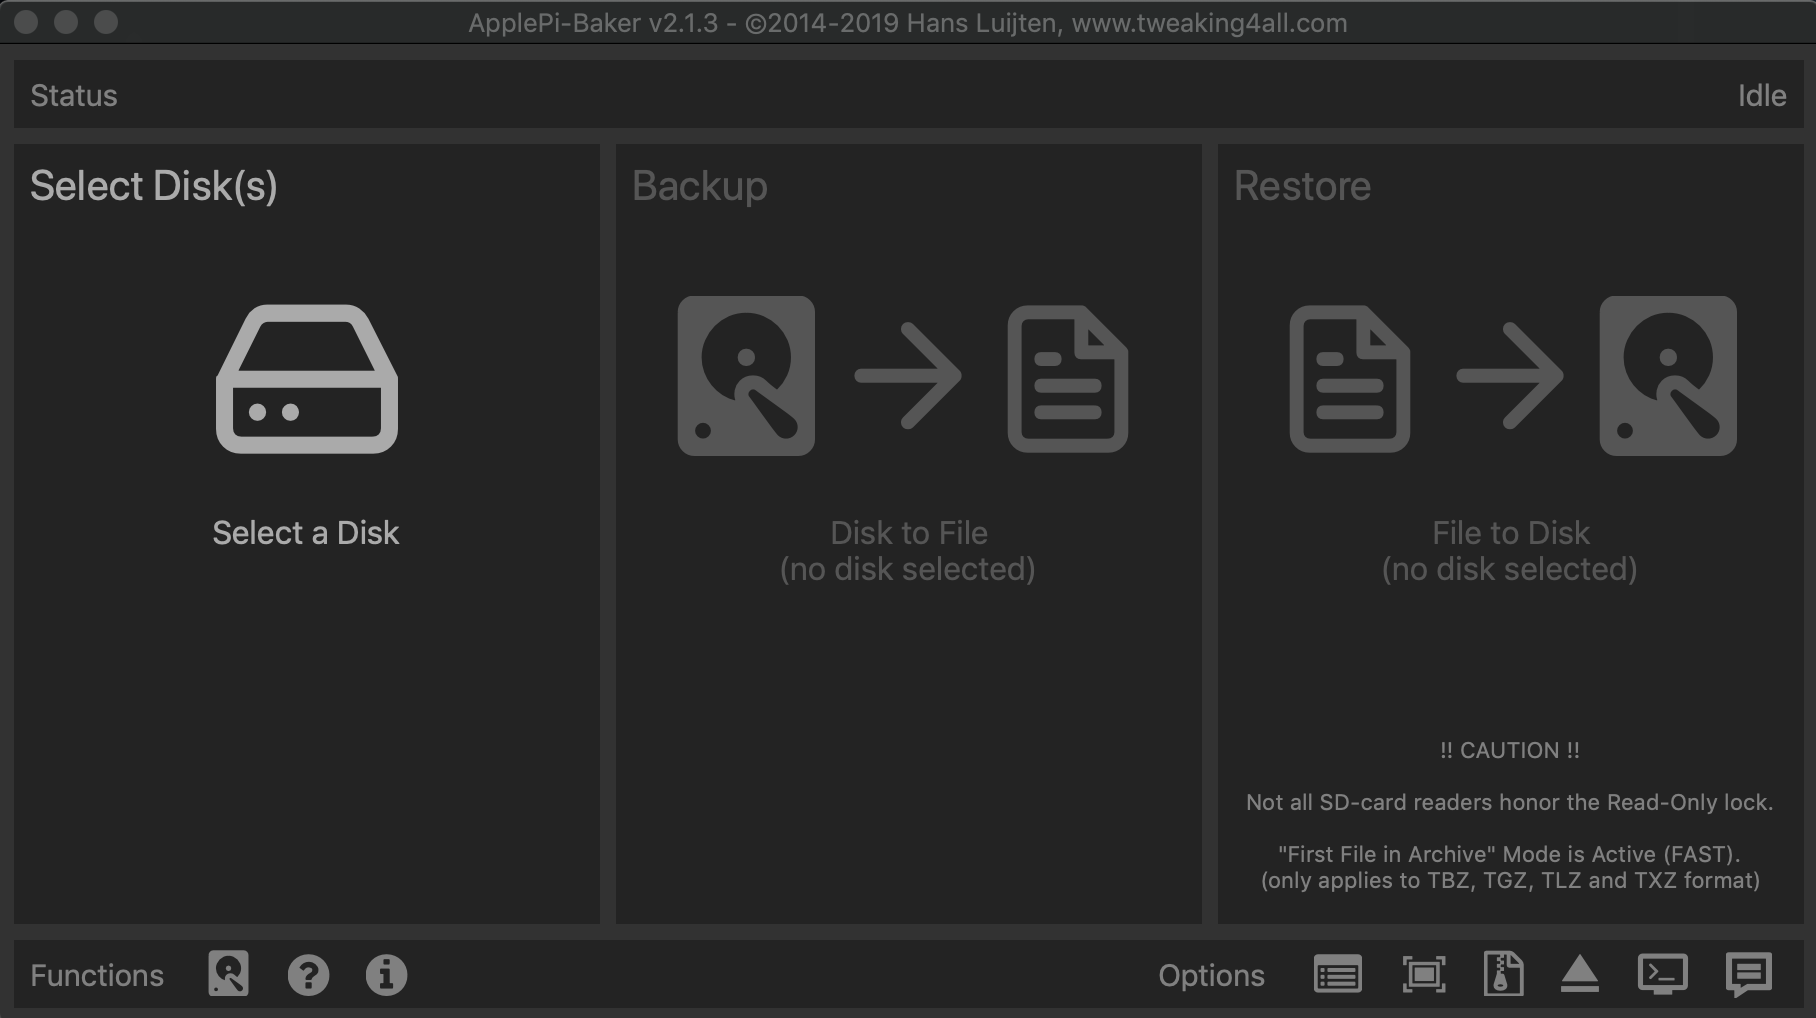
Of course you can also use one of the following programs for this purpose:
https://www.tweaking4all.com/software/macosx-software/applepi-baker-v2/
or https://sourceforge.net/projects/win32diskimager/
GPS Clock (Time sync & Position)
Let’s talk about time synchronization. Software like wsjt-x needs an exact time. In your network you can get the time from the internet. On the way you can use a smartphone or tablet pc with mobile internet as WLAN hotspot for the Raspi. Another possibility is to use a GPS. I use a Diymall Vk-172 Usb GPS Dongle. The GPS ist also nice if you like to track your position (Xastir APRS will support it) or something else. If you have a transceiver like the ICOM IC-705 you can use the build in GPS.
The installation is based on a video from OH8STN
https://youtu.be/2oWLjl0dFkY
Put the GPS in the Raspi and power it up
Now it is necessary to find out at which USB port the Raspberry Pi recognized the GPS. The easiest way to do this is with the terminal and the command
ls -l /dev/serial/by-id
ttyUSB0 is my CAT cable from the Elecraft KX2
ttyACM0 is my Kenwood TH-D74
ttyACM1 ist my USB GPS dongle
So i use ttyACM1 as DEVICES for the next step
sudo apt -y install gpsd gpsd-clients python-gps chrony
sudo nano /etc/default/gpsd
# Make / change to following setting:
START_DAEMON=”true”
USBAUTO=”true”
DEVICES=”/dev/ttyACM1″
GPSD_OPTIONS=”-n”
# Ctrl-X and yes to save
sudo nano /etc/chrony/chrony.conf
# Comment out pool 2... line for time only from gps
# Add the following line to the end of the file:
refclock SHM 0 offset 0.5 delay 0.2 refid NMEA
# Ctrl-X and yes to save
reboot
Now we can check if everything is all right
# check that gpsd and chronyd are active
systemctl is-active gpsd
# if not try: sudo systemctl restart gpsd
systemctl is-active chronyd
# if not try: sudo systemctl restart chronyd

# you can check the status
sudo systemctl status gpsd

# show the gps data
gpsmon -n
cgps
xgps
Real Time Clock
If you don’t have a GPS or GPS reception and don’t have Internet Connection, it is a good idea to provide the Raspi with an accurate time. This can be done with a additional hardware DS3231 RTC Board that can be connected to the GPIO port.
The installation is based on a video from OH8STN
https://youtu.be/jABiEUV1bvk
# First, please check that I2C is enabled in the Interfaces tab of the Raspberry Pi configuration. If not, please activate and reboot.

sudo i2cdetect -y 1

# Column 8 and line 60 should contain 68. if yes then go ahead. If not check hardware and Raspi config.

sudo modprobe rtc-ds1307
sudo bash
echo ds1307 0x68 > /sys/class/i2c-adapter/i2c-1/new_device
exit

# Read time hardware clock
sudo hwclock -r
# Read time raspberry pi
date
# Write time to hardware clock
sudo hwclock -w

sudo nano /etc/modules
# Add end of file
rtc-ds1307
# CTRL-X and Yes for safe

sudo nano /etc/rc.local
# Add bevor exit 0
echo ds1307 0x68 > /sys/class/i2c-adapter/i2c-1/new_device
sudo hwclock -s
date
# CTRL-X and Yes for safe
Install Packet Radio (Hamlib, Direwolf, Xastir, Linpac)
Install Hamlib (Transceiver Control)
Note: Install Hamlib if you need a PTT-Control. If you have a serial TNC or a transceiver like Kenwood TH-D74 with build in KISS TNC and you only like to use APRS with Xastir, you don’t need to install. Have a look to the Xastir section on this side.

If you use a Signalink USB sound card you don’t need to install Hamlib. It works good with fast VOX setting for 1200 baud packet, but not so good with 9600 baud. Don’t use the VOX from a Transceiver. It ist not fast enough. If u use a cheap USB sound card like mine (it works great) you need a hardware PTT circuit or a USB serial cable and Hamlib for Transceiver control.
The installation is based on a video from KM4ACK.
https://youtu.be/iUOfsOnOmvQ
Download site (Check for updates)
https://sourceforge.net/projects/hamlib/
cd Downloads
wget https://sourceforge.net/projects/hamlib/files/hamlib/4.2/hamlib-4.2.tar.gz
tar -zxvf hamlib-4.2.tar.gz
cd hamlib-4.2
./configure --prefix=/usr/local --enable-static
make
sudo make install
sudo ldconfig
reboot
Now you can check if Hamlib will work. With the following command you can check which transceivers are supported
# l is a lower case L
rigctl -l
Note the number in the line in front of the radio you want to control. We will need the number later for the PTT control in direwolf.conf. I use an Elecraft KX2 and a 144/432Mhz transverter. 2044 is the rig number. So that I can e.g. output the frequency with the following command
rigctl -m 2044 -r /dev/ttyUSB0 -s 38400 fInstall Direwolf (Sound Modem)
IMPORTANT: If you want to use Hamlib for PTT control you have to install it BEFORE installing Direwolf.
Direwolf checks during compilation whether the following files exist
/usr/local/include/hamlib/rig.h
/usr/local/lib/libhamlib.so
These are created during the installation of Hamlib. If these files are present, Direwolf is created for using Hamlib.
Note: If you have a serial TNC or a transceiver like Kenwood TH-D74 with build in KISS TNC and you only like to use APRS with Xastir, you don’t need to install Direwolf. Have a look to the Xastir section on this side.
The installation is based on a video from KM4ACK.
https://youtu.be/Nz4mOzi5bcw
sudo apt-get install cmake
sudo apt-get install libasound2-dev
sudo apt-get install libudev-dev
cd ~
git clone https://www.github.com/wb2osz/direwolf
cd direwolf

# Optional - Do this to get the latest development version rather than the latest stable release.
#git checkout dev

mkdir build && cd build
cmake ..
make -j4
sudo make install
make install-conf
reboot
Now we can setup Direwolf. First we have a look about our sound card in- and output
# l is a lower case L
aplay -l
arecord -l
If you use the same USB Card for RX and TX audio you can only use aplay -l. You get the info back where your USB Soundcard is. For example:
Card 1: CODEC [USB AUDIO CODEC], Device 0: USB Audio [USB Audio]
Then you have to set ADEVICE plughw:1,0
The syntax is: ADEVICE plughw:Card,Device
Now we can edit the Direwolf config file
sudo nano direwolf.confScroll down to the line: #ADEVICE plughw:1,0 and delete the # from the start of the line and set the correct Soundcard as shown before.
Scroll down to CHANNEL 0 PROPERTIES and replace NOCALL with your callsign, i.e. DL1GKK. NB: This must be caps.
Then, if you like to use Hamlib scroll to ptt and change it (in my case) to:
PTT RIG 2044 /dev/ttyUSB0
# remember, you can read out the CAT Port with:
ls -l /dev/serial/by-id
Press Ctrl+x, close an save the file. Then make a reboot. Now you can start direwolf.
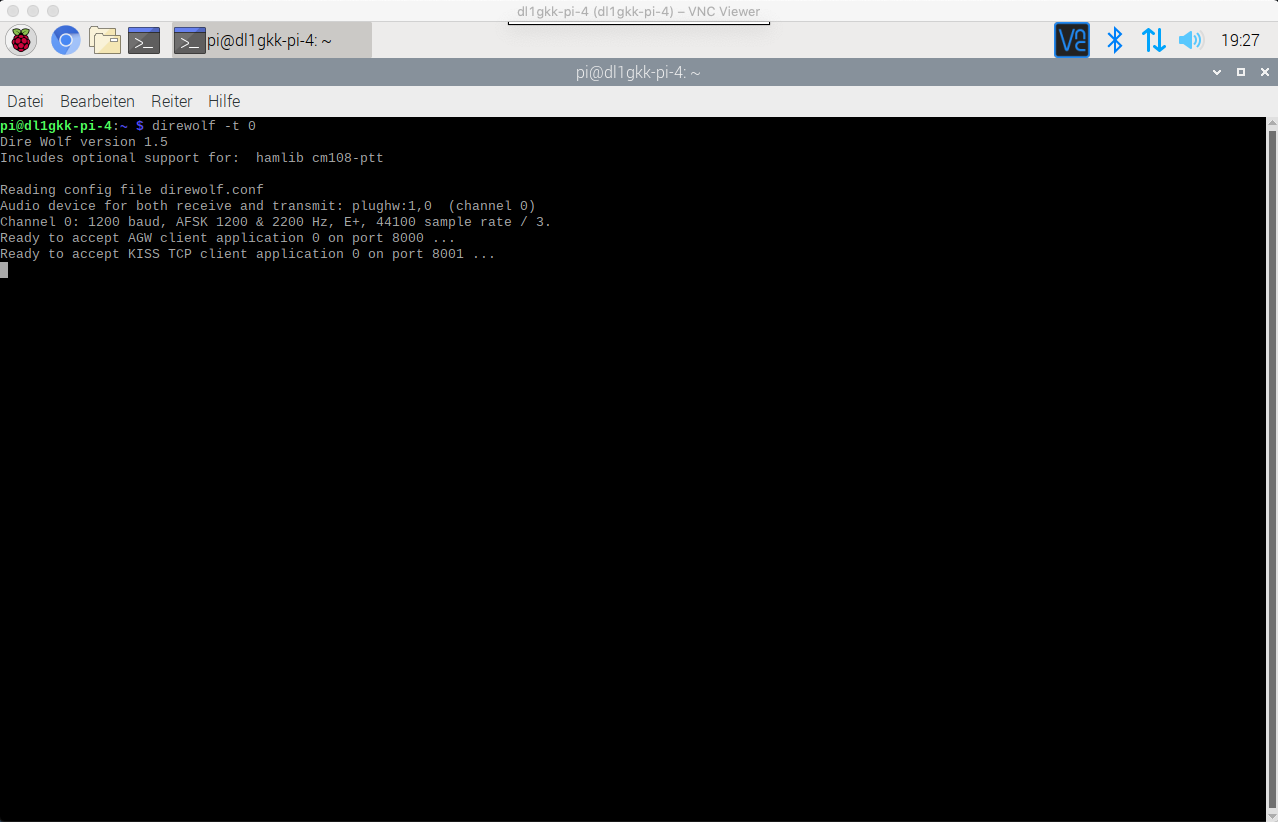
direwolfAfter start you see infos from Dirwolf bevor it begins to decode packet messages. You will see that Hamlib ist enabled, the active audio device, info about your active channels and config and the info that Direwolf is ready to accept AGW (Port 8000) and KISS TCP (Port 8001). We need AGW for a simple connect with Xastir.
Flashing console output ? In my case, after i start direwolf, the text is flashing. That is a Terminal behavior changed on Raspbian Buster. There are two opportunities to fix it:
1.) You can start direwolf black/white the -t 0 command
direwolf -t 02.) You can fix it using the “dev” branch
rm -rf direwolf
git clone https://www.github.com/wb2osz/direwolf
cd ~/direwolf
git checkout dev
mkdir build && cd build
cmake ..
make -j4
sudo make install
make install-conf
reboot
Install Xastir (APRS)
Note: If you want to use an existing radio that has no built-in TNC you will need to install Hamlib and Direwolf beforehand.
sudo apt-get install xastir
# Add the system user ‘pi’ to run the xastir program
sudo usermod -a -G xastir-ax25 pi
reboot
Now we can start xastir with:
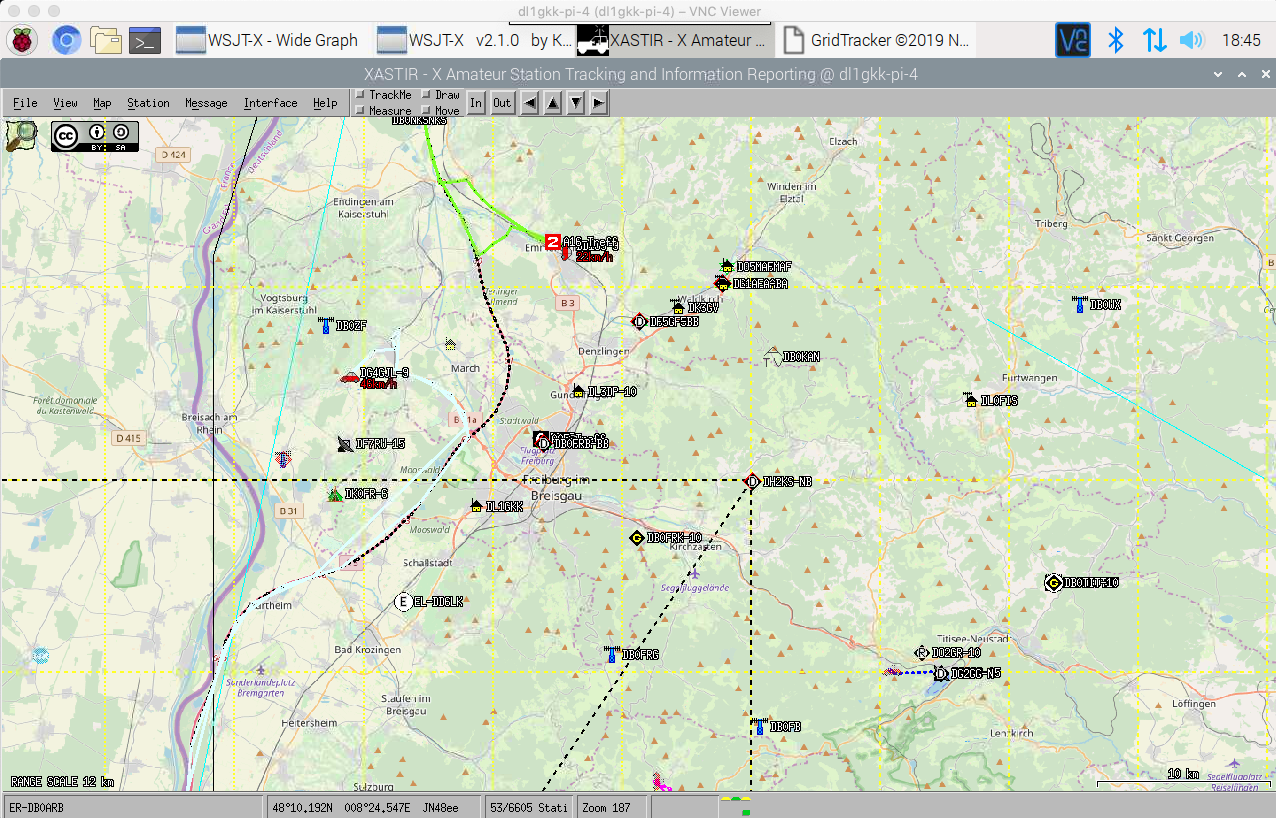
xastirAfter the first start of Xastir Configure Station. Input your CALL, LAT/LONG and look for a nice Station Symbol.
Then go to Interface and Interface Control. Add a new Interface Type
Xastir with Direwolf
For Direwolf this is “Network AGWPE”. localhost and Port 8000 is ok, you see it if you start Direwolf (You must start Direwolf before you start Xastir in a separately terminal window). Make ok, click on the corresponding Device and Start it. The service change from down to up.
Xastir with a USB GPS
If you have installed GPS like my description you can activate it. Go to Interface Control and “Network GPS (via gpsd)”. localhost and GPSD Port 2947. Make ok, click on the corresponding Device and Start it. The service change from down to up.
Xastir with a Internet Server
If you want, you can also connect Xastir additionally or only with a server from the Internet. Go to Interface Control and “Internet Server”. Enter your APRS “Pass-code”. Make ok, click on the corresponding Device and Start it. The service change from down to up. If you don’t have a pass-code you can create one. Have a look here: https://apps.magicbug.co.uk/passcode/
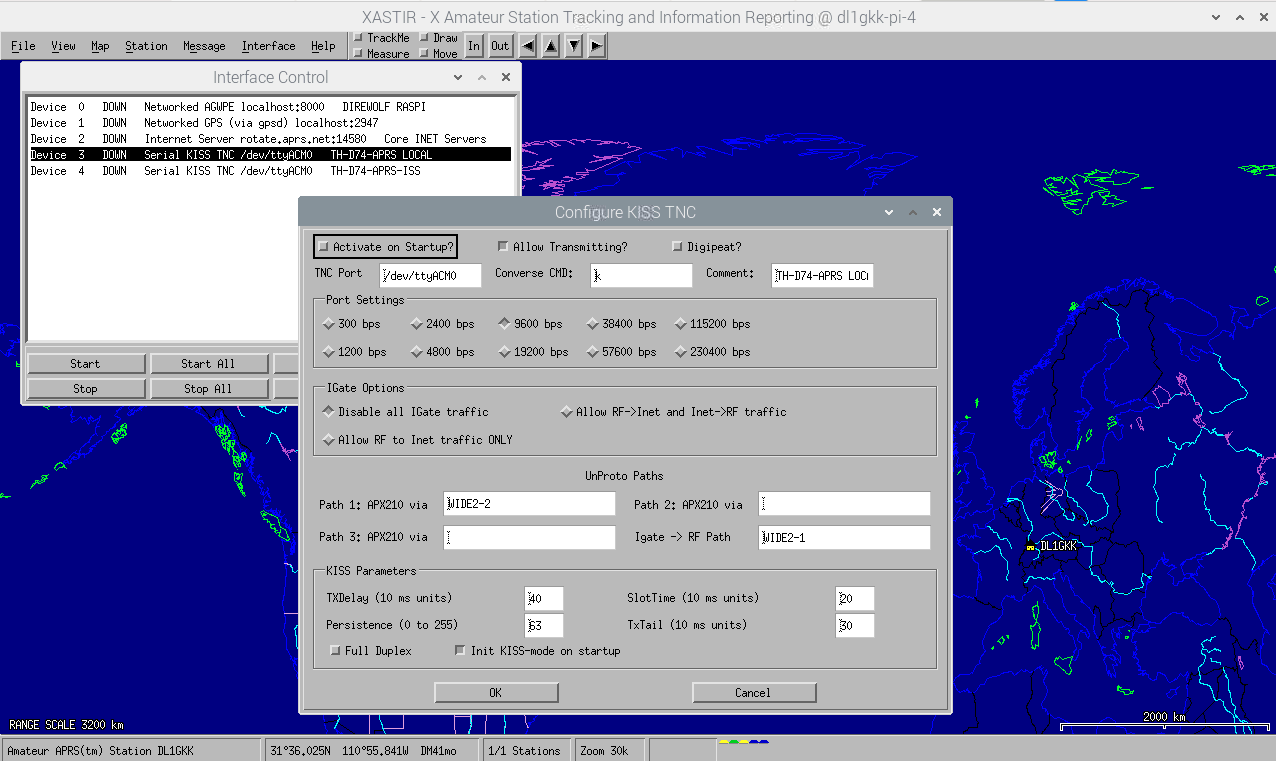
Xastir with a external TNC
For pure APRS operation a soundmodem (e.g. direwolf) is not mandatory. Radio devices such as the Kenwood TH-D74 with built-in KISS-TNC can be connected directly. Take a look here:
https://dl1gkk.com/raspberry-pi-xastir-and-kenwood-th-d74-for-aprs-a-good-relationship/
This is what my setup looks like
Install Linpac (Packet Radio Terminal)
Note: If you like to make Packet Radio then I recommend you to use the Build a Pi Script from Jason, KM4ACK. There is PiQtTermTCP included which can be easily used with Direwolf via AGW connection. Linpac is not up to date and not easy to configure and use.
For more information see also:
https://dl1gkk.com/aprs-packet-radio-made-easy/
First we have to install AX25 network support
sudo apt-get install libax25 ax25-apps ax25-toolsNow we must change the axports
cd /etc/ax25/
sudo nano axports
In my case i have to setup to:
1 DL1GKK 1200 255 2 Packet
port-number call speed paclen window description
Leave with ctrl+x, save and reboot
Now you can start Direwolf with -p (activate KISS-TNC)
direwolf -p Now you can connect Direwolf to AX25
sudo /usr/sbin/kissattach /dev/pts/1 1 44.56.4.118/dev/pts/1 is from Direwolf. The 1 after this is the port-number from the axports file. If everything is ok you get: AX.25 port 1 bound to device ax0
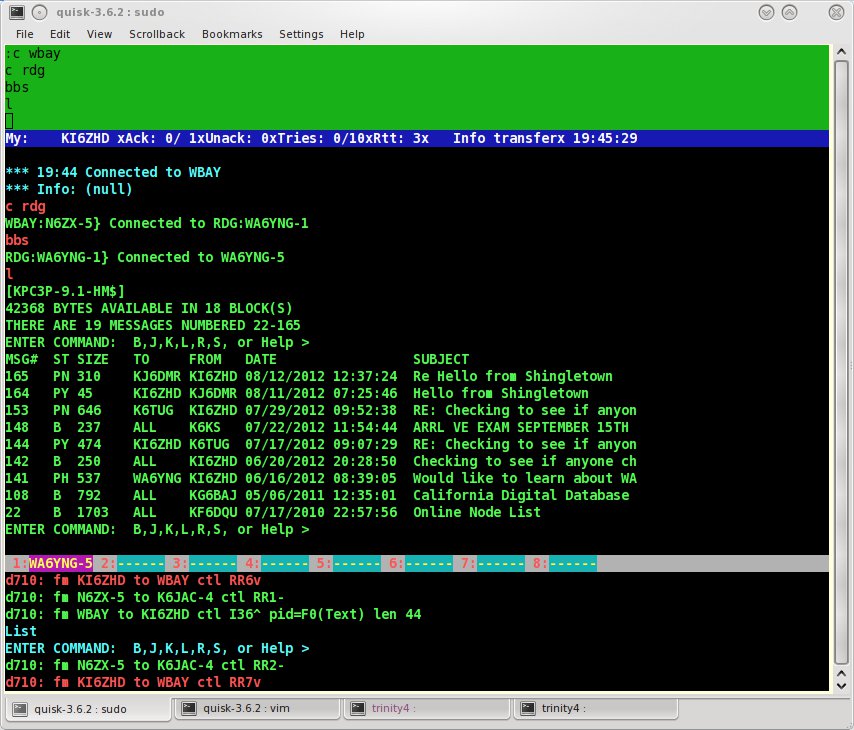
Now we can install Linpac. Open the raspbian menu settings: add / remove Software, search for linpac, select it and Apply. Start linpac with:
sudo linpac -mNow linpac should run and you can adjust your individual setup. When ready make a reboot.
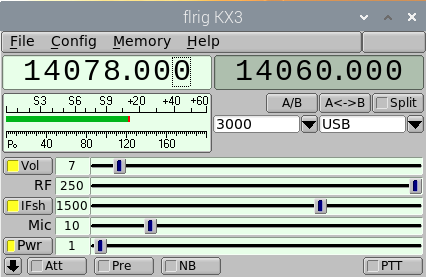
Install FLRig (Transceiver Control)
Note: It is important that you install FLRig before FLDigi.
The installation is based on a video from KM4ACK.
https://www.youtube.com/watch?v=WCj2usvOItQ
First install the requirements
sudo apt-get install libfltk1.3-dev libjpeg9-dev libxft-dev libxinerama-dev libxcursor-dev libsndfile1-dev libsamplerate0-dev portaudio19-dev libpulse-devFor the further installation we need the software from
http://www.w1hkj.com/files/
We are going to the Folder /flxmlrpc and copy the link-adress with the right click on flxmlrpc-0.1.4.tar.gz (in this case… later it is possible that you have a higher release number), we need it for the wget command.
cd Downloads
wget http://www.w1hkj.com/files/flxmlrpc/flxmlrpc-0.1.4.tar.gz
tar -zxvf flxmlrpc-0.1.4.tar.gz
cd flxmlrpc-0.1.4
./configure --prefix=/usr/local --enable-static
make
sudo make install
sudo ldconfig
cd ~/Downloads
We are going to the Folder /flrig and copy the link-adress with the right click on flrig-1.4.0.tar.gz (in this case… later it is possible that you have a higher release number), we need it for the wget command.
wget http://www.w1hkj.com/files/flrig/flrig-1.4.0.tar.gz
tar -zxvf flrig-1.4.0.tar.gz
cd flrig-1.4.0
./configure --prefix=/usr/local --enable-static
make
sudo make install
cd ~
flrig
Now FLRig should run and you can adjust your individual setup.
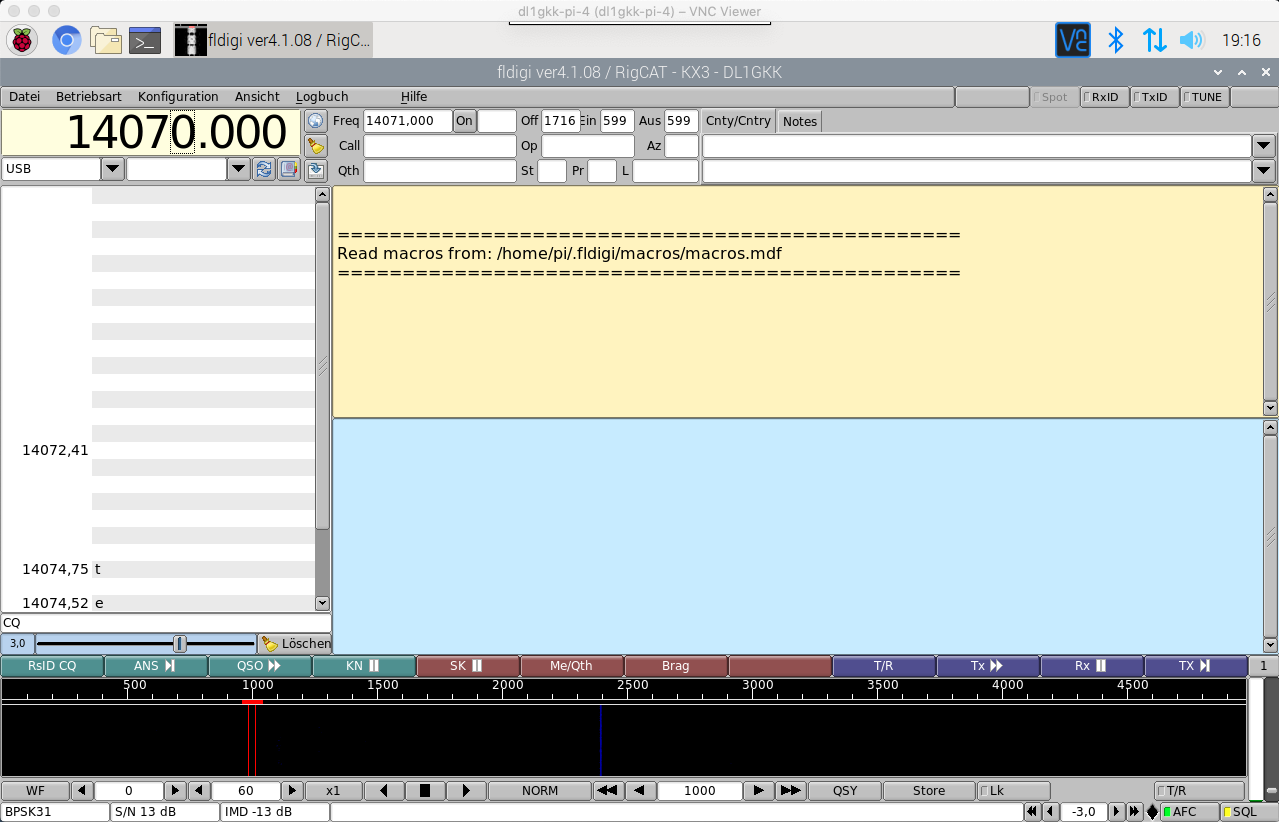
Install FLDigi (Data Mode)
Note: It is important that you install FLRig before FLDigi.
The installation is based on a video from KM4ACK.
https://www.youtube.com/watch?v=oD59HpiYtDE
sudo nano /etc/dphys-swapfiledelete the “#” from the line: #CONF_SWAPFILE=/var/swap
set CONF_SWAPSIZE=512
Make CTRL+X and safe the swapfile
sudo /etc/init.d/dphys-swapfile restartFor the further installation we need the software from
http://www.w1hkj.com/files/
We are going to the Folder /fldigi and copy the link-adress with the right click on fldigi-4.1.19.tar.gz (in this case… later it is possible that you have a higher release number), we need it for the wget command.
sudo apt install libudev-dev
cd Downloads
wget http://www.w1hkj.com/files/fldigi/fldigi-4.1.19.tar.gz
tar -zxvf fldigi-4.1.19.tar.gz
cd fldigi-4.1.19
./configure --prefix=/usr/local --enable-static
make
sudo make install
sudo ldconfig
cd ~
Now we have to undo the changes in the swap-file
sudo nano /etc/dphys-swapfilemake a “#” in front of the line: #CONF_SWAPFILE=/var/swap
set CONF_SWAPSIZE=100
Make CTRL+X and safe the swapfile
sudo /etc/init.d/dphys-swapfile restart
fldigi
Now FLDigi should run and you can adjust your individual setup. Note: If you use FLRig for transceiver control you need to start it. When ready make a reboot.
Install WSJT-X (Data Mode)
Note: If you like to use FLRig for transceiver control with WSJT-X it is important that you install FLRig before.

Download WSJT-X for Raspbian from the Homepage (..armhf.deb):
https://physics.princeton.edu/pulsar/K1JT/wsjtx.html
cd Downloads
sudo dpkg -i wsjtx_2.4.0_armhf.deb
sudo apt-get --fix-broken install
sudo dpkg -i wsjtx_2.4.0_armhf.deb
Now WSJT-X should run and you can adjust your individual setup. Note: If you use FLRig for transceiver control you need to start it first. When ready make a reboot.
WSJT-X release 2.3.0 will give an error on startup with a message about the en_US.UTF-8 locale not being found. This is because a default install of Raspberry Pi OS has very few locales installed. This is easily rectified by the following two lines executed on a terminal:
sudo sed -i "s/# en_US.UTF-8/en_US.UTF-8/g" /etc/locale.gen
sudo locale-gen
Alternatively you can install locales from a GUI using:
sudo dpk-reconfigure localesThen check the en_US.UTF-8 one and click Ok.
This locale is needed for the new diagnostic logging facility to convert wide character strings to a suitable 8-bit encoding in log files.
Install JTDX (Data Mode)
Note: If you like to use FLRig for transceiver control with JTDX it is important that you install FLRig before.
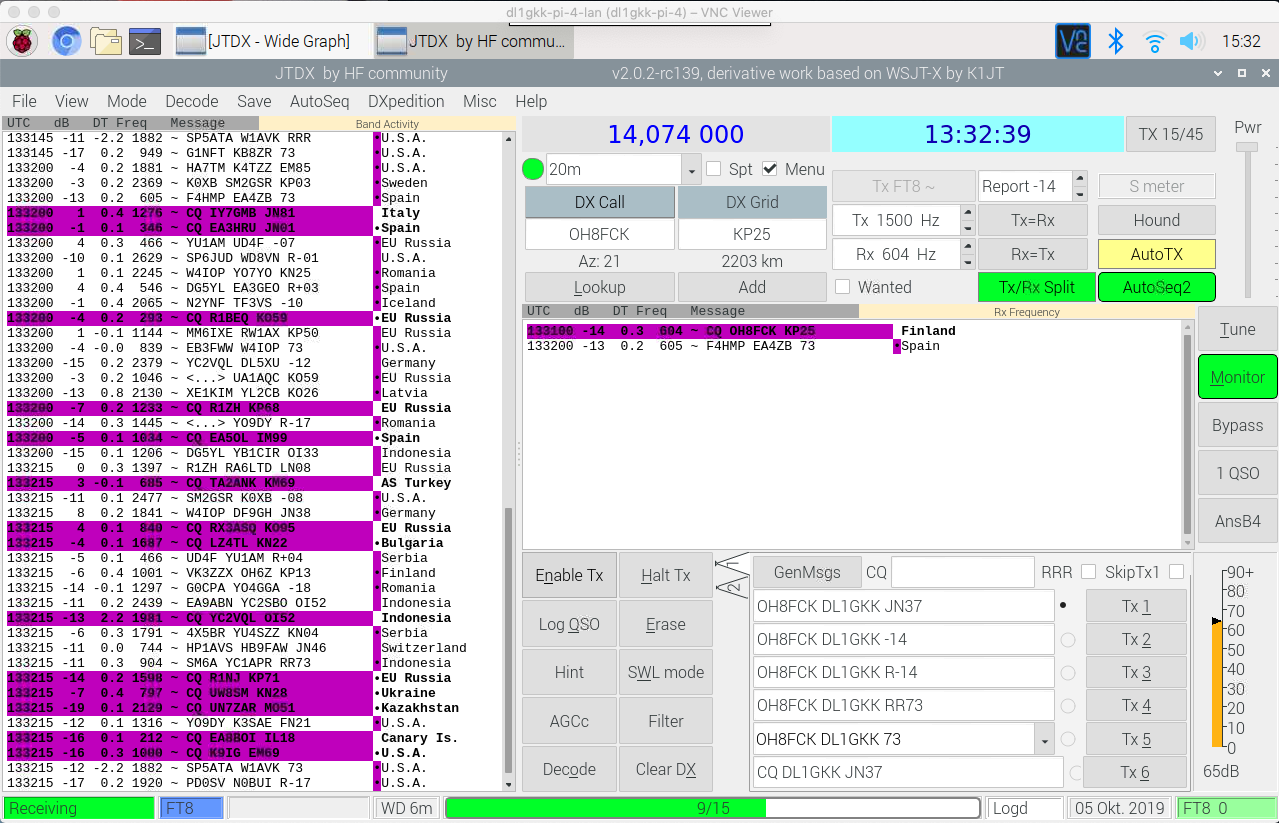
Download the last version from https://www.jtdx.tech/en/ into the Downloads Folder of your Raspberry Pi. In my case it was JTDX v2.2.0-rc152. Go to the Downloads Folder and make double click on it to start the installation. After the installation make a reboot. Then JTDX would show up in the menu.
Install GridTracker (Display connections on a map)
Note: Install is easy and work great with WSJT-X and JTDX.
![]()
Download the actually software from https://tagloomis.com/downloads/ into the Downloads Folder. GridTracker-Linux-Arm-1.20.0927.tar.gz. Unzip it with a right click in the filemanager. Change to GridTracker folder and read the README.txt. There you will find the instructions for the installation, as follows
As an example, assume that GridTracker-Linux-Arm-1.20.0927.tar.gz was downloaded to /home/pi/Downloads/, and extracted to a folder directly below it, /home/pi/Downloads/GridTracker/. Copy Pi3- or Pi4-GridTracker.desktop to /home/pi/Desktop/, and gridtracker.png to /home/pi/Downloads/GridTracker/. If your GridTracker install uses other file locations, simply edit the apporpriate lines in GridTracker.desktop to reference the proper folders. You should now see the GridTracker icon on your desktop.
Start WSJT-X (and/or JTDX) and Go to the Filemenu, Settings, Reporting and activate:
- Accept UDP requests
- Notify on accepted UDP request
- Accept UDP request restore window
UDP Server ist 127.0.0.1 and port numer 2237
Now you can start GridTracker with a double click on the desktop icon.
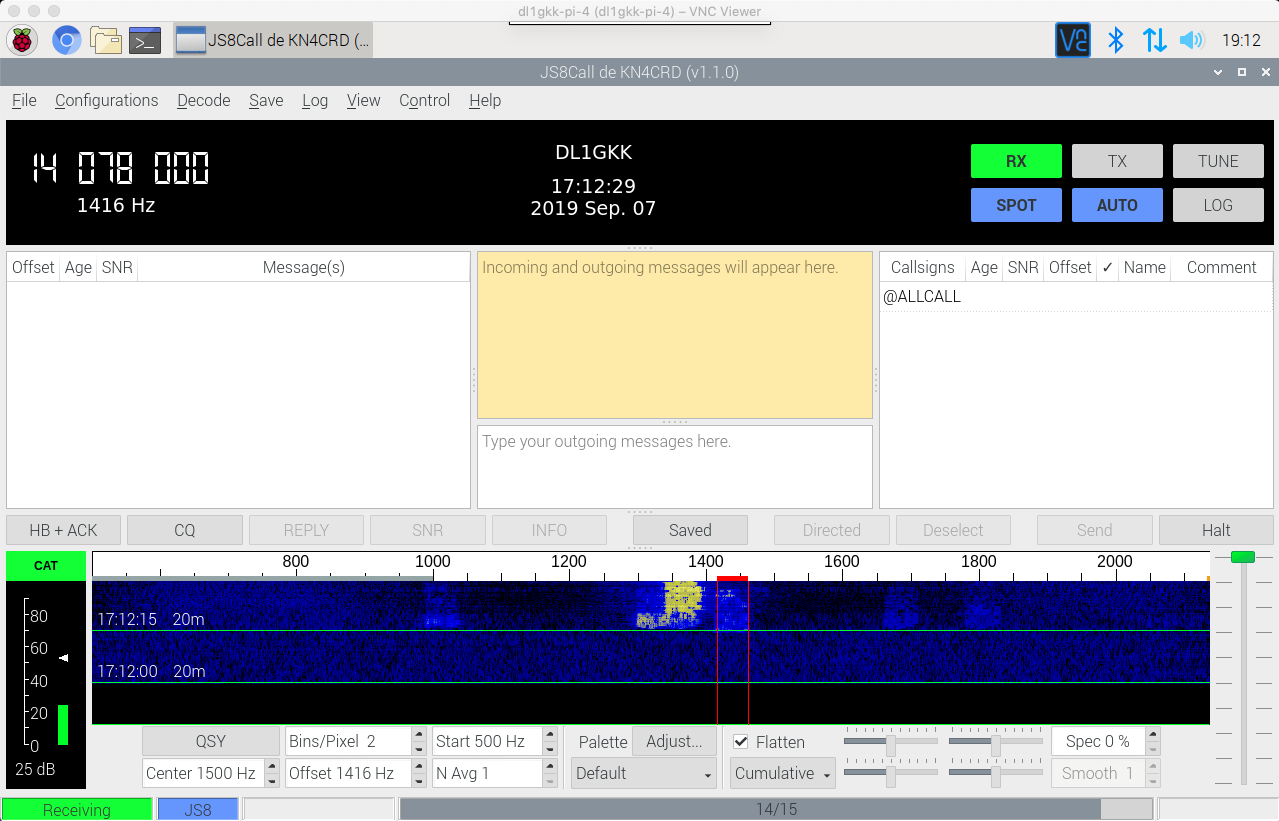
Install JS8Call (Data Mode)
The installation is based on a video from KM4ACK.
https://youtu.be/Nz4mOzi5bcw
For the further installation we need the software from
http://files.js8call.com/latest.html
We copy the link-adress with the right click on http://files.js8call.com/2.2.0/js8call_2.2.0_armhf.deb (in this case… later it is possible that you have a higher release number), we need it for the wget command.
cd Downloads
wget http://files.js8call.com/2.2.0/js8call_2.2.0_armhf.deb
sudo dpkg -i js8call_2.2.0_armhf.deb
reboot
If you run into dependency issues try running
sudo apt --fix-broken install
sudo dpkg -i js8call_2.2.0_armhf.deb
Now JS8Call should run and you can adjust your individual setup. Note: If you use FLRig for transceiver control you need to start it.
See this video if you want to get your gridsquare from GPS https://youtu.be/DpzC7g-gY44
Install PAT (WINLINK)
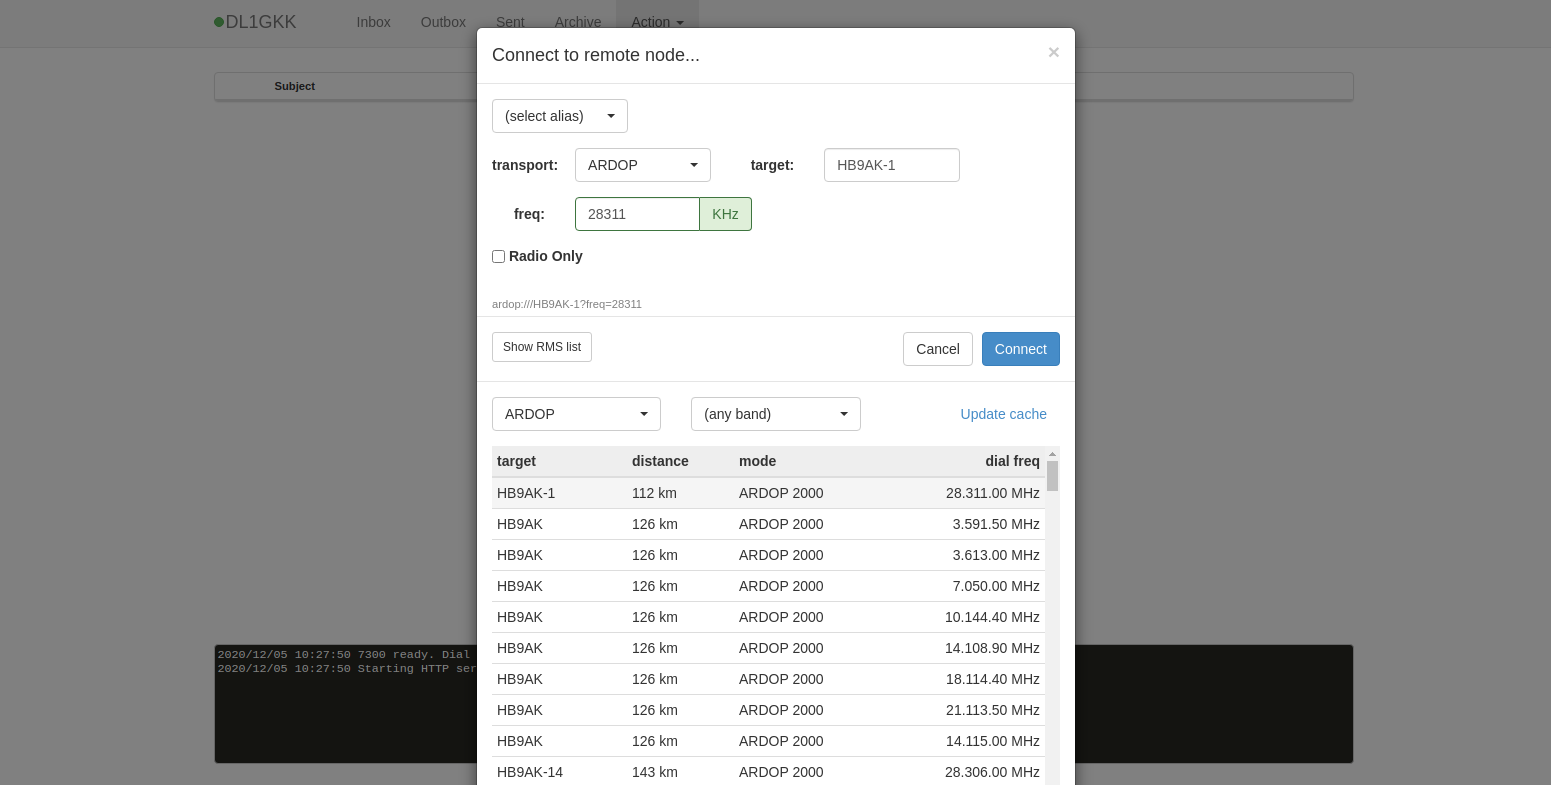
Pat is a cross platform Winlink client written in Go. You can find all information you need on https://getpat.io
You can use it with telnet, external serial tnc, ardop soft modem and much more. The installation is easy and best practice are the videos from Jason, KM4ACK.
1.) Install PAT: https://youtu.be/oZJJLfVz23k
2.) Install Ardop Modem for PAT: https://youtu.be/BgqsTbxzR4E
3.) Install Hamlib Rig Control (see also the instructions on this page previously)
https://youtu.be/ZCMHeuNjhK0
There is also a nice video, from Julian OH8STN, how to setup a raspberry pi for PAT with a ICOM IC-705. Have a look here: https://youtu.be/oq9PDHjXP4A
You can Winlink use do download Weather data (Grib Files) for Weather data visualization. See next Chapter.
Install zyGrib (Weather data visualization)

Open the raspbian menu settings: add / remove Software, search for zygrib, select Weather data visualization… and Maps for zyGrib… and apply.
There is a successor software which can be found here: https://github.com/orgs/opengribs/repositories
Thanks for the info to Andreas, DL9MDV
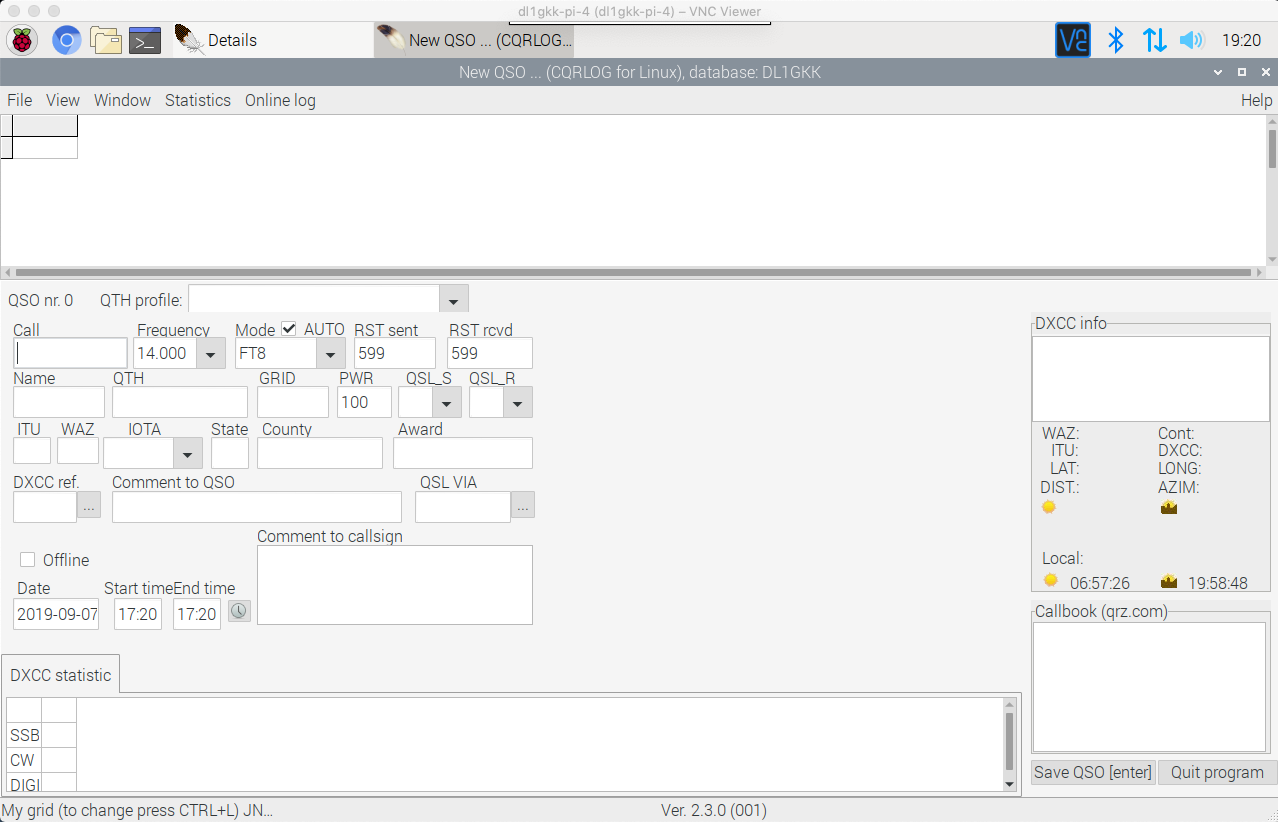
Install CQRLOG (Advanced ham radio logbook)
sudo apt install cqrlog
sudo apt install -y lcl*2.0 lazarus*2.0 fp*3.0.4 fpc*3.0.4 libssl-dev
cd ~
git clone https://github.com/ok2cqr/cqrlog.git
cd cqrlog
make
sudo make install
Note: If you have problems with the up- or download at eQSL, just set a new password on the eQSL homepage and in CQRLOG. For the upload to LOTW the correct tqsl command line path must be set. On the Raspi this is “/usr/local/bin/tqsl -d -l “LOCATION” %f -x”. LOCATION is set in TQSL. It must bee the same.
Install TQSL (LOTW Support)
Download TQSL for Linux from the Website and unpack it
http://www.arrl.org/tqsl-download
cd Downloads
cd tqsl-2.5.7
sudo apt-get install cmake
sudo apt-get install libssl-dev
sudo apt-get install libexpat1-dev
sudo apt-get install zlib1g-dev
sudo apt-get install libdb-dev
sudo apt-get install libwxgtk3.0-dev
sudo apt-get install libcurl4-openssl-dev
export LIB_SUFFIX=""
cmake .
make
sudo make install
Type tqsl in the command window and configure TQSL
SSL Error TQSL & CQRLOG
For some users it happens that an SSL error is displayed. The problem when uploading or downloading Lotw logs on a Raspberry Pi is that Cqrlog can’t load the SSL-lib. The reason for this is because on Rapsbian Buster libssl and libcrypto are at a different location than on other Linux releases. ( /usr/lib/arm-linux-gnueabihf )
Just copy from /usr/lib/arm-linux-gnueabihf to /usr/lib following files:
libssl.so*
libcrypto.so*
Install GPredict (Sat-Tracking)

Open the raspbian menu settings: add / remove Software, search for gpredict, select it and Apply.
Now Gpredict should run and you can adjust your individual setup. When ready make a reboot.
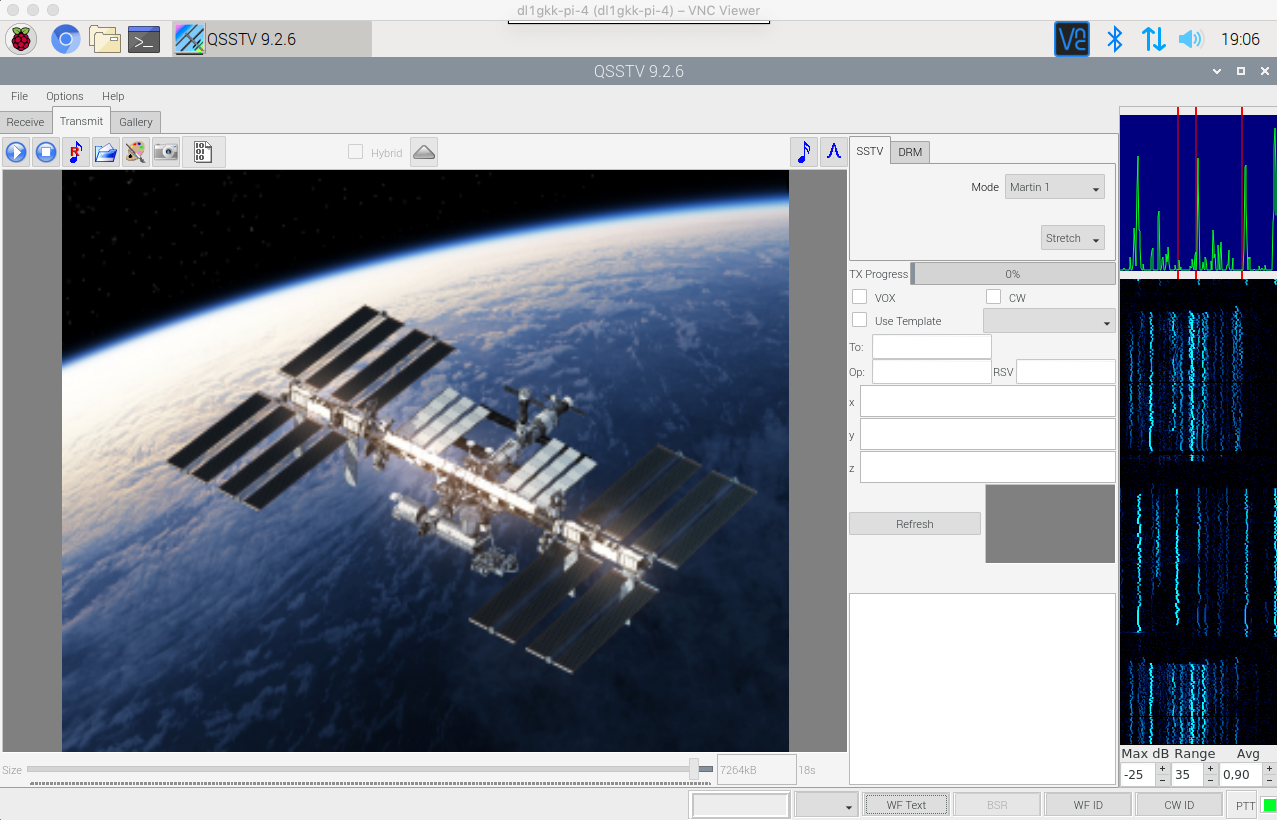
Install QSSTV (Slow Scan Televison)
Download from Website
http://users.telenet.be/on4qz/qsstv/index.html
sudo apt-get install g++ libfftw3-dev qt5-default libpulse-dev
sudo apt-get install libhamlib-dev libasound2-dev libv4l-dev
sudo apt-get install libopenjp2-7 libopenjp2-7-dev

cd ~/Downloads
tar -xvzf qsstv_9.5.3.tar.gz
cd qsstv_9.5.3
qmake
make
sudo make install
If you get a FILPATHLEN-1 error then you must patch the rig/rigcontrol.cpp
#FROM
strncpy(my_rig->state.rigport.pathname,(const char *)catParams.serialPort.toLatin1().data(),FILPATHLEN-1);

#TO
strncpy(my_rig->state.rigport.pathname,(const char *)catParams.serialPort.toLatin1().data(),HAMLIB_FILPATHLEN-1);
Then compile it again.
Type qsstv in the command window and configure QSSTV
Use the ALSA settings and not the PulseAudio !!
Install GQRX (SDR)
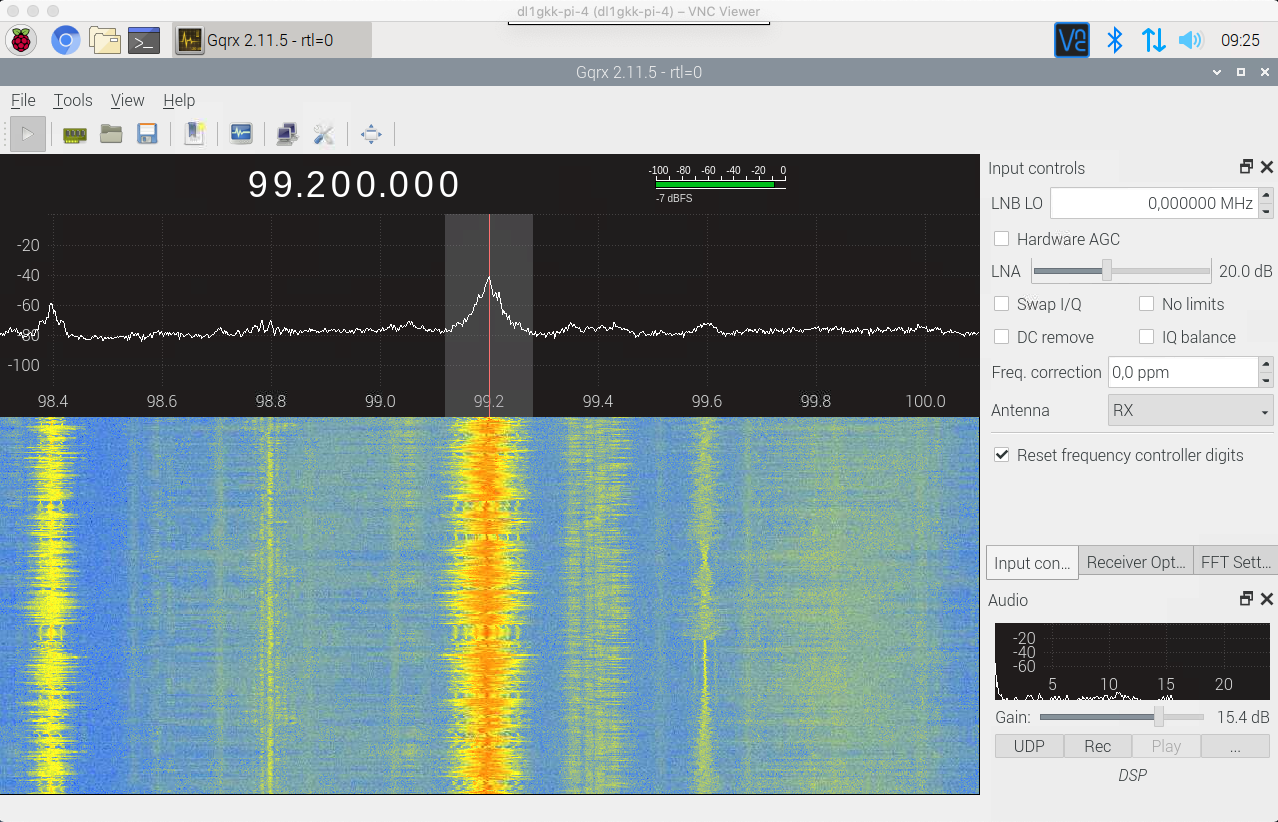
SDR receivers are the first choice if you just want to be ready to receive in as wide a frequency range as possible. These receivers are already very inexpensive and work well together with the Raspberry. I use the DX PATROL MK4 with a frequency range from 100khz to 2Ghz.
With an adapted LNB and a downconverter the reception of the amateur radio satellite QO-100 is also possible.
Have a look here: http://www.dxpatrol.pt
But also for the decoding of most different signals like e.g. weather fax the SDR Receiver is suitable in the best way.
In order to use the SDR receiver you need the appropriate SDR software. I use Gqrx. Following the installation.
Open the raspbian menu settings: add / remove Software, search for gqrx, select it and Apply. After finish make a reboot.
Don’t be surprised, the launch of GQRX on the Raspi takes a while… Now then gqrx should run and you can adjust your individual setup. DX PATROL MK4 is a RTL2838 device so i use as I/O input Realtek RTL2838UHIDIR SN:00000001. I use the USB 2.0 port because I had problems with the USB 3.0 port from time to time.
No Audio ?
It may be possible that you don’t hear audio even though Gqrx starts and indicates on the waterfall that signals are being received. I had this problem too. After researching with google I found two ways to fix this problem. Just try out what helps for you.
First make a update with
sudo apt-get update
sudo apt-get upgrade
1.) Try a new install
Open the Webbrowser on the Raspi
http://gqrx.dk/download/gqrx-sdr-for-the-raspberry-pi
Download the current version of Gqrx for Raspberry Pi 3 in my case is it the SDR 2.11. Open the file manager and got to Downloads. Make a right click on gqrx-sdr-2.11.5-linux-rpi3.tar.xz and and choose unpack here. Open the folder gqrx-sdr-2.11.5-linux-rpi3. Have a look in readme.txt. Open LXTerminal an enter
sudo apt-get update
sudo apt install gnuradio libvolk1-bin libusb-1.0-0 gr-iqbal
sudo apt install qt5-default libqt5svg5 libportaudio2
cd Downloads
ls
cd gqrx-sdr-2.11.5-linux-rpi3
sudo cp udev/*.rules /etc/udev/rules.d/
reboot
2.) RUN volk_profile
It is recommended that users run the volk_profile tool to optimize GNU Radio performance on the specific computer it is being used on.
volk_profileIf you get errors you can try
sudo apt-get install libvolk1-bin
volk_profile
Then make a reboot. In my case audio will work.
Install FreeDV (Digital Voice)
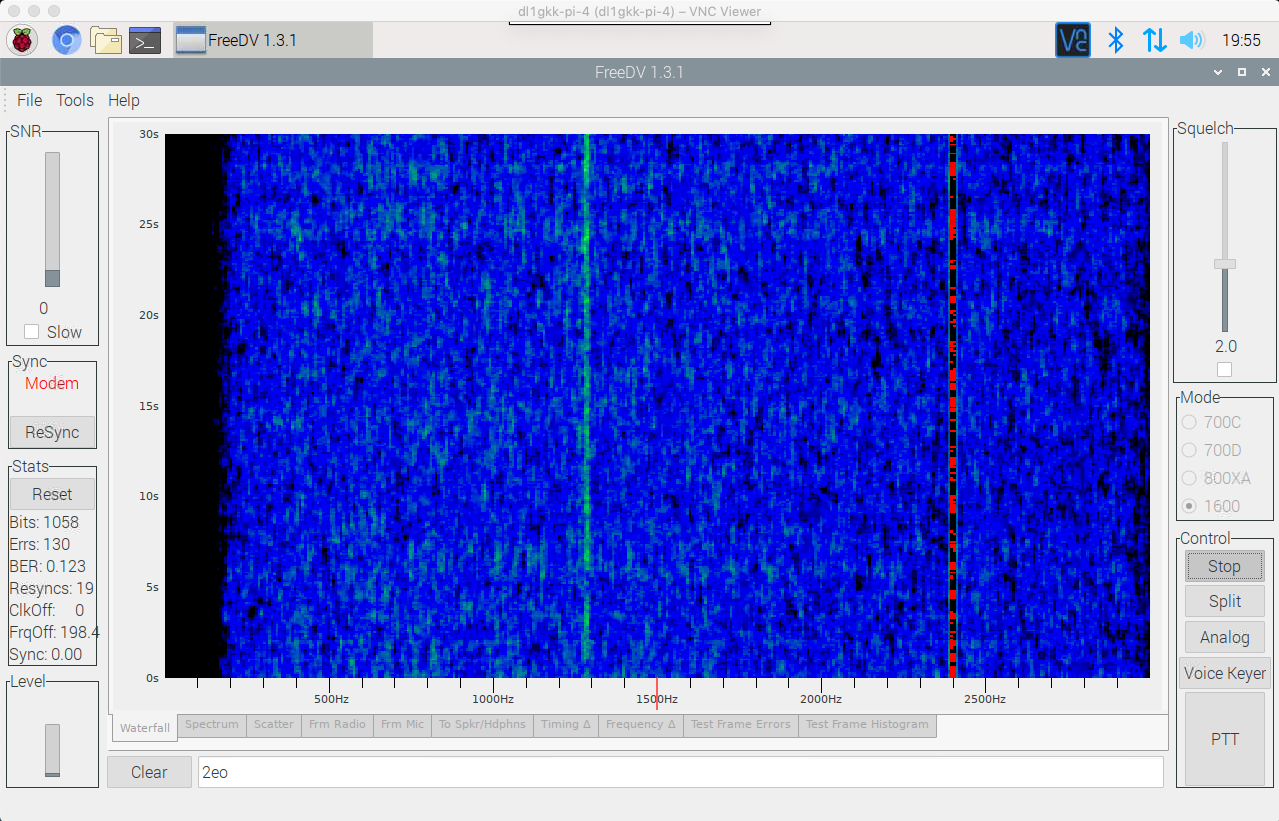
Open the raspbian menu settings: add / remove Software, search for freedv, select it and Apply.
Now FreeDV should run and you can adjust your individual setup. When ready make a reboot.
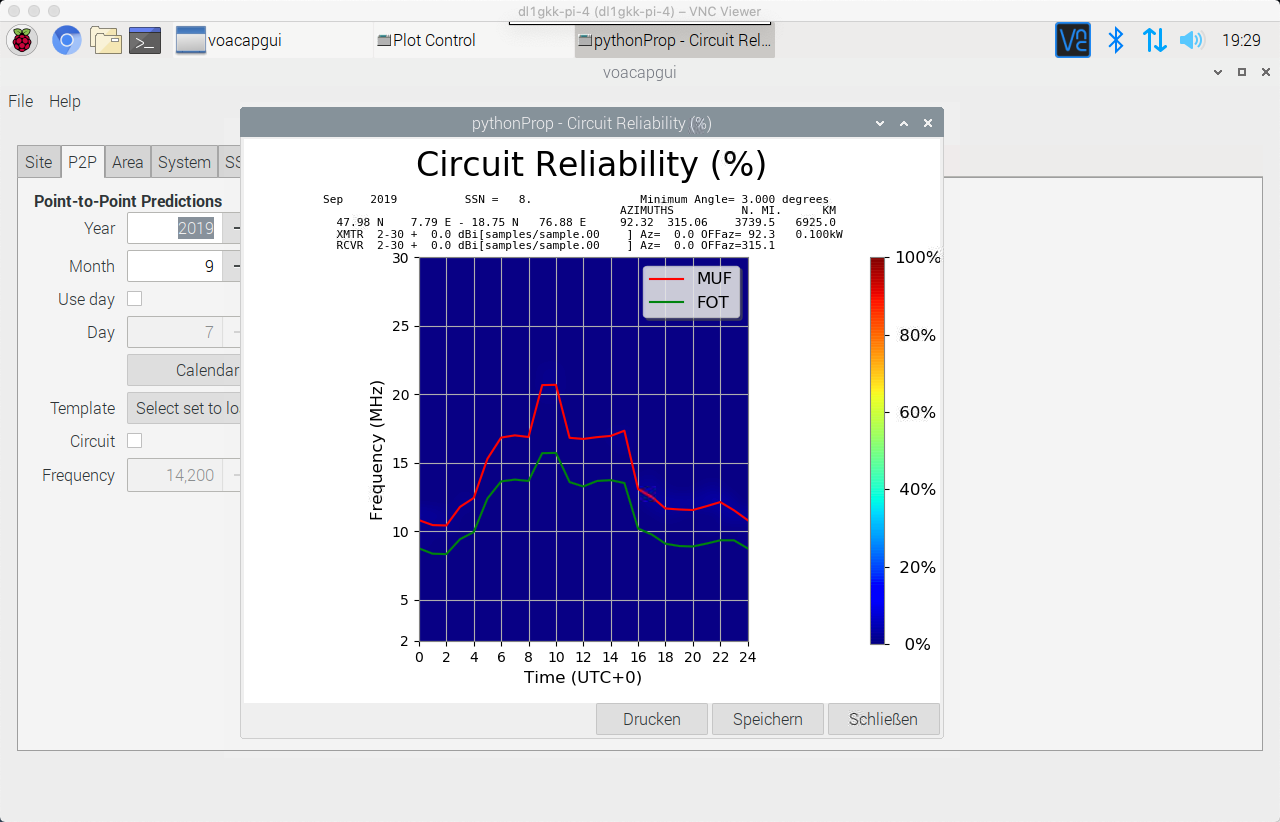
Install VOACAP (Propagation Prediction)
The installation is based on a video from KM4ACK.
https://www.youtube.com/watch?v=jye6JkIPYY0
For the installation we need the software from
https://www.qsl.net/hz1jw/voacapl/index.html
sudo apt-get install gfortran
cd Downloads
wget https://www.qsl.net/hz1jw/voacapl/downloads/voacapl-0.7.2.tar.gz
ls
tar -xzf voacapl-0.7.2.tar.gz
cd voacapl-0.7.2
./configure
make
sudo make install
makeitshfbc
Test the installation by typing the following command
voacapl ~/itshfbcYou should see output similar to the following
Executing from dir=/home/pi/itshfbc/run
OPENing file=voacapx.dat
TRANSMIT=2-D Table [default/const17.voa ]=Const 17dB beam= 0.0 az= 57.4
RECEIVE =2-D Table [default/swwhip.voa ]=SWWhip.VOA beam= 0.0 az= 254.7
Method 30 Jun 100ssn Freqs= 6.1 7.2 9.7 11.9 13.7 15.4 17.7 21.6 25.9
If you see something similar to the above (with no error messages) voacapl and the data files are built and installed correctly.
Install the graphic interface
Note: The following lines from the first sudo command to the next sudo command are a block. Please copy and paste as block. Everything else is a single line.
sudo apt-get install yelp python3-gi python3-gi-cairo rarian-compat \
  gnome-doc-utils pkg-config python3-dateutil python3-mpltoolkits.basemap \
  python3-cairocffi

sudo apt-get install libgtk-3-dev
cd ..
ls
wget https://www.qsl.net/hz1jw/pythonprop/downloads/pythonprop-0.28.tar.gz
ls
tar -xzf pythonprop-0.28.tar.gz
cd pythonprop-0.28
./configure
sudo make install
reboot
The software can now be started via the Raspi menu. To use the software it is useful to watch the video of Jason and to read the user manual.
Install Chirp (Programming transceivers)
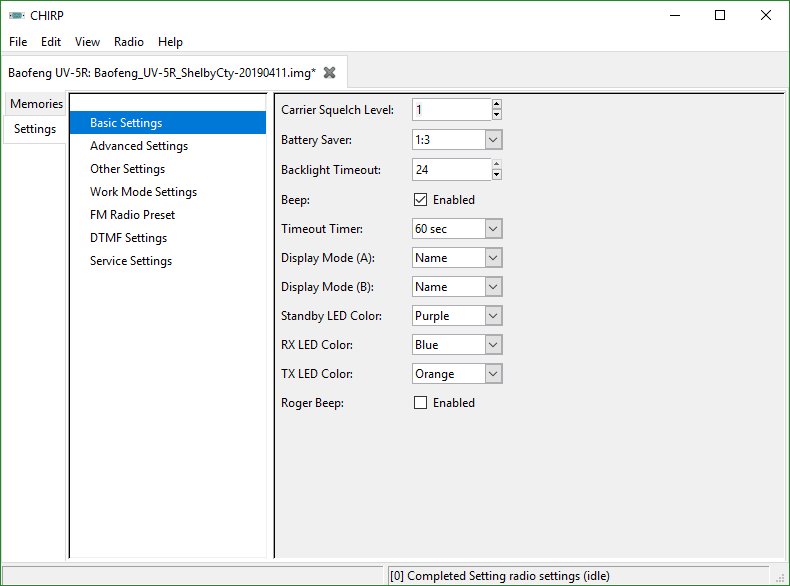
The installation is based on a video from KM4ACK.
https://youtu.be/RQ8eEsU1b1c
For the installation we need the software from
https://chirp.danplanet.com/projects/chirp/wiki/Download
sudo apt-get -y install python-gtk2 python-serial python-libxml2
mkdir chirp
cd chirp
wget https://trac.chirp.danplanet.com/chirp_daily/LATEST/chirp-daily-20190829.tar.gz
ls
tar -xzf chirp-daily-20190829.tar.gz
ls
cd chirp-daily-20190829
sudo python setup.py install
Qtel (Echolink Client)
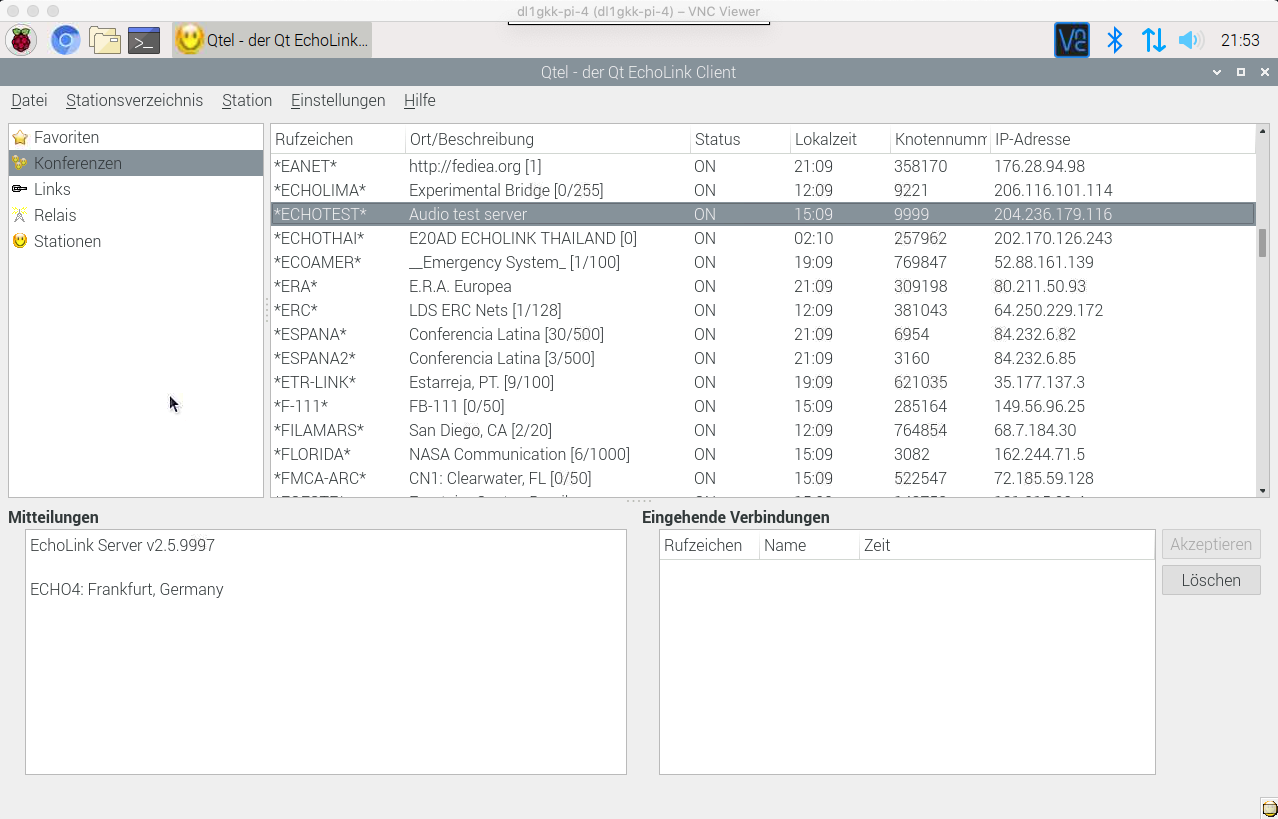
Open the raspbian menu settings: add / remove Software, search for qtel (graphical client for the EchoLink protocol), select it and Apply.
Now Echolink should run and you can adjust your individual setup. When ready make a reboot. In my case it will not work with the 3.5mm Audio Jack. I use a USB-Headset.
More Information about EchoLink
http://www.echolink.org
Important: For Echolink to work it is necessary to enable the ports UDP-5198-5199 and TCP 5200 in the router and assign them to the Raspberry Pi.
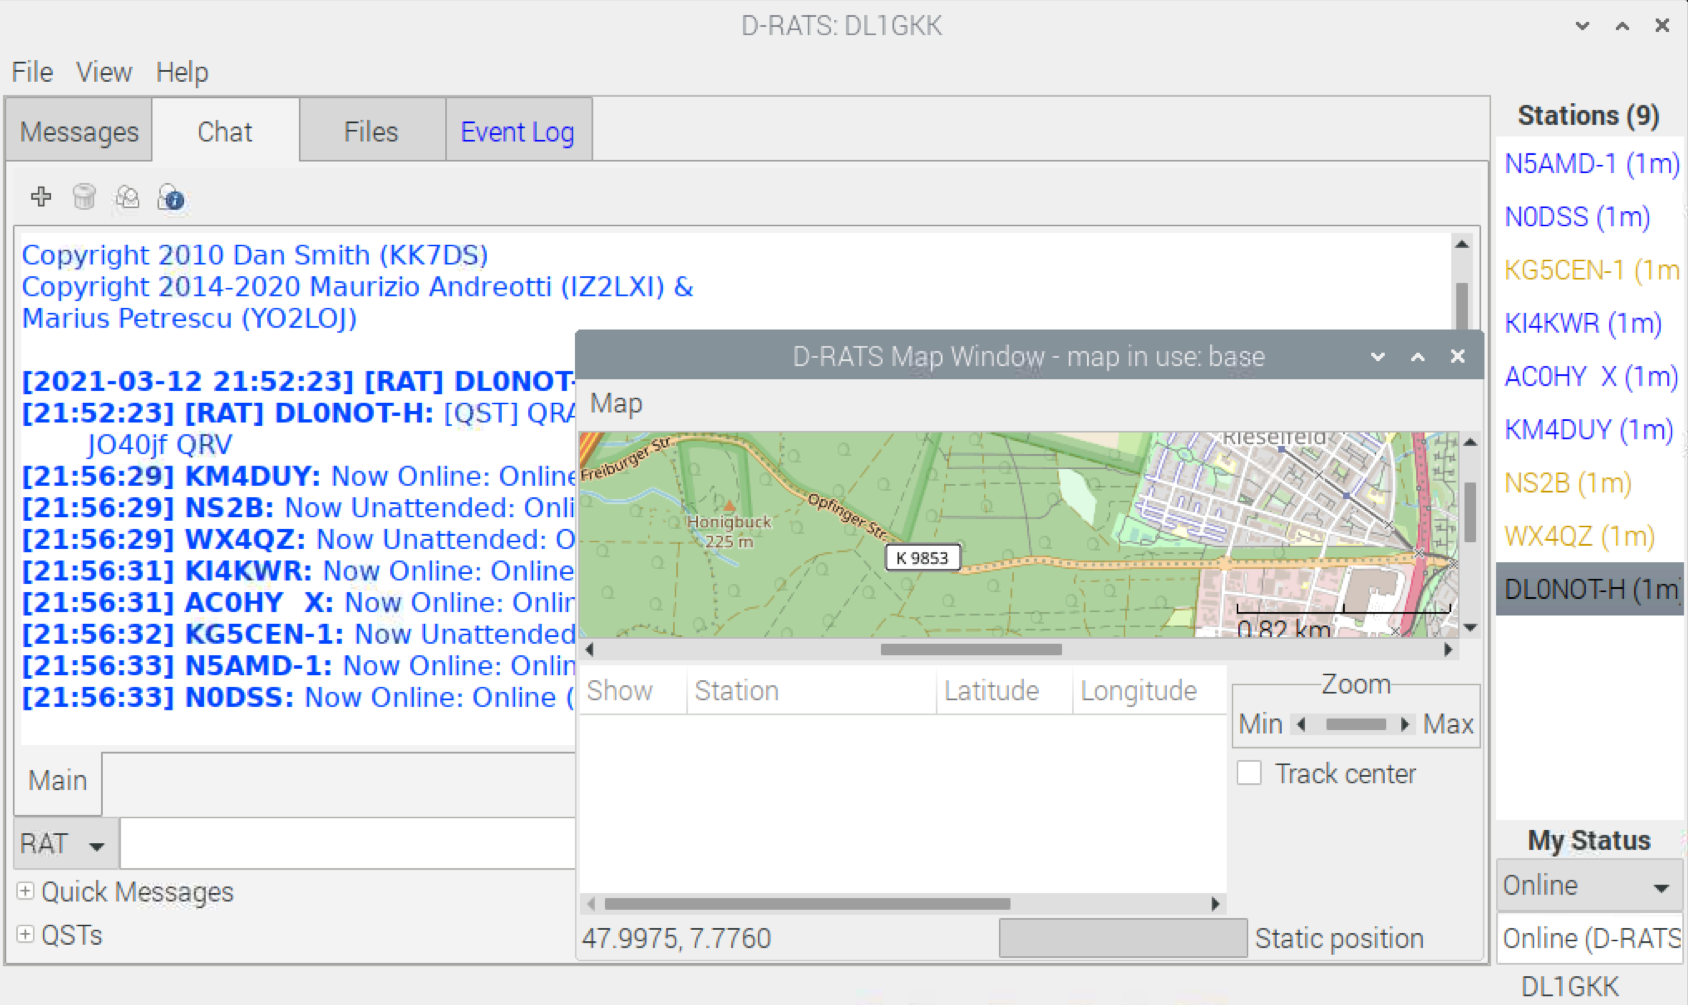
Install D-RATS (D-STAR Communication)
D-RATS is a communications tool for D-STAR amateur radio low-speed data (DV mode). It provides: Multi-user chat capabilities; File transfers Structured data transport (forms); and Position tracking and mapping.
sudo apt-get install python-gtk2
sudo apt-get install python-glade2
sudo apt-get install python-serial
sudo apt-get install python-libxml2
sudo apt-get install python-libxslt1

# optionally set aspell-language to get rid of annoying messages at D-Rats start
sudo apt-get install aspell aspell-de
# de=Germany: add as many languages as you need
Download it from https://github.com/maurizioandreotti/D-Rats/releases/tag/0.3.9 in your Downloads folder and unzip it with a right click.
cd Downloads
cd D-Rats-0.3.9
# execute it with:
python d-rats.py
Configure as you would do on a windows machine. You can find a good Quick Start Guide here: http://www.dstarinfo.com/Data/Sites/1/media/getting-started-with-d-rats-(ga).pdf
And have a look to the facebook group here: https://www.facebook.com/groups/DRATS/
Install CubicSDR with SDRplay RSP’s (SDR)
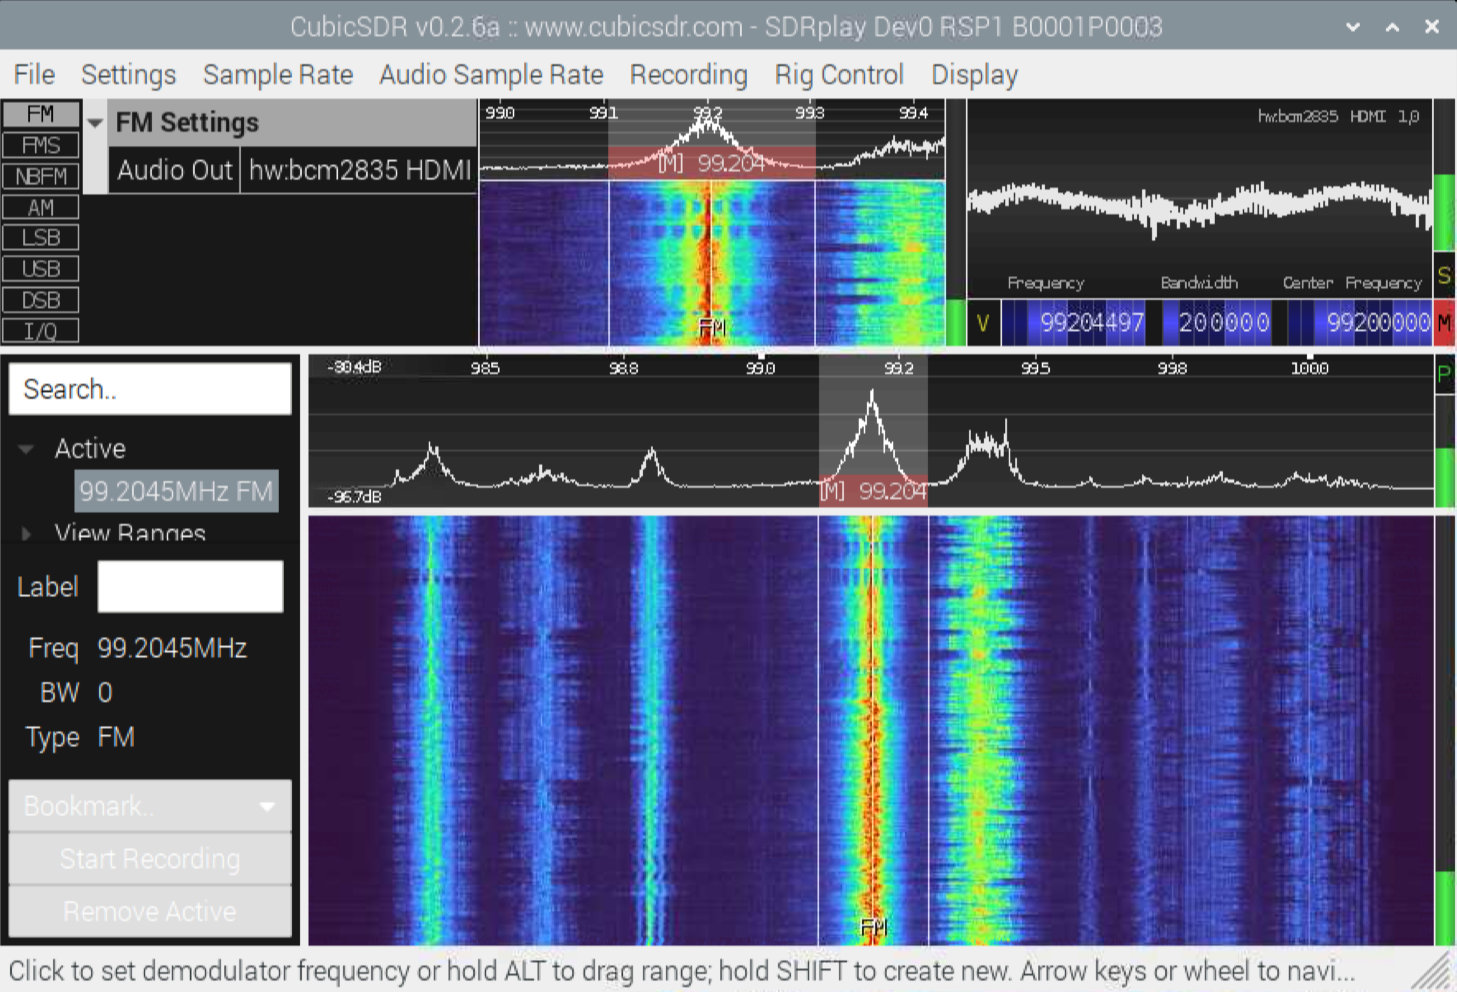
The really easiest and fastest way to install CubicSDR on the Raspberry Pi for the SDRplay RSP’s including all drivers yourself (there are also completely ready-made images) are the ready-made scripts from SDRplay.
https://www.sdrplay.com/downloads/
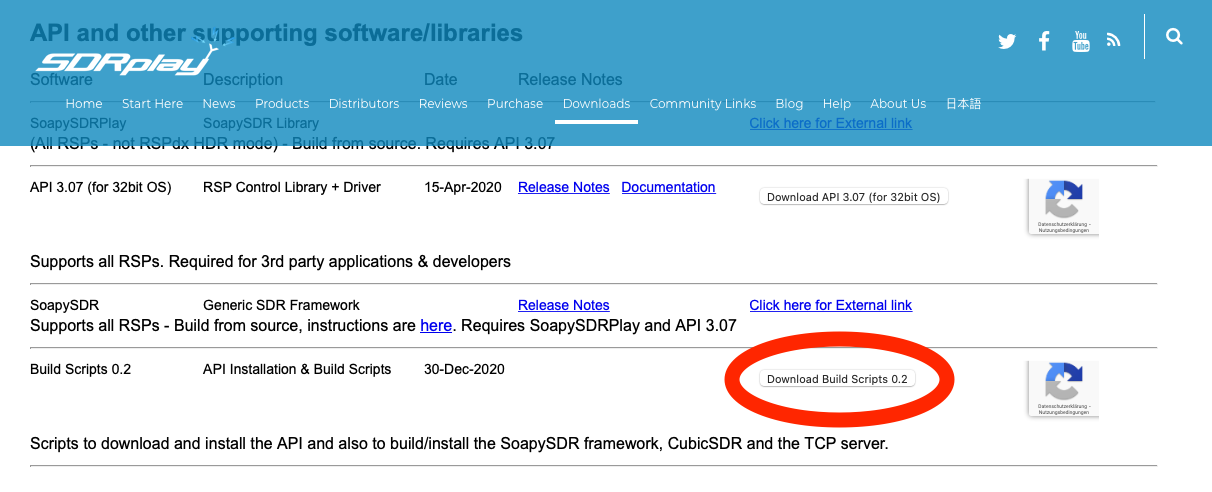
Download it with the browser on your Raspberry Pi. Then you will find a zip file and if you unzip it you will find 6 scripts. Here in the example it is the build 0.2. Later it can be of course also a higher build number and more ore other scripts.
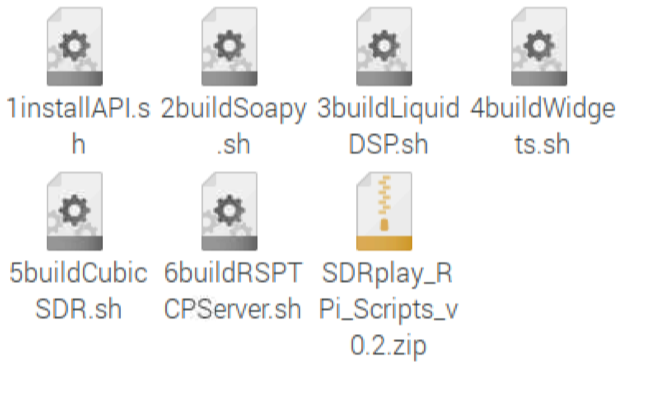
Open the terminal and execute the scripts in the order 1-6. That was it. Really simple.
Install ADS-B Receiver with SDRplay RSP’s (SDR)

The installation ist based on a video from SDRplay.
https://www.youtube.com/watch?v=WprfindqMc8
cd Dev
git clone https://github.com/SDRplay/dump1090 -b api3
cd dump1090
sudo apt install librtlsdr-dev
make
Start the software with
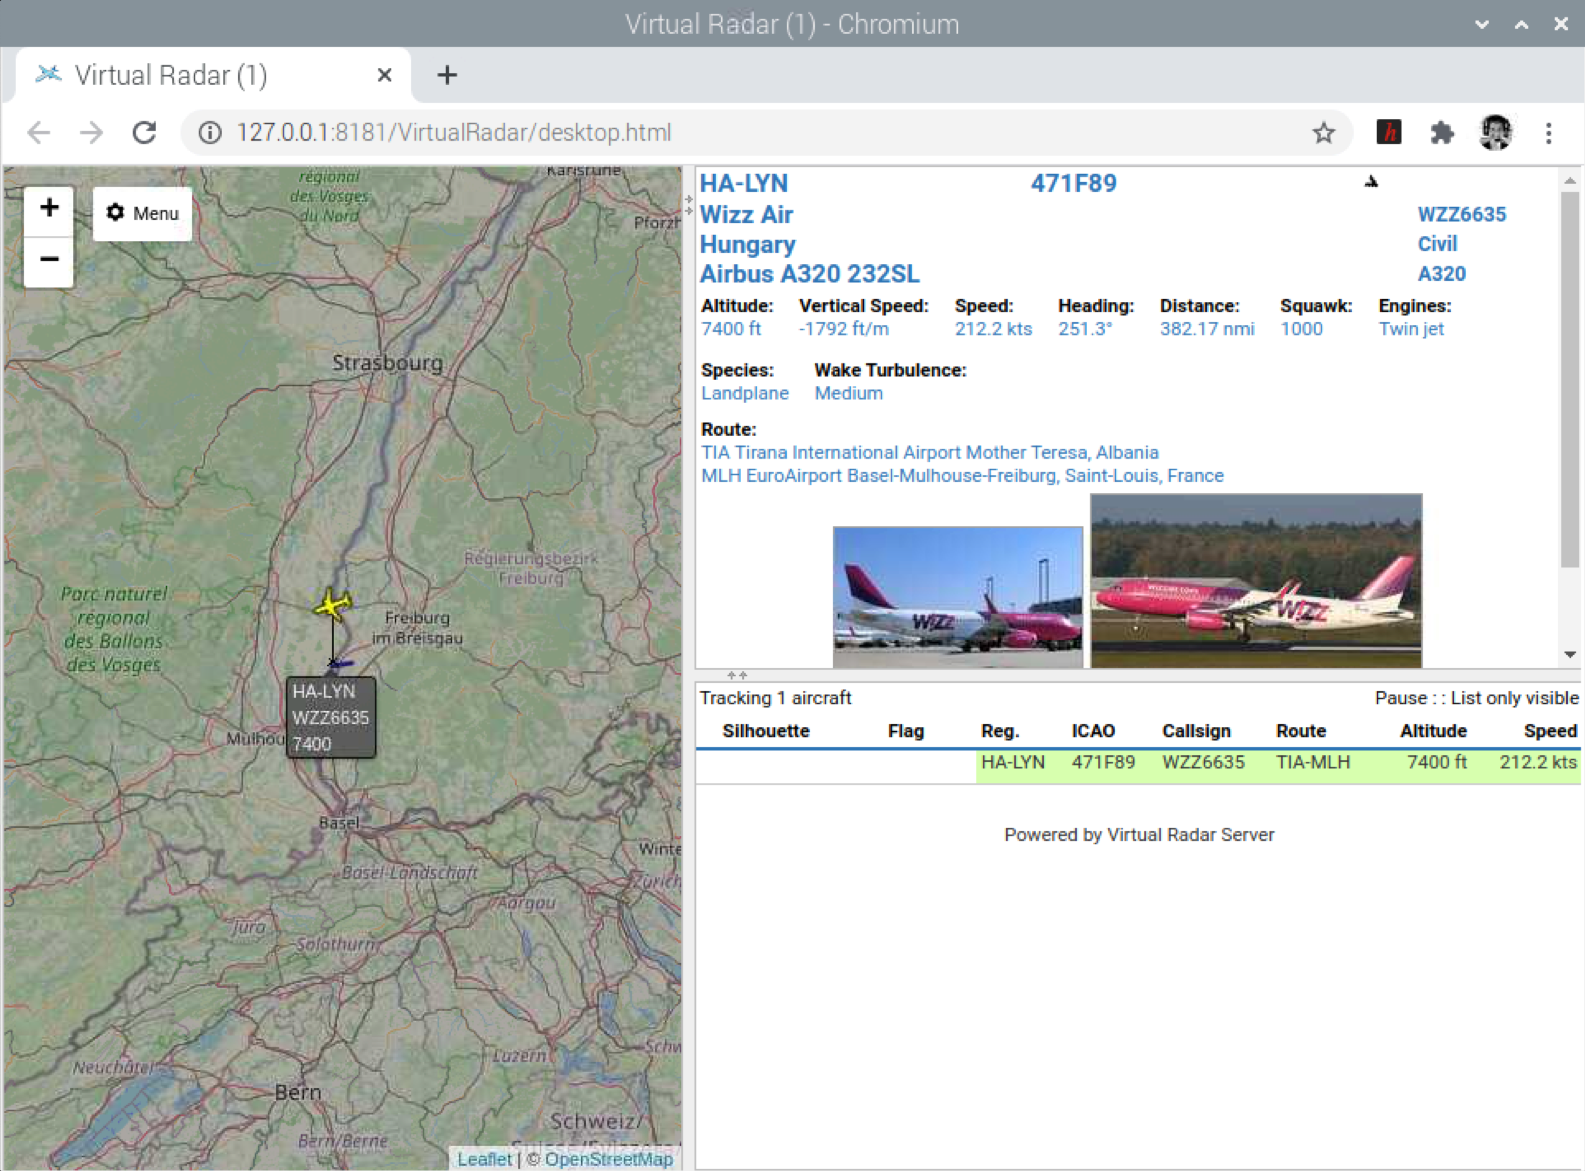
./dump1090 --dev-sdrplay --interactive --netInstall VirtualRadar (Display Airplanes)
First you need to install .NET Framework on the Raspberry PI
apt-get install mono-completeThen you can make a new directory and install the Software
mkdir VirtualRadar

cd VirtualRadar

wget http://www.virtualradarserver.co.uk/Files/VirtualRadar.tar.gz

wget http://www.virtualradarserver.co.uk/Files/VirtualRadar.WebAdminPlugin.tar.gz

wget http://www.virtualradarserver.co.uk/Files/VirtualRadar.LanguagePack.tar.gz

tar xvf VirtualRadar.tar.gz

tar xvf VirtualRadar.WebAdminPlugin.tar.gz

tar xvf VirtualRadar.LanguagePack.tar.gz
There is a mono 4 issue. This can be fixed by adding a configuration file to the same folder where you unpacked the server. Have a look here:
http://www.virtualradarserver.co.uk/Mono.aspx
By default VirtualRadar will listen to port 8080. In my case this is use from another service. I change it to 8181. In the configuration folder create a text file called InstallerConfiguration.xml. For most Linux distributions it will be ~/.local/share/VirtualRadar. Open the file and paste this into it:
<?xml version="1.0" encoding="utf-8" ?>
<InstallerSettings xmlns:xsi="http://www.w3.org/2001/XMLSchema-instance" xmlns:xsd="http://www.w3.org/2001/XMLSchema">
    <WebServerPort>8181</WebServerPort>
</InstallerSettings>
Now you have to setup the admin console. Use your own username and password.
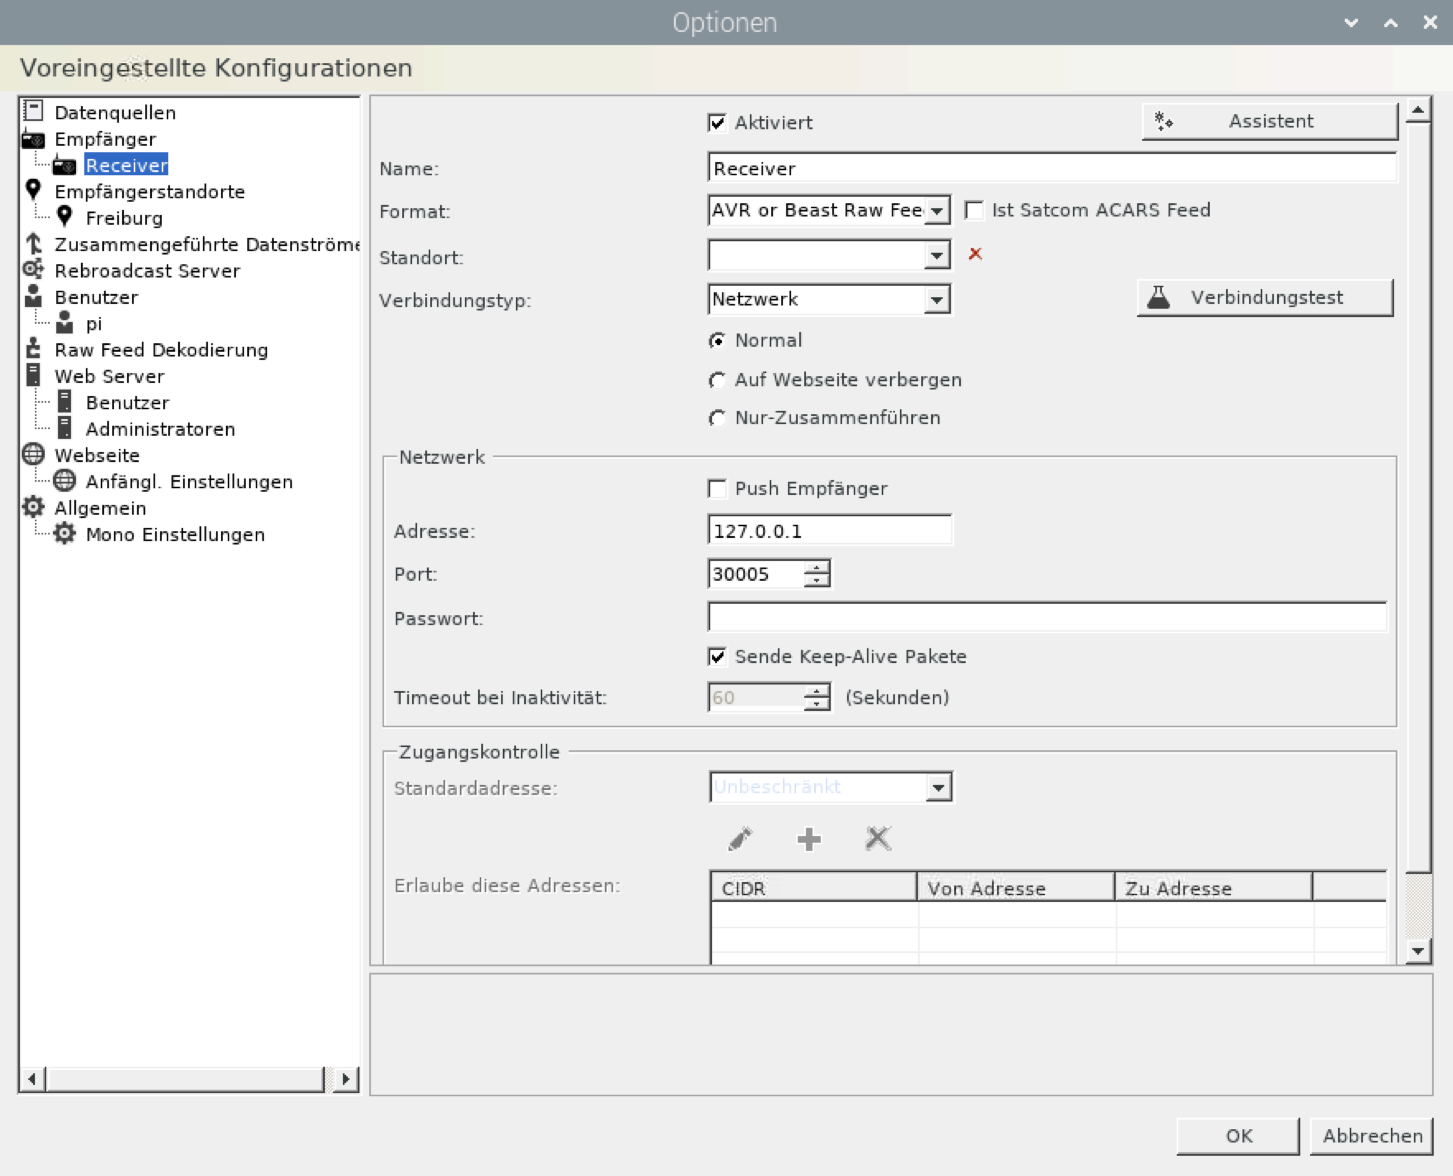
mono VirtualRadar.exe -nogui -createAdmin:username -password:passwordIs everything ok you can start first dump1090 and then VirtualRadar with: mono VirtualRadar.exe. Then go to setup an enter your Receiver Locations and the SDRplay Receiver Settings as shown below
Install XDX (DX-Cluster Client)
XDX is a client to connect to a DX-Cluster. DX messages will be displayed in a list, announcements will go to a text display. As well as the usual functions, if you have hamlib installed it can control the radio and set the frequency simply by double clicking a DX-Spot (using rigctl).
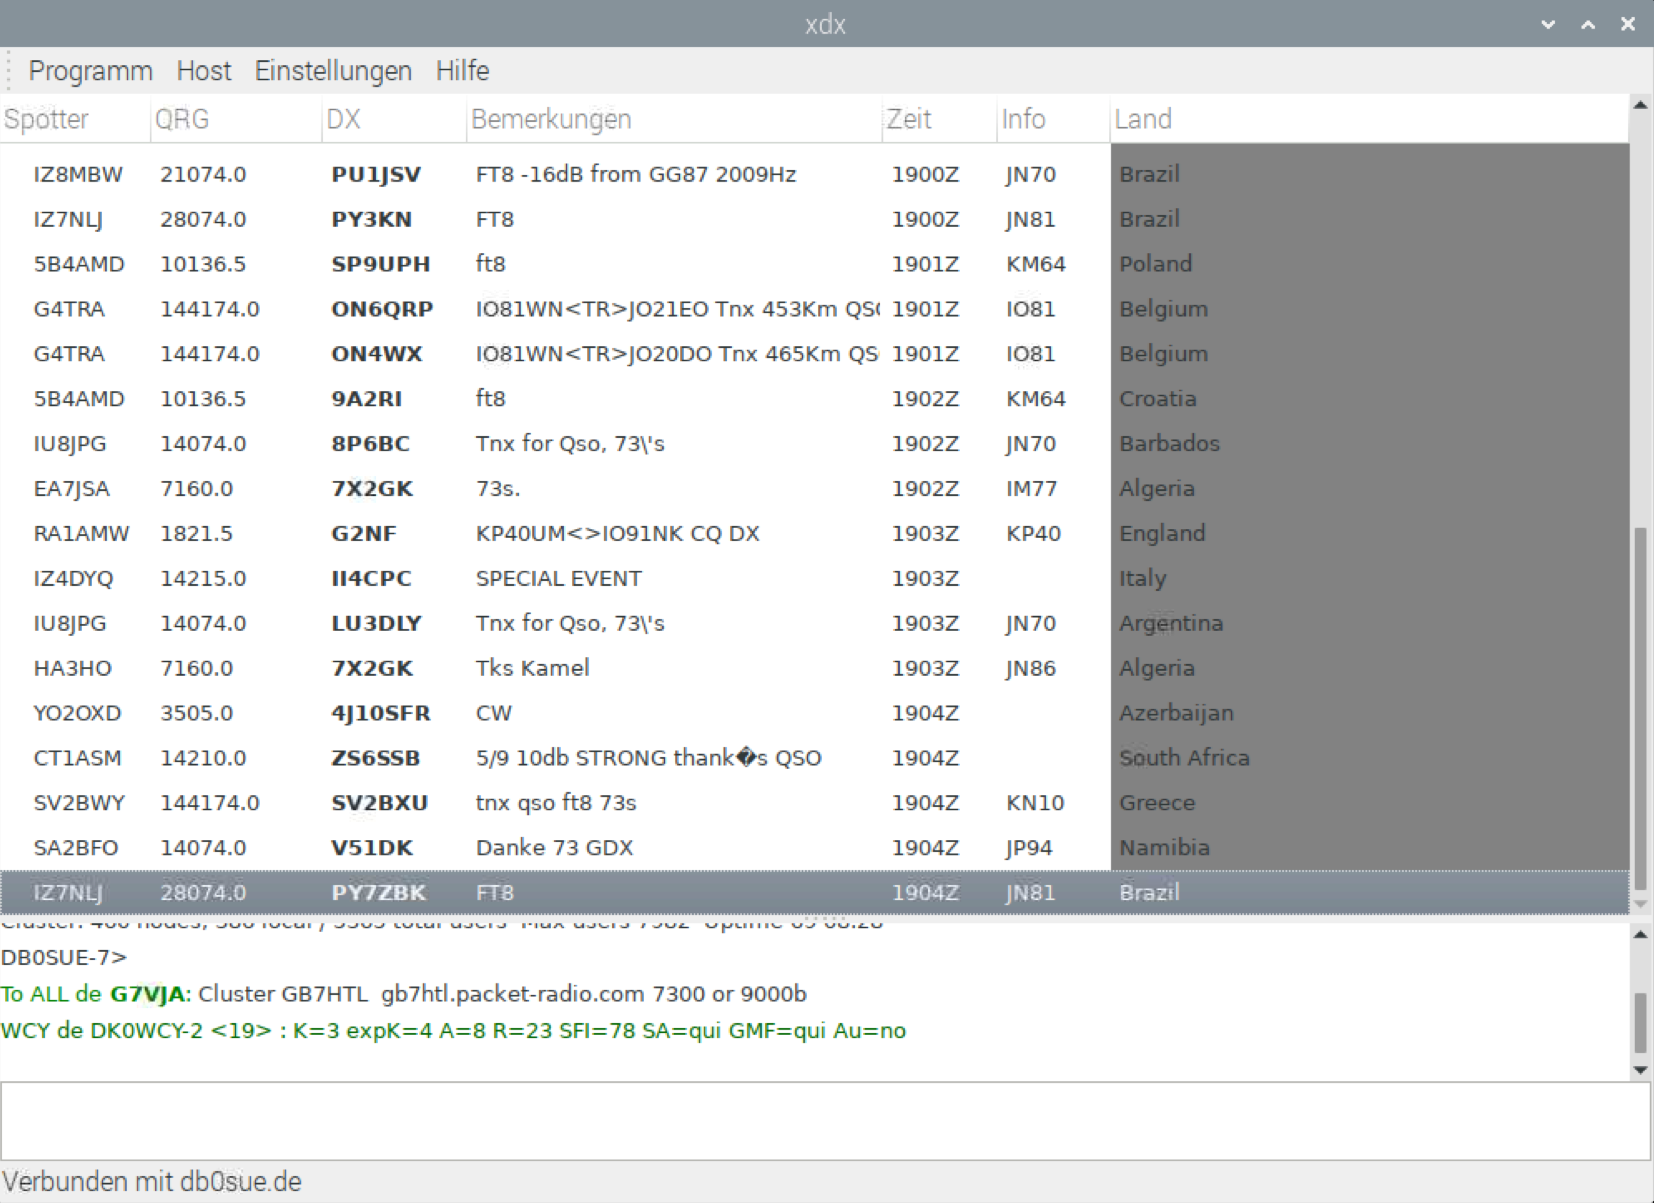
Open the raspbian menu settings: add / remove Software, search for xdx select it and Apply. After installation you can find in Raspi Menu/Internet xdx and you can start it from there.
Install Xcwcp (Morse Code Tutor)
Xcwcp is an interactive Morse code tutor. It allows choosing from a number of options for practice, including sending random characters, random words, and characters from the keyboard. It will also receive Morse code sent using the keyboard or mouse as a Morse keyer, and display the characters it sees.
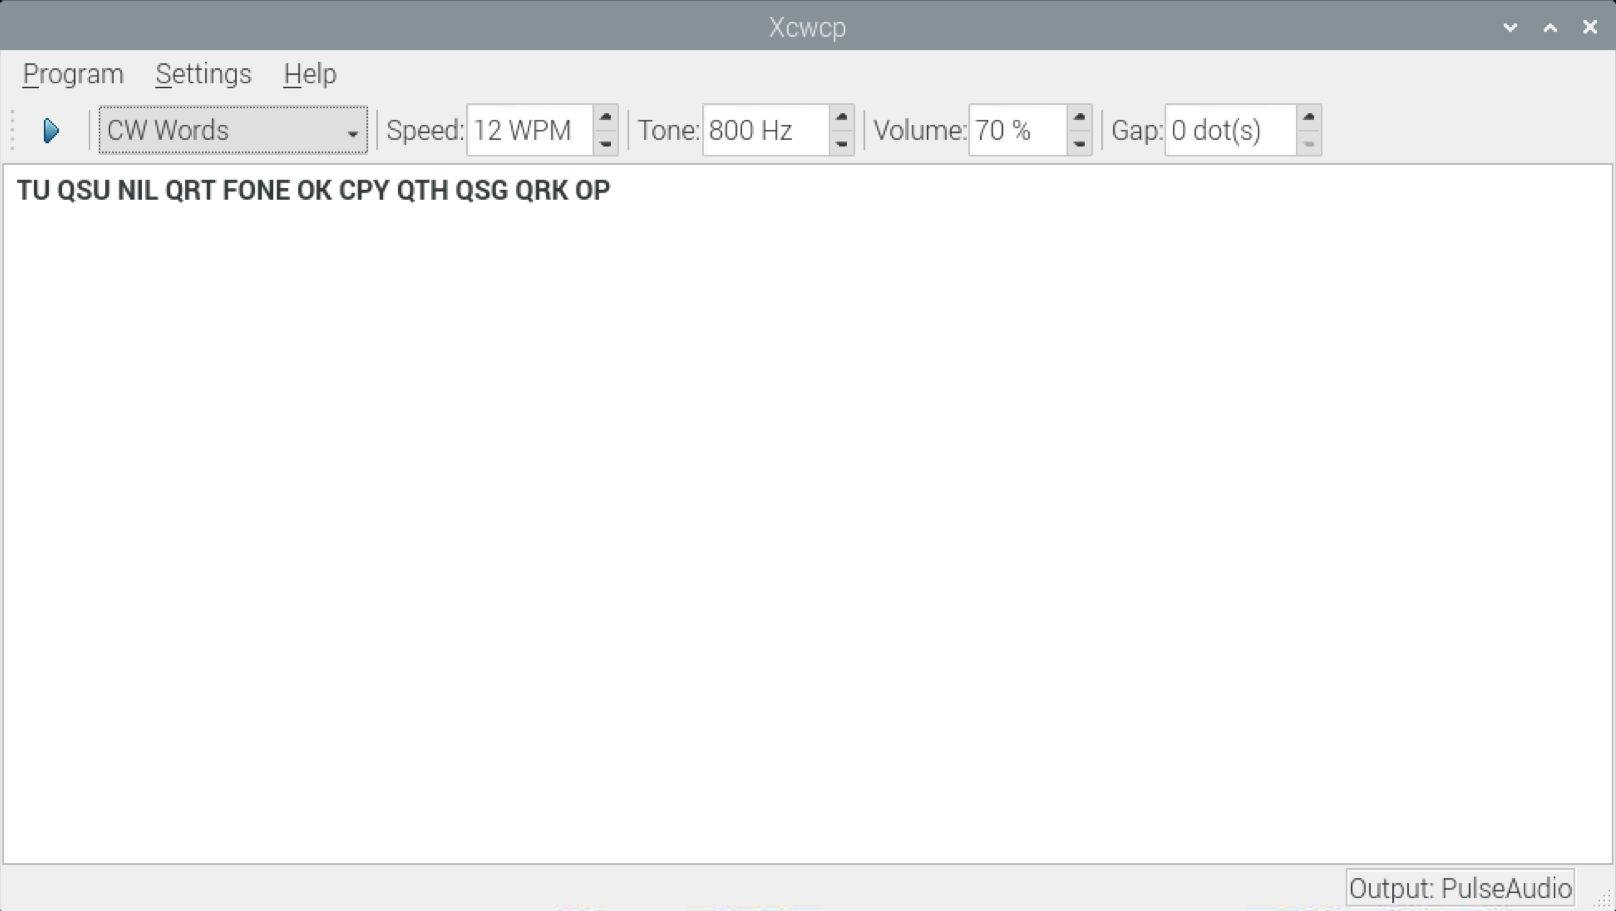
Open the raspbian menu settings: add / remove Software, search for xcwcp select it and Apply. After installation you can execute it with xcwcp
Some important Raspberry PI commands and settings
I installed the most software on my Raspberry PI using Jason’s Build a Pi script and added a few more programs myself. But some important parameters can only be checked or set in the terminal and some programs are also started with it. Below is a list of commands that have arisen over time of use. The commands require of course that the corresponding programs are installed.
### GPSD DEPENDS WITH ICOM IC-705 ###
First boot Raspberry PI, then power on ICOM 705, then
sudo systemctl restart gpsd

### START DUMP1090 WITH SDRplay RSP1 ###
./Dev/dump1090/dump1090 --dev-sdrplay --interactive --net

### START VIRTUAL RADAR ###
cd VirtualRadar
mono VirtualRadar.exe

### PAT WINLINK START###
1.) Pat is setup to start as a service - no need todo

2.) Start Hamlib Daemon for Rig Controll IC-7300
rigctld -m 373 -r /dev/ttyACM0 -s 9600

3.) Start Ardop Modem - use link on desktop
/home/pi/ardop/./piardopc 8515 plughw:1,0 plughw:1,0

Stop Hamlib and Ardop Modem
CTRL+C

### PAT SETUP ###
pat configure

### START RS-BA1 LINUX REPLICA SOFTWARE ###
cd go/bin
./kappanhang -u username -p password -a 172.20.10.7

### LIST SOUNDCARD DEVICES ###
arecord -l

### LIST USB DEVICES ###
ls -l /dev/serial/by-id

### ALSO LIST USB DEVICES ANOTHER OPTION ###
cd /dev/serial/by-id
ls

### RESTART GPSD ###
sudo systemctl restart gpsd

### SETUP GPS ###
sudo nano /etc/default/gpsd
sudo systemctl restart gpsd

### CHECK THAT GPSD AND CHRONYD ARE ACTIVE ###
systemctl is-active gpsd
systemctl is-active chronyd

### CHECK STATUS GPSD ###
sudo systemctl status gpsd

### SHOW GPS DATA ###
cgps
xgps
gpsmon -n

### CHRONY SETUP ###
sudo nano /etc/chrony/chrony.conf

### TIME SOURCES ###
sudo chronyc sources -v

### CHECK CHRONYC ###
sudo chronyc tracking

### TIME SET HARDWARE CLOCK ###
sudo hwclock -r
date
sudo hwclock -w

### WLAN SETUP ###
sudo nano /etc/wpa_supplicant/wpa_supplicant.conf

### PORTS ###
sudo netstat -lptu
Other useful software
RPI-Monitor
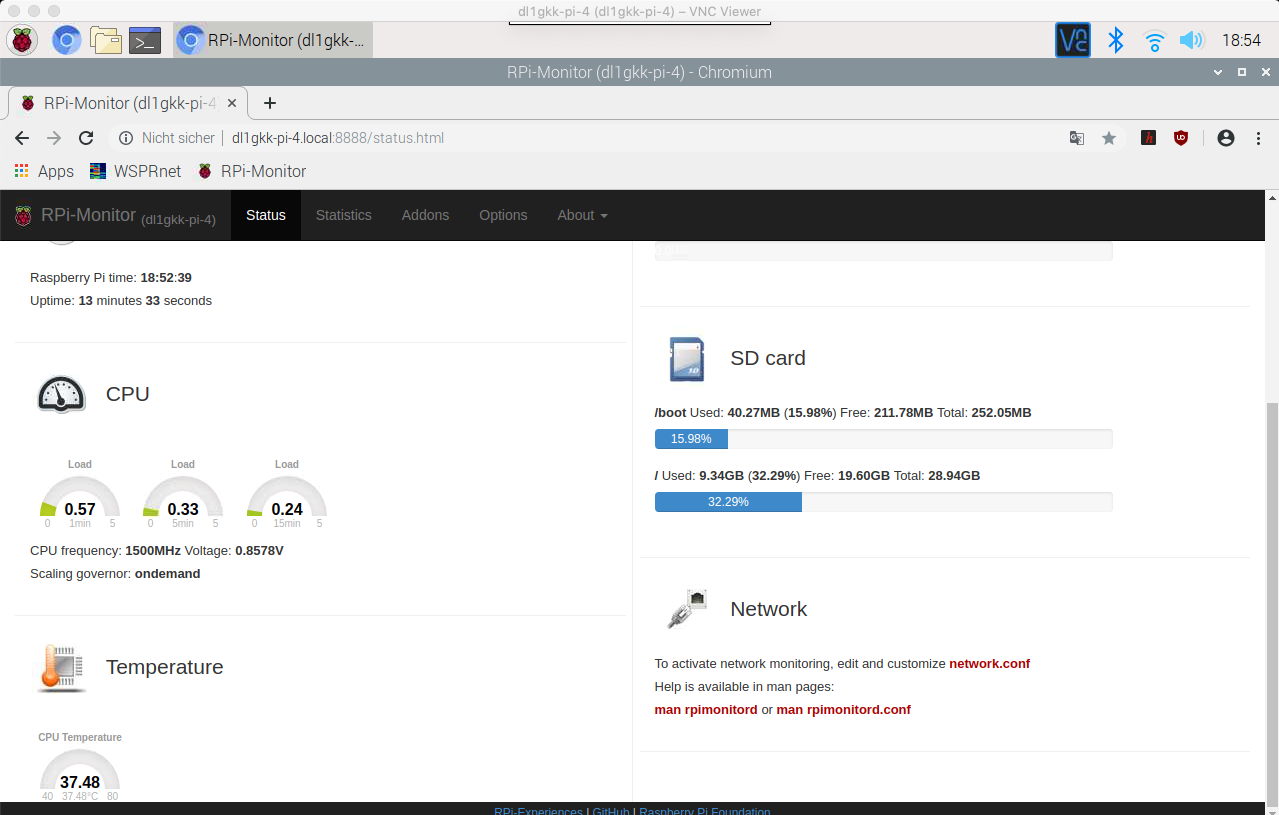
RPi-Monitor is a software designed to monitor the metrics from GNU/Linux system and connected peripherals. It store statistic into local Round Robin Database and embed a web server allowing to display current status and statistics.
https://xavierberger.github.io/RPi-Monitor-docs/11_installation.html
https://xavierberger.github.io/RPi-Monitor-docs/index.html
# Install RPi-Monitor‘s public key to trust RPi-Monitor repository:

sudo apt-get install dirmngr
sudo apt-key adv --recv-keys --keyserver keyserver.ubuntu.com 2C0D3C0F

# Execute the following command to add RPi-Monitor into your list of repository:

sudo wget http://goo.gl/vewCLL -O /etc/apt/sources.list.d/rpimonitor.list

# To install RPi-Monitor, execute the following command:

sudo apt-get update
sudo apt-get install rpimonitor
RPi-Monitor is designed to start automatically and collect metrics. The web interface is available on address http://raspberrypi.local:8888 (if you change the Raspberry Pi hostname, use your-Hostname.local:8888)
If you get info that Package(s). Update needed…. use:
sudo apt-get update
sudo apt-get upgrade
sudo /etc/init.d/rpimonitor update
Screen Saver Utility
If you want to disable the screen saver it is easiest to install a screen saver utility
sudo apt-get install xscreensaver
reboot
Open the utility and deactivate the screen saver.
Remote Desktop Software
Several remote desktop tools are available for Linux distributions. These can handle one or many of the various protocols that can be used to remote control another machine. However, the best option—certainly for the Raspberry Pi—is probably Remmina, which supports RDP, VNC, SPICE, NX, XDMCP, SSH and EXEC. To install Remmina, return to the Terminal and enter
sudo apt install remmina
reboot
General Information
Many programs are installed using this manual. In case of an error, it may be helpful to carry out an update. Important: Make a backup of the SD card before attempting to do so.
sudo apt-get update
sudo apt-get upgrade
reboot
Alternatively it might be helpful to upgrade the complete system. Be careful, the programs may not work afterwards.
sudo apt-get update
sudo apt-get dist-upgrade
reboot
Disclaimer
Please note the software/information available on this website are provided “as is” without warranty of any kind, either expressed or implied and such software is to be used at your own risk.
The use of the software links on this website is done at your own discretion and risk and with agreement that you will be solely responsible for any damage to your computer system or loss of data that results from such activities. You are solely responsible for adequate protection and backup of the data and equipment used in connection with any of the software linked to this website, and we will not be liable for any damages that you may suffer connection with downloading, installing, using, modifying or distributing such software. No advice or information, whether oral or written, obtained by you from us or from this website shall create any warranty for the software.
Have fun… and if you like a look to my About me page.
VY 73, Karl-Heinz, DL1GKK